Sitemap Shopify 101: How to Create, Submit, and Optimize
When working with Shopify, you have to focus on a lot of elements, and Sitemap Shopify is one of the factors you can’t lack. Many Shopify store owners feel confused with Sitemap. This is because they’re truly solely for the search engines crawling and indexing their material, not for the site’s users.
To help you know more about the sitemap Shopify, in this blog, ArrowTheme will instruct you on how to find, edit as well as submit it with some comprehensive and simple guides.
What Does Sitemap Shopify Mean?
Firstly, you can understand simply that Sitemap Shopify is an XML file used by search engines to locate the URLs on your website. Then, it generates links to your product, category, blog, and marketing pages automatically. In particular, the Shopify site map.xml file cannot be edited manually.
How To Find Sitemap Shopify?
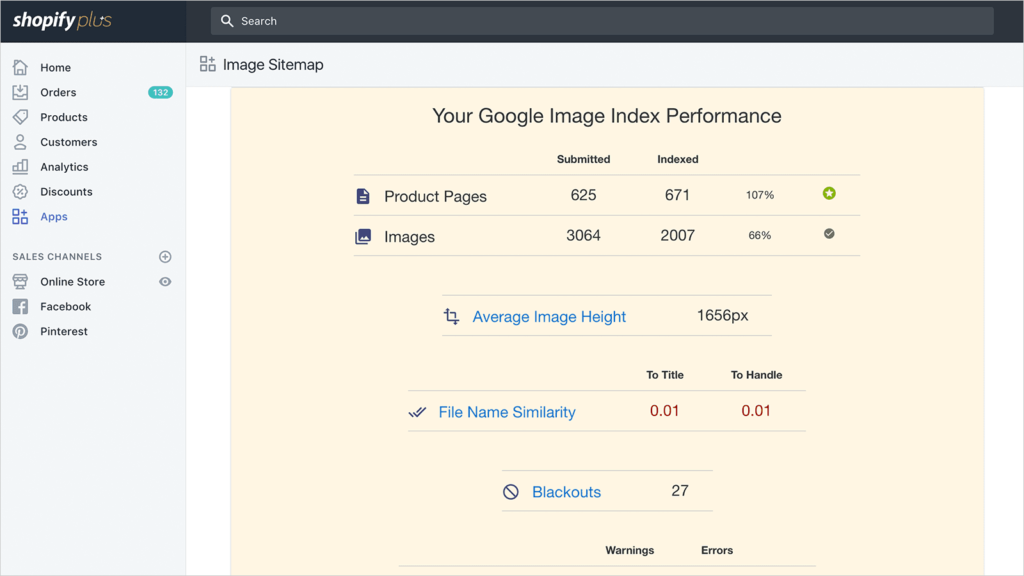
A sitemap Shopify XML file is generated automatically for all Shopify stores and contains links to all of your goods, product photos, pages, collections, and blog articles.
Search engines like Google and Bing use this file to index your site so that your store’s pages show up in search results. Google will find and index pages on your site if you submit your sitemap Shopify files to Google Search Console.
In case you’re using the Basic Shopify plan, only your store’s primary domain has a created sitemap Shopify file, and search engines also only discover it.
Besides, any Shopify eCommerce owner store that registers on Shopify, Advanced Shopify, or Shopify Plus plan, can utilize the international domain’s functionality to create region-specific or country-specific domains.
What’s more, you can create sitemap Shopify files for all of your domains when you use foreign domains. Unless they redirect to your major domain, search engines can find all of your sites.
The crawling and indexing of your site can take a long time, and Google cannot promise how long it will take. From Google Search Console Help, you can learn more about what to expect when your site is indexed.
The Comprehensive Guide To Adding Sitemap Shopify
You must first validate your domain with Google Search Console to ensure that you are the owner of your Shopify store before submitting your sitemap Shopify. Besides, a Google Search Console account is a must-have so if you don’t have it, you must register it.
After that, you must disable password security for your online store to authenticate your domain. Moreover, if you aren’t ready to open your store yet, you can turn off password protection and then turn it back on once your domain has been verified.
Then, you should follow the steps below to know how to add the Shopify site map in detail:
- Step 1. Click and then select “Add property” from the drop-down menu in your Google Search Console account.
- Step 2. Select the URL prefix from the Select property type dialog box, then input the domain you want to add as property, including the https://.
- Step 3. Continue by pressing the Enter key.
- Step 4. Select the HTML tag in the Verify ownership popup. Choose your favorite approach if you’re familiar with alternative verification methods.
- Step 5. Copy the entire HTML tag to your clipboard by pressing “cmd + c “on a Mac or “ctrl + c” on a PC. Make sure everything is selected, including the and >.
With The Desktop Version
- Step 1. Go to Online Store > Themes in your Shopify admin.
- Step 2. After you’ve found the theme you wish to change, go to Actions > Edit code.
- Step 3. Click theme.liquid in the Layout section.
- Step 4. Copy the meta tag from step 5 and paste it below the opening head> tag on a blank line:
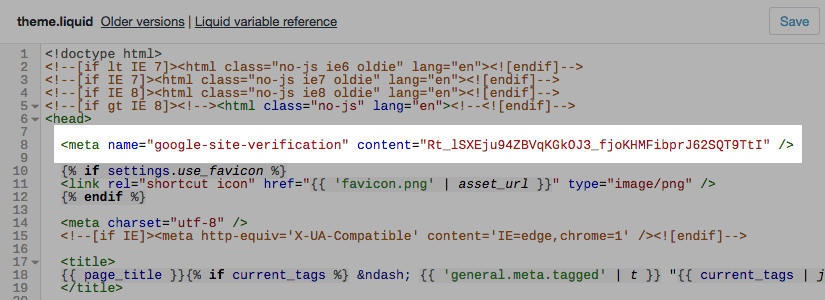
- Step 5. Click the Save button.
- Step 6. Finally, return to Google Search Console and select Verify.
With The iPhone/Android
- Step 1. Tap Store on the Shopify app.
- Step 2. Tap Online Store under the Sales channels section.
- Step 3. Select Manage Themes from the drop-down menu.
- Step 4. After you’ve found the theme you wish to change, go to Actions > Edit code.
- Step 5. Click theme.liquid in the Layout section.
- Step 6. Copy the meta tag from step 5 and paste it below the opening <head> tag on a blank line:

- Step 7. Then, click Save.
- Step 8. Return to Google Search Console and select Verify, and, the process to add Sitemap Shopify is done.
In addition, in case you’re taking advantage of international domains and have a Shopify plan or higher, repeat these steps to verify each domain you’ve connected to your Shopify store.
Each meta tag should be pasted on a different line in the same theme.liquid file for each domain you validate.
How To Edit Sitemap Shopify?
Unluckily, you are unable to upload your sitemap.xml to Shopify and must instead rely on their auto-generated file. Shopify customer service has confirmed this.
While this can be a bit restrictive, we prefer auto-generated sitemap.xml files in general. If you’re utilizing a bespoke static solution, your sitemap may not be updated as your store’s pages are added and removed. Because inventory at eCommerce stores is always changing, this might be a major concern.
The Simple Way To Submit Sitemap Shopify
To assist Google in finding and indexing pages on your site, you can upload your sitemap file to Google Search Console. Now, you should follow the three steps we instruct below to know more.
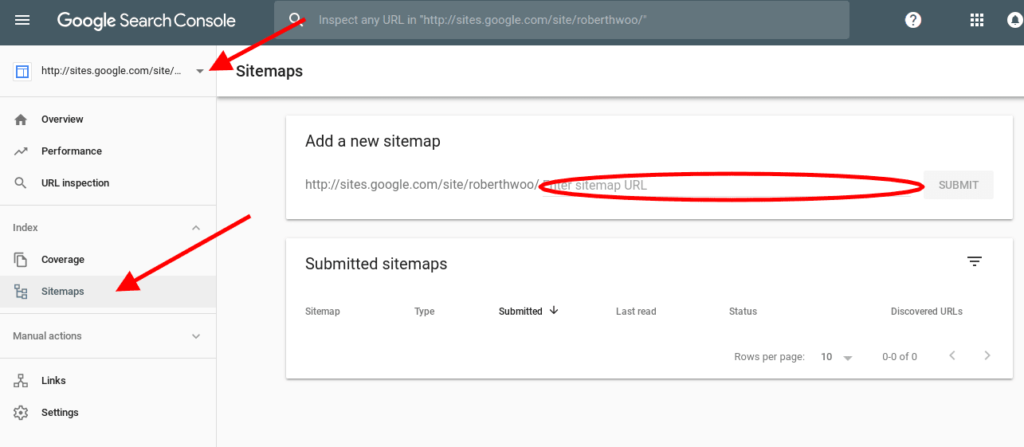
- Step 1. Go to Google Search Console when your site has been confirmed.
- Step 2. Select Sitemaps.
- Step 3. Enter the name of your domain’s sitemap file in the Add a new sitemap area, then click SUBMIT. The format of your domain’s sitemap should be similar to https://www.johns-apparel.com/sitemap.xml. You may obtain an error message from Google if you don’t include the entire sitemap URL.
For more detail, if you utilize international domains and are on a Shopify plan or higher, you must submit a sitemap file for each domain. The root directory of your Shopify store’s domains always contains sitemap files.
Additionally, with any store owner selling in multiple languages, the languages will be added to the sitemap files for each of their domains automatically. So, they don’t have to do anything special to include them.
Google uses your sitemap files to crawl and index your store once you submit them. For the crawler to work, your store must be accessible, therefore make sure it doesn’t have a password.
The crawling process can take some time, and Google can not promise how long it will take to crawl your store. Visit Google Search Console Help for more information and troubleshooting.
In Conclusion
All in all, Arrowtheme wishes through this blog, you can know exactly how to find, add, edit, and submit Sitemap Shopify. Then, you will apply them to your Shopify business store and succeed on the nearest day.
Read More: What Is Mailchimp Popup & How To Add It To Shopify
Contact US – ArrowTheme:
– Email: [email protected]
– Facebook: Facebook.com/ArrowThemeTeam
– Website: ArrowTheme.com