5 Proven Ways to Stop Contact Form Spam in WordPress
Contact form spam is a widespread issue that affects nearly every website, especially those built with WordPress. Regardless of your site’s size, spambots can flood your inbox with unwanted messages, creating unnecessary clutter and potential security risks. If you’re facing this problem, it’s important to take action quickly. In this article, Arrowtheme shares effective and proven methods to help you block contact form spam in WordPress – let’s dive in and take control!
Claue – Clean and Minimal Magento Theme
We provide an amazing Magento theme with fast and responsive designs. Let’s find out!
Why Do You Need to Block Contact Form Spam in WordPress?
Most WordPress contact form spam is automated, generated by “bots” that spread spam across the web. These bots scan websites for unsecured forms to exploit, flooding your inbox with spammy links. Even small or lesser-known websites aren’t safe from their reach.
Beyond being an annoyance, spam bots can pose serious threats. Some attempt brute force attacks to access your login forms, while others search for vulnerabilities in your site’s forms to hijack them – so this is potentially spreading malware or sending spam to others. This makes contact form spam more than just a nuisance; it’s a real threat to your website’s security and reputation.
How to Stop Contact Form Spam in WordPress?
Dealing with contact form spam can be frustrating, but the good news is that there are effective ways to stop it on your WordPress site – here’s how you can do it.
1. Selecting the Best WordPress Form Plugin for Spam Protection
Many WordPress contact form plugins either lack built-in spam protection or offer solutions that are unreliable and difficult to use. Therefore, selecting a high-quality contact form plugin is the most effective way to prevent spam. We highly recommend using WPForms, as it includes built-in “honeypot” spam protection, along with integrated reCAPTCHA and custom CAPTCHA features to combat spam effectively.
To get started, you’ll need to install and activate the WPForms plugin. If you’re unfamiliar with the process, you can follow our step-by-step guide on how to install a WordPress plugin. After activation, you’ll need to create a contact form.
First, go to WPForms → Add New, give your form a name, and select the Simple Contact Form template.
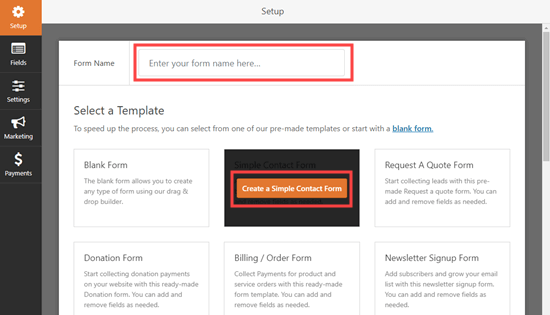
WPForms will automatically generate a basic contact form with fields for the user’s name, email address, and message.
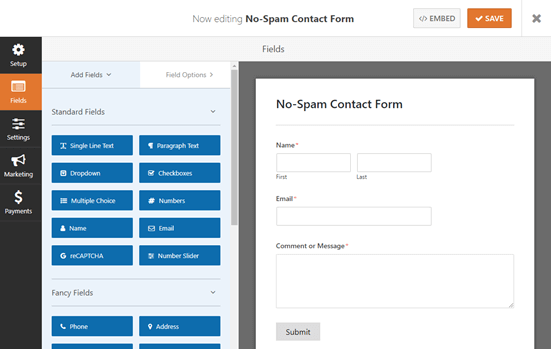
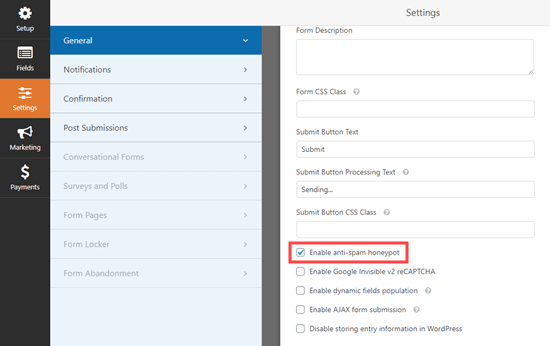
By default, WPForms enables the honeypot anti-spam feature, which adds a hidden field that users cannot see but spambots will attempt to fill. If a bot fills this field, the form submission will be rejected as spam.
You can find this setting under Settings → General for any form. Not only that, “Enable anti-spam honeypot” will be enabled automatically.
2. Block Contact Form Spam with the ReCAPTCHA Checkbox
Another effective way to stop contact form spam in WordPress is by using the reCAPTCHA Checkbox. This method is fully compatible even with the free version of WPForms. Specifically, Google’s reCAPTCHA is a free tool that you can integrate alongside WPForms’ built-in honeypot feature to strengthen spam protection.
To set it up, first go to WPForms → Settings in your WordPress dashboard, then select the reCAPTCHA tab.
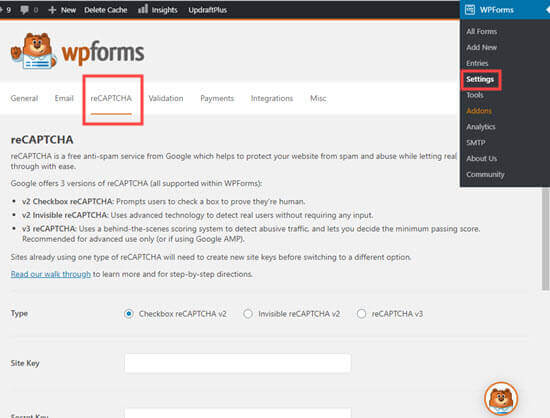
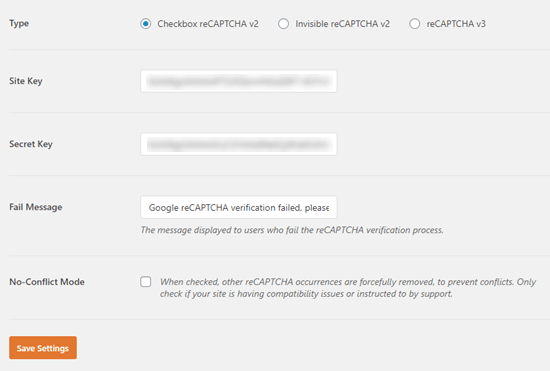
Choose the Checkbox reCAPTCHA v2 option. After that, you’ll need to visit Google’s reCAPTCHA setup page to obtain your Site Key and Secret Key. Click the blue Admin Console button at the top right of the reCAPTCHA page to get started.

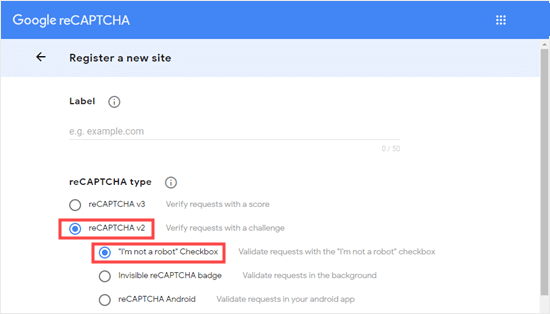
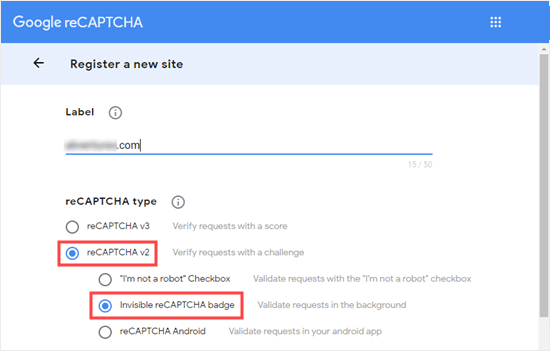
If you’re not already signed into your G Suite account, you’ll be prompted to log in or create one. Then, you’ll be taken to the registration screen. Here, create a label for your website (for internal use only), select reCAPTCHA v2, and choose the “I’m not a robot” checkbox option.
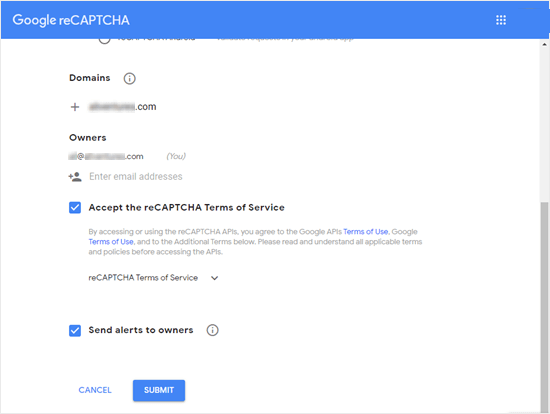
Next, enter your website’s domain name. Your email address should automatically appear, but you can add others if needed. After accepting Google’s terms of service, click Submit.
Following that, you can see a page with a website key and a secret key for your website.
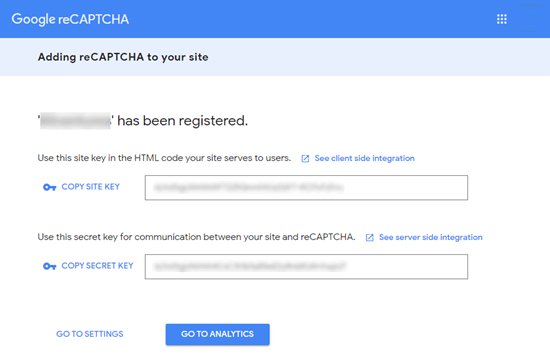
Copy them, return to your WordPress dashboard, and paste them into WPForms → Settings → reCAPTCHA. Finally, click Save Settings.
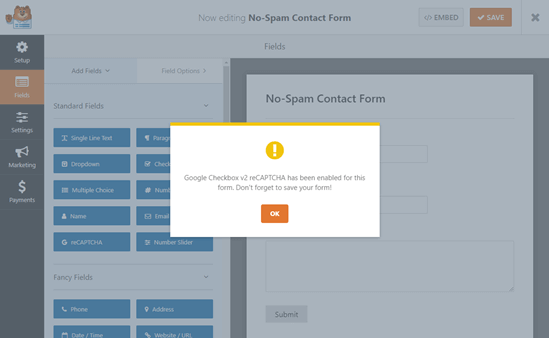
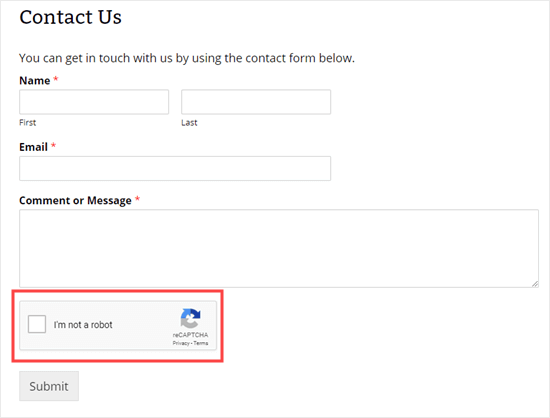
Once reCAPTCHA is enabled, you can add it to your form. Go to WPForms → All Forms, find your form, and open it to edit. Inside the form builder, click the reCAPTCHA field from the left-hand panel. A confirmation message will appear, letting you know that reCAPTCHA is now active on your form – simply click OK.
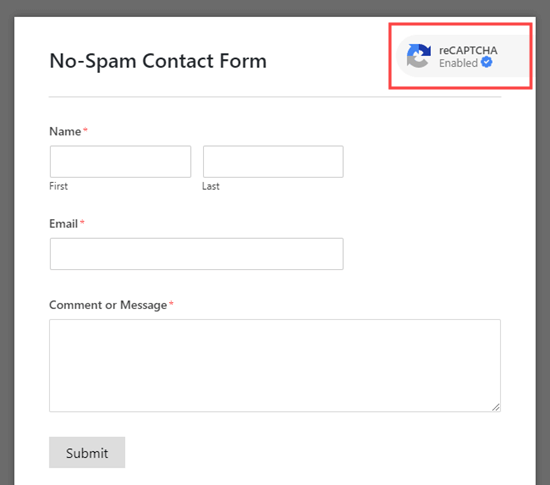
At the top of your form, you will see the reCAPTCHA logo.
If you ever wish to remove reCAPTCHA, simply click the reCAPTCHA field again and confirm the removal.
How to Add Your WordPress Contact Form to Your Website?
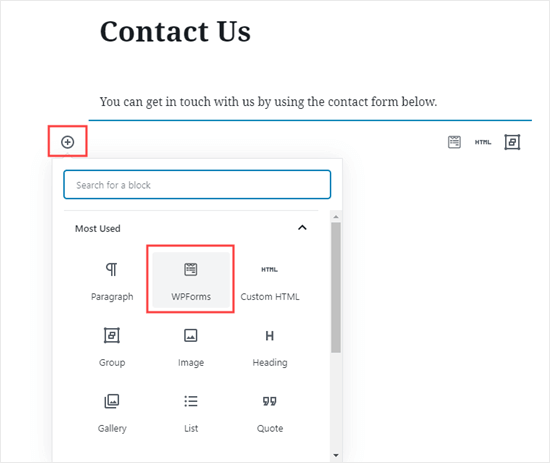
First, navigate to your Contact page and create a new block to add your form. You can either search for the “WPForms” block or find it under the Widgets section.
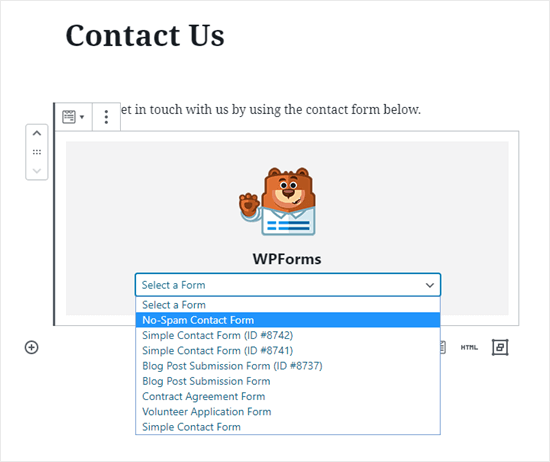
Next, select your form from the dropdown list, and it will be automatically added to your page.
When you preview or view the page, the reCAPTCHA box should appear at the bottom of your form.
Because it eliminates all automated spam submissions, this should dramatically reduce contact form spam on your website.
3. Block WordPress Contact Form Spam by Using Google Invisible reCAPTCHA
Coming to another way you must know to stop contact form spam in your WordPress website is to utilize the Google Invisible reCAPTCHA.
Some website owners prefer not to require users to click a checkbox when submitting a contact form, and that’s exactly where Invisible reCAPTCHA comes in. The main difference between Invisible reCAPTCHA and traditional reCAPTCHA is that there’s no checkbox for users to click. Instead, Google automatically checks whether a submission was made by a bot when the form is submitted. If suspicious activity is detected, Google will prompt the user to complete additional verification.
You can easily use Invisible reCAPTCHA on your WPForms contact forms, and the setup process is quite similar to using the standard reCAPTCHA checkbox.
When setting up reCAPTCHA in Google, make sure to select the “Invisible reCAPTCHA badge” option instead of the “I’m not a robot” option.
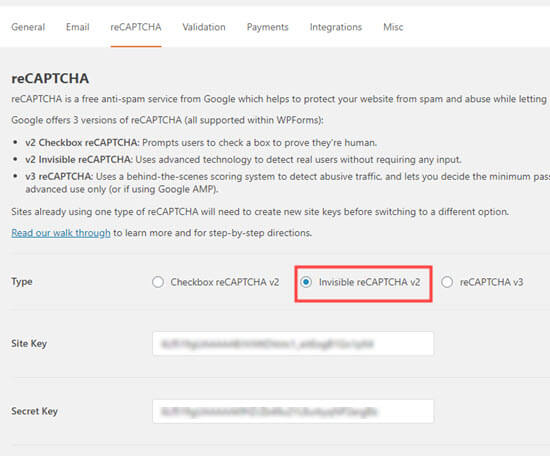
After obtaining your Site Key and Secret Key, go to WPForms » Settings, select the reCAPTCHA tab, and then choose “Invisible reCAPTCHA v2.”
Then, the invisible reCAPTCHA will now be used when you add the reCAPTCHA field to your contact form. Moreover, if users access your form, it will appear as follows:
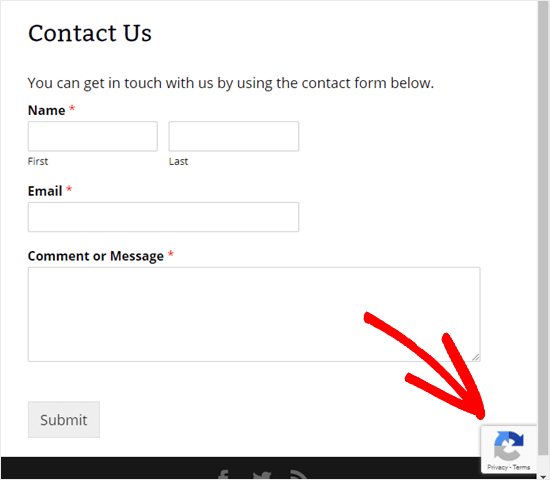
In addition, as you can see, the reCAPTCHA logo will appear in the bottom right corner of the screen at all times. Plus, in case a visitor wishes to learn more about reCAPTCHA on your website, they can click on the logo. It will extend to include links to Google’s privacy and terms of service policies. Not only that, you should also change the privacy policies on your own website.
4. Using a Custom CAPTCHA to Block Contact Form Spam in WordPress
Some website owners may prefer not to use Google’s reCAPTCHA on their site due to privacy concerns or branding preferences. In such cases, using the Custom CAPTCHA addon from WPForms (available in the Pro version) is a great alternative. This feature allows you to create custom arithmetic questions or simple Q&A challenges to validate form submissions and prevent spam.
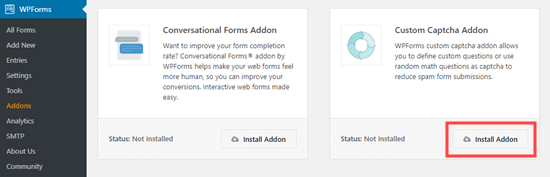
To get started, go to WPForms » Addons, locate the Custom CAPTCHA Addon, and click “Install Addon.”
Once installed, activate the addon and then open your form by going to WPForms » All Forms.
Next, look under the “Fancy Fields” section to find the Captcha field. Drag and drop it into your form, ideally placing it just above the Submit button.

Click on the CAPTCHA field to customize its settings. You’ll be able to choose between two types: “Math” or “Question and Answer.”
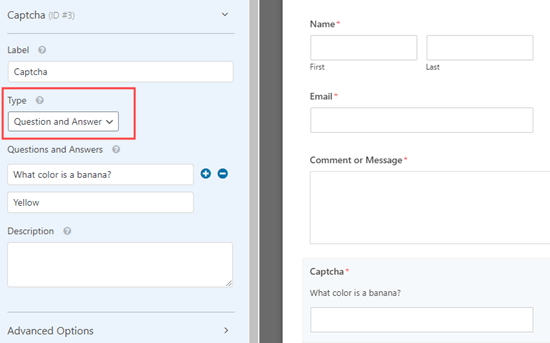
- With Math, WPForms will automatically generate random equations, making it harder for bots to predict.
- With Question and Answer, you can create a list of custom questions. WPForms will randomly rotate them, so it’s best to add a few variations to enhance security.
Once you’re happy with your setup, make sure to save your form and then embed it on your Contact page. This simple but effective measure can significantly reduce spam submissions without relying on third-party services.
5. Prevent Spam Bots from Seeing Your Form in WordPress
Last but not least, you can stop bots from viewing your form in order to avoid contact form spam. Specifically, you might achieve this by encrypting your form or only displaying it to members of your WordPress membership site. Although these techniques may be a bit overkill for a standard contact form, they can be very useful in many circumstances. For example, you could build a form for your email newsletter subscribers to submit questions if you host a monthly Q&A.
Password Protecting Your Form Using the Visibility Options in WordPress
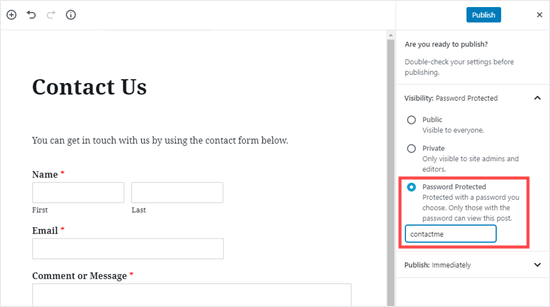
To begin, you need to set your page’s visibility to “Password Protected” under the “Publish” options. You will also need to create a password — this will be the same for all users.
When users visit your page for the first time, they will see a message like the image below. To access the page and view the contact form, they’ll need to enter the password. Once they’ve done that, they can use your form normally.
However, this approach has a few disadvantages. The default WordPress message will always appear first on your page, saying: “To view this password-protected post, enter the password below.” In fact, it’s not easy to customize or change this message.
Another drawback is that the password protection covers your entire page, not just the form. If you want some parts of the page, like FAQs, to stay visible to everyone, this could be a bit inconvenient.
Password Protecting Your Form by Using a WPForms Addon
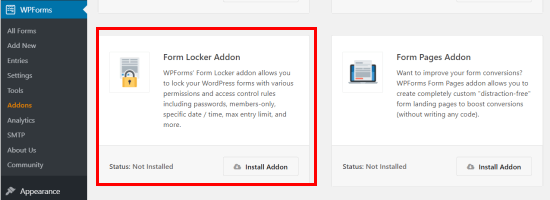
If you have WPForms Pro, you can install the Form Locker addon. This lets you password-protect just your form — not the entire page.
To get started, go to WPForms >> Addons and find the Form Locker Addon. Then, click Install Addon. It should automatically activate once installed.
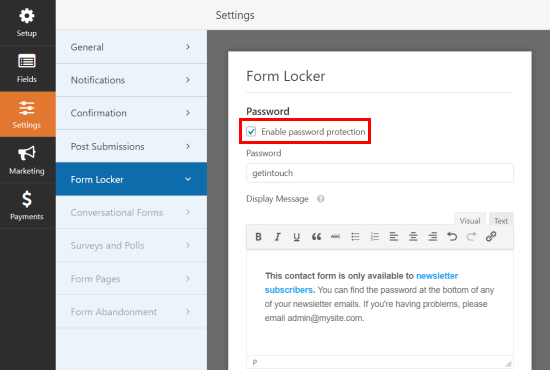
Next, go to WPForms >> All Forms and find the form you want to secure. Just click on it to edit. Then, navigate to Settings >> Form Locker. Check the “Enable Password Protection” box, and you’ll be able to set your password and customize the message users will see.
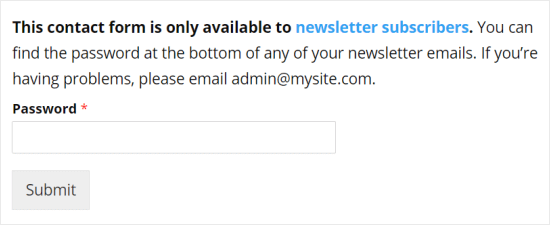
Now, all users will still be able to view your contact page, but the form itself will be hidden until the password is entered. Before the password is entered, the form will look like this:
How to Show Your Contact Page Only to Registered Users?
Finally, you can choose to allow only registered users to access your contact form. You can do this by using a membership site plugin to restrict access to your contact page for members only.
This is a great option if you want to offer certain services exclusively to registered users. Plus, there are several excellent membership site plugins available that make this easy to set up.
In conclusion
Overall, Arrowtheme wishes you could know how to stop Contact Form Spam in WordPress through several proven ways we suggest above. If you can’t do it on your own, let Arrowtheme know, then our WordPress experts with WordPress packages will come up with the best solution for you.
Best of all, we are having an up to 30% discount program for all of our WordPress services. Hence, let’s grab this great opportunity by leaving your information on our CONTACT FORM now!
Contact US – ArrowTheme:
– Email: [email protected]
– Facebook: Facebook.com/ArrowThemeTeam
– Website: ArrowTheme.com
Read more: How to Remove the Uncategorized Category in WordPress