How to remove the “Proudly Powered By WordPress” link on your website
The “Proudly Powered By WordPress” message informs visitors that your website is powered by WordPress. If you don’t like this link, you may choose to delete the mail for a variety of reasons. In this article, Arrowtheme will give you a complete guide to remove Proudly powered by WordPress on your website. Hence, let’s explore with us right now!

Why you need to remove proudly powered by wordpress link
In many cases, you have built a unique design for your site that doesn’t seem like standard WordPress, and you don’t want to draw attention to the CMS you’re using. Besides, maybe you don’t want to inform everyone you are utilizing WordPress because hackers can easily guess the structure of your file system. Moreover, in case you have developed a website for a customer using a third-party theme, you might wish to replace it with a link to your own site. Fortunately, you can completely remove the “Proudly Powered By WordPress” link on your website with ease.
How to remove proudly powered by wordpress?
In fact, using a plugin is the quickest and most straightforward approach to remove the “powered by WordPress” message. In this section, we will go through some outstanding alternatives you should know.
>>> Refer to: The ultimate guide to edit HTML, CSS, PHP in WordPress
Remove Powered by WordPress plugin
When you activate this plugin, it will add a checkbox to the Customizer’s Theme Options screen. Then, it allows you to enable or disable the “powered by WordPress” message.
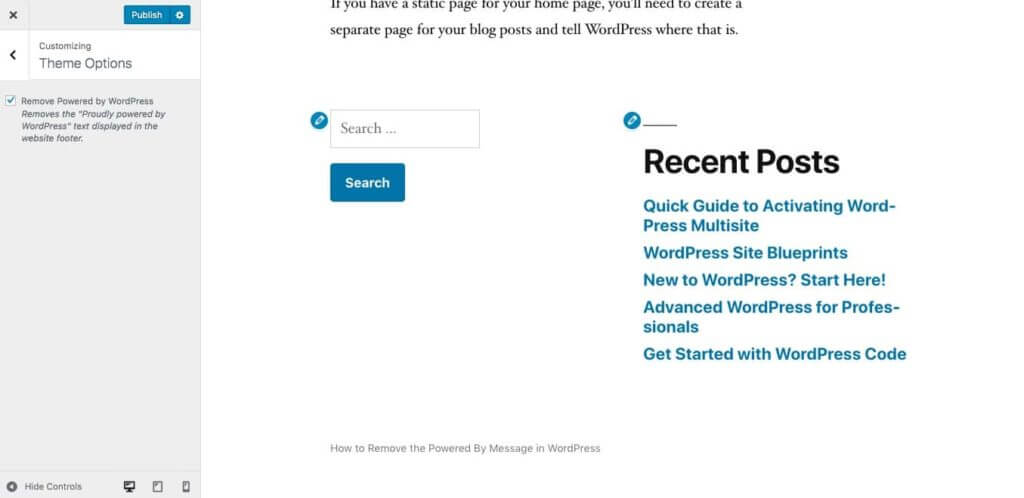
However, in a site with the Storefront theme activated for WooCommerce, this just removes proudly powered by wordpress text and does not eliminate any custom messages linking to the theme creator.
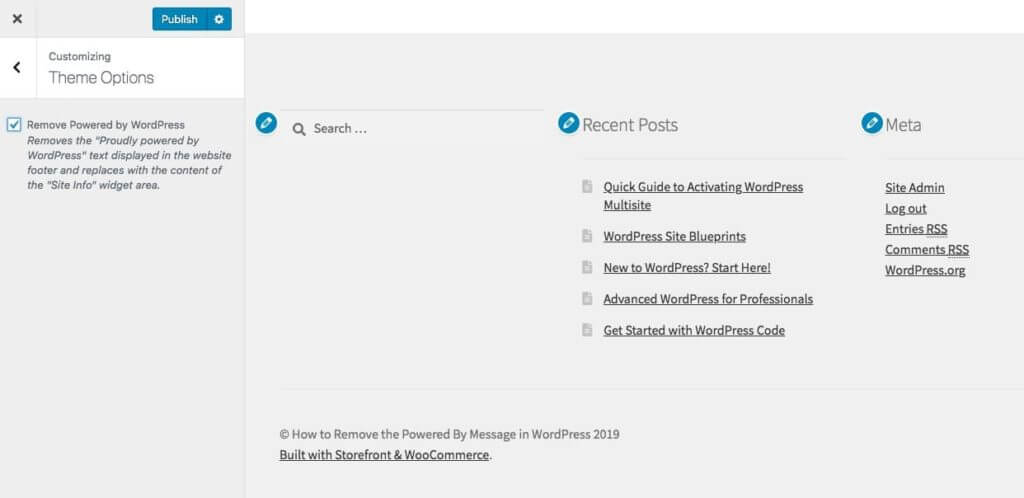
Then, you need to utilize a plugin that helps you to target certain text rather than the default credits to get rid of this.
Remove Footer Credit plugin
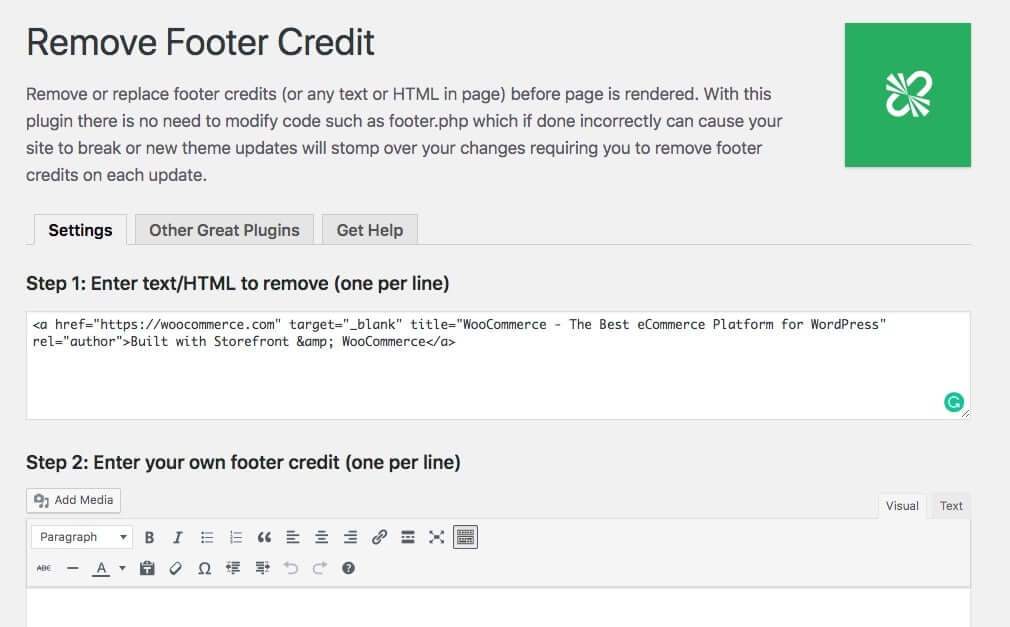
Secondly, you can remove certain text or HTML from your footer with the help of the Remove Footer Credit plugin. Then, you can tell the plugin to target a custom credit in the footer if your theme developer has added one. For more details, in order to reach the settings panel, you must click to Tools >> Remove Footer Credit after activating the plugin.
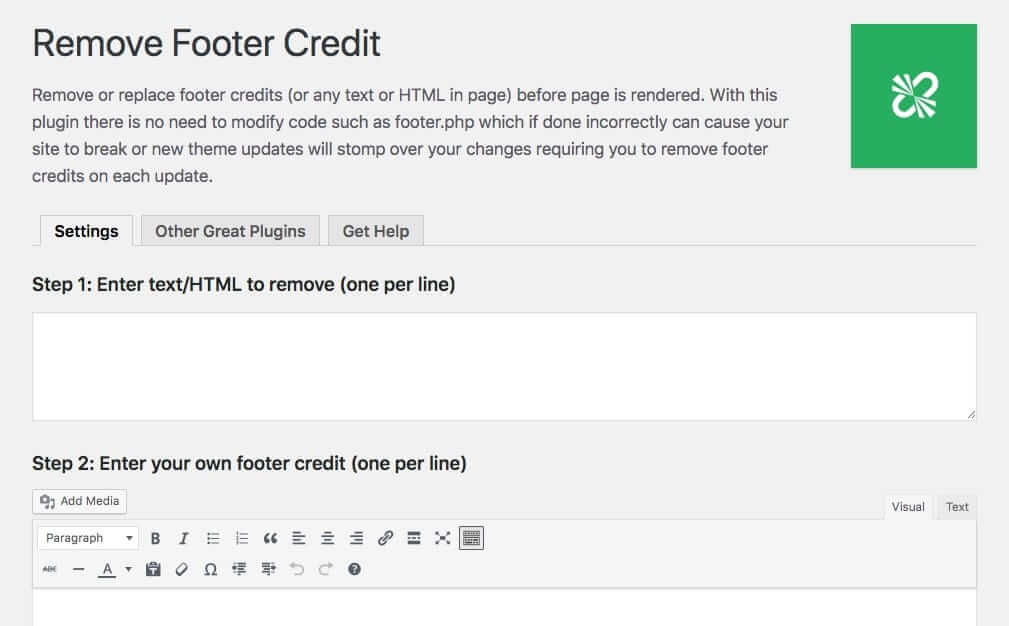
What’s more, you need to include not only the text in the credit, but also the HTML if you want to enable the plugin. To get this, let’s open your browser to any page on your site and look at the code.
Moreover, when using Chrome, you can find a link and text for the Storefront theme’s footer credit:

After that, you have to copy and paste the complete piece of HTML that includes the URL into the first field of the Remove Footer Credit settings screen:
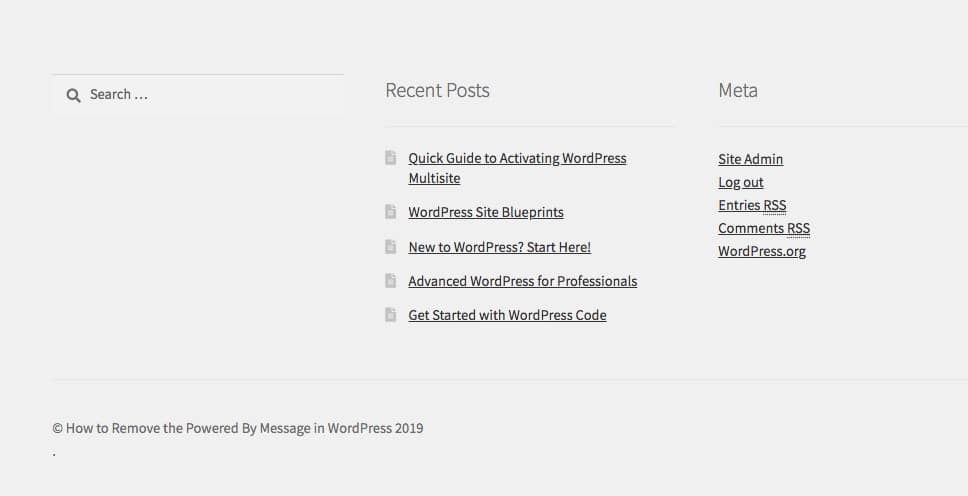
Then, you must go back to your site and refresh the screen after scrolling down and clicking the Save button. Now, you will notice that the credit in the footer has vanished:
Furthermore, in the second field, you are able to type your own alternative text. Plus, this can include links as well as HTML.
In addition, in case you need any help to remove proudly powered by wordpress, our WordPress packages with the help of our WordPress experts are the perfect choice for you.
Following that, you can choose from three alternatives featured in Arrowtheme’s WordPress packages, which are the Basis, Standard, and Advance packages, depending on your needs. Not only that, we also provide many other great deals that can help you save upto 30% compared to original price. Don’t ignore this unique opportunity by connecting us via our CONTACT FORM now!
How to remove proudly powered by wordpress manually?
In fact, if you are really comfortable modifying the code in your WordPress theme yourself, removing the “Proudly Powered By WordPress” link by editing the code in your theme or a child theme is more efficient.
On the other hand, if you are utilizing a custom theme, you should go ahead and change it. Moreover, you will need to create a WordPress child theme in case you are using a third-party theme that is downloaded from the theme directory or purchased from a theme vendor.
Identify the code
To begin, you must discover the code that causes the notice to appear before you can remove it. In fact, this will differ depending on your theme. Now, let’s have a look at some outstanding examples below.
For instance, in the default Twenty Nineteen theme, the code for the area in the footer that displays the link is as follows:
<footer id=”colophon” class=”site-footer”>
<?php get_template_part( ‘template-parts/footer/footer’, ‘widgets’ ); ?>
<div class=”site-info”>
<?php $blog_info = get_bloginfo( ‘name’ ); ?>
<?php if ( ! empty( $blog_info ) ) : ?>
<a class=”site-name” href=”<?php echo esc_url( home_url( ‘/’ ) ); ?>” rel=”home”><?php bloginfo( ‘name’ ); ?></a>,
<?php endif; ?>
<a href=”<?php echo esc_url( __( ‘https://wordpress.org/’, ‘twentynineteen’ ) ); ?>” class=”imprint”>
<?php
/* translators: %s: WordPress. */
printf( __( ‘Proudly powered by %s.’, ‘twentynineteen’ ), ‘WordPress’ );
?>
</a>
<?php
if ( function_exists( ‘the_privacy_policy_link’ ) ) {
the_privacy_policy_link( ”, ‘<span role=”separator” aria-hidden=”true”></span>’ );
}
?>
<?php if ( has_nav_menu( ‘footer’ ) ) : ?>
<nav class=”footer-navigation” aria-label=”<?php esc_attr_e( ‘Footer Menu’, ‘twentynineteen’ ); ?>”>
<?php
wp_nav_menu(
array(
‘theme_location’ => ‘footer’,
‘menu_class’ => ‘footer-menu’,
‘depth’ => 1,
)
);
?>
</nav><!– .footer-navigation –>
<?php endif; ?>
</div><!– .site-info –>
</footer><!– #colophon –>
In general, there is lots of code in that. As a result, it will generate a colophon that looks something like this:
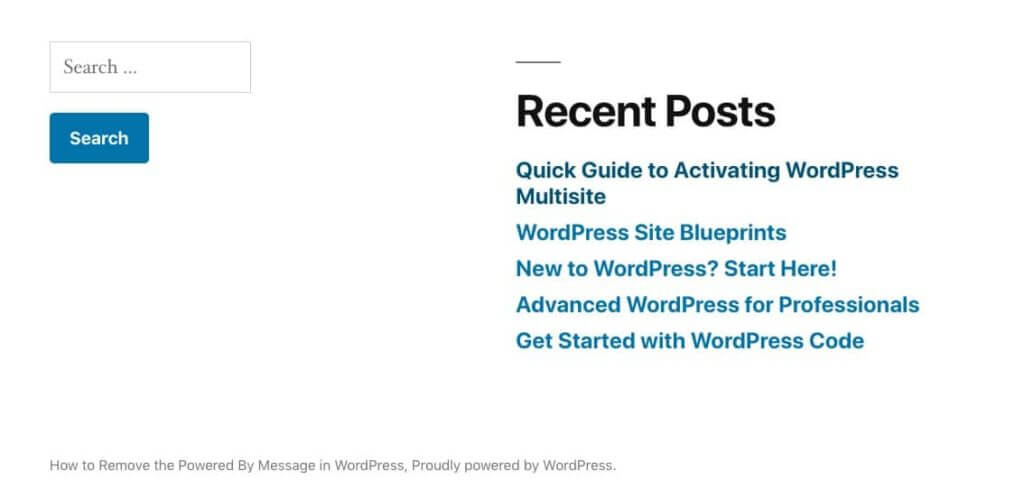
The two widgets that you put to the footer widget section, as well as a colophon with the site name and the “Proudly Powered By WordPress” link, are included in this footer.
You can see the message’s display code like below:
<a href=”<?php echo esc_url( __( ‘https://wordpress.org/’, ‘twentynineteen’ ) ); ?>” class=”imprint”>
<?php
/* translators: %s: WordPress. */
printf( __( ‘Proudly powered by %s.’, ‘twentynineteen’ ), ‘WordPress’ );
?>
</a>
Make changes to the footer.php file
Furthermore, if you make changes to the footer.php file in the theme and then update it, the new version of the footer file will overwrite your changes. Alternatively, the Twenty Nineteen theme allows you to alter or remove this message by creating a child theme, duplicating the footer.php file from the parent theme (Twenty Nineteen), and editing it.
In addition, the Storefront theme, which is free and suited for WooCommerce stores, has a feature that displays the footer credit. Below is the colophon from Storefront’s footer.php file:
<footer id=”colophon” class=”site-footer” role=”contentinfo”>
<div class=”col-full”>
<?php
/**
* Functions hooked in to storefront_footer action
*
* @hooked storefront_footer_widgets – 10
* @hooked storefront_credit – 20
*/
do_action( ‘storefront_footer’ );
?>
</div><!– .col-full —>
</footer><!– #colophon —>
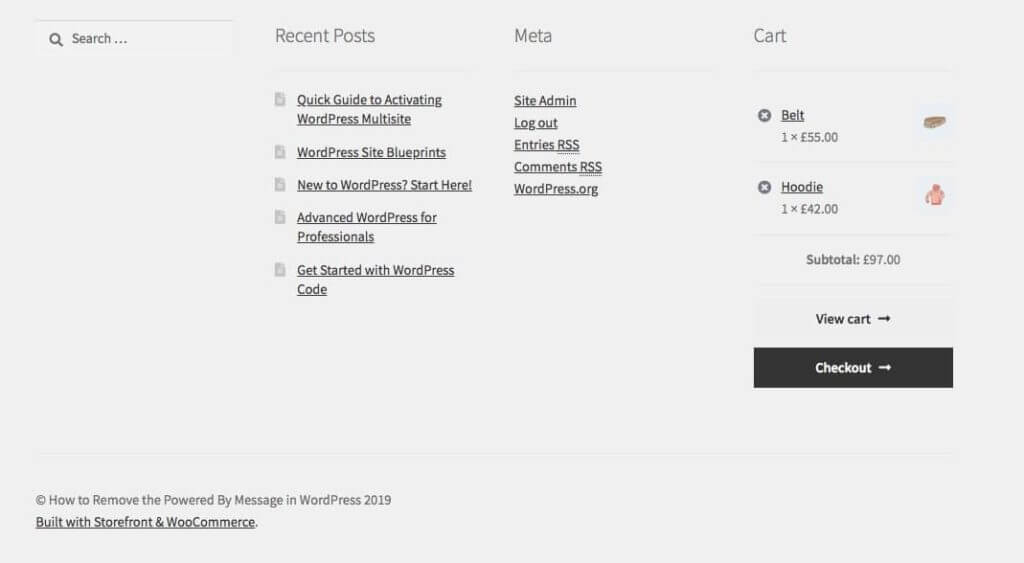
In reality, this does not include any code that generates the “Proudly Powered By WordPress” link on your website. When you visit a Storefront-powered site, though, you will notice a message that says the site is powered by Storefront and WooCommerce rather than WordPress:
For more details, the code may be found in the footer.php file, which contains the storefront_footer_widgets and storefront_credit methods that are linked to the storefront_footer action. storefront credit is the function that generates this code.
Moreover, it is accessed by the storefront_footer hook, which is enabled with the following code:
do_action( ‘storefront_footer’ );
Furthermore, the storefront_credit function is connected to that action hook in the storefront-template-hooks.php file, which you can see when you dig deeper into the theme files. Let’s see the code below:
add_action( ‘storefront_footer’, ‘storefront_credit’, 20 );
Hence, we have two options for adding the “Proudly powered by wordpress” statement to the footer: manually coding it into the footer file, or using a function and a hook. Now, let’s have a look at how you can override it.
How to create a child theme?
You will need to establish a child theme for your code before you start with either of these techniques. Following that, you can create a new folder in your wp-content folder and name it. After that, the next thing you must do is to tweak the child theme before activating it. Because it’s a child theme, the parent theme’s template files will be utilized to display your site unless the child theme has a file with the same name. Moreover, if this is the case, it will override the parent theme’s comparable file. What’s more, you can also override functions in the parent theme by writing functions in your child theme.
Way to remove the Credit from the Footer File
Let’s start with how to update the message when it’s explicitly coded in footer.php. You need to look in the parent theme for the footer.php file. Then, let’s make a copy of footer.php in your child theme. Then, in your child theme, you have to open the footer.php file, not in your parent theme. Now, you must look for the code that displays “powered by WordPress” on the screen that looks like below:
<a href=”<?php echo esc_url( __( ‘https://wordpress.org/’, ‘twentynineteen’ ) ); ?>” class=”imprint”>
<?php
/* translators: %s: WordPress. */
printf( __( ‘Proudly powered by %s.’, ‘twentynineteen’ ), ‘WordPress’ );
?>
</a>
Now, all you have to do to remove the credit is remove the code from your footer.php file. After that, don’t forget to save it. At this time, you will notice that the “powered by WordPress” message has vanished when you refresh your screen.
Way to remove “Powered By WordPress” by using a Function
To remove the “Proudly Powered By WordPress” link using a Function, you should build a function in your child theme’s functions file that eliminates the credit instead of modifying the footer.php file in your child theme. Just need to follow these steps below:
To begin, you must open the functions.php file in your child theme. This file is already present in your child theme because it is where the parent theme’s stylesheet is enqueued. Additionally, the Twenty Nineteen footer with “powered by WordPress” removedstorefront_credit is the function in the Storefront theme that adds the footer credit. It is attached to the action hook storefront_footer. This means that you must use the remove_action() function to unhook the storefront credit function from the action hook in order to remove all of its content.
Then, you must add this following code in your child theme’s functions file:
function remove_storefront_credit() {
remove_action( ‘storefront_footer’, ‘storefront_credit’ );
}
add_action( ‘wp_head’, ‘remove_storefront_credit’, 20 );
Otherwise, the function you create will not activate. This is because it is not connected to another action. In fact, it is wp_head in this scenario. Besides, it is far more critical to include the priority as the third parameter for add_action(), and to make this the same as in the initial add_action() instance from the storefront-template-hooks.php file.
When you navigate to your site now, you will notice that the footer credit has vanished:

Furthermore, the copyright notice, as well as the complete credit, has vanished. Plus, you will need to update the method with your own code if you want to be more particular and only target the Storefront link.
How to replace the “Proudly Powered By WordPress” link with your own code?
You could replace the footer credit with your own code instead in case you don’t want to delete it. Besides, depending on the technique your theme uses to add the credit, you will need to do it differently. Then, let’s start with a theme that puts it to the footer file directly.
Using the Footer File to add your own Credit
Instead of deleting the code for the “Proudly Powered By WordPress” link in the new footer.php file you established in your child theme, you replace it with your own.
When adding a link to the website, the new version of the code is as follows:
<a href=”<?php echo esc_url( __( ‘https://kinsta.com//’, ‘kinsta’ ) ); ?>” class=”imprint”>
<?php
/* translators: %s: WordPress. */
printf( __( ‘Hosted by %s.’, ‘kinsta’ ), ‘Kinsta’ );
?>
</a>
Finally, remember to save the file and visit the site again. Now, the message “Proudly powered by WordPress” has been updated.

Using a Function to add your own credit
You have to look in the Storefront files for the function’s code. storefront_credit() is exactly the function you are looking for. More importantly, if you have unhooked the function using the above methods, you need to remove the code that did so. Moreover, that function can be found in the inc folder of the theme’s storefront_template_functions.php file. Below is how it works:
if ( ! function_exists( ‘storefront_credit’ ) ) {
/**
* Display the theme credit
*
* @since 1.0.0
* @return void
*/
function storefront_credit() {
?>
<div class=”site-info”>
<?php echo esc_html( apply_filters( ‘storefront_copyright_text’, $content = ‘© ‘ . get_bloginfo( ‘name’ ) . ‘ ‘ . date( ‘Y’ ) ) ); ?>
<?php if ( apply_filters( ‘storefront_credit_link’, true ) ) { ?>
<br />
<?php
if ( apply_filters( ‘storefront_privacy_policy_link’, true ) && function_exists( ‘the_privacy_policy_link’ ) ) {
the_privacy_policy_link( ”, ‘<span role=”separator” aria-hidden=”true”></span>’ );
}
?>
<?php echo ‘<a href=”https://kinsta.com/” target=”_blank” title=”‘ . esc_attr__( ‘Kinsta hosting’, ‘kinsta’ ) . ‘” rel=”author”>’ . esc_html__( ‘Hosted by Kinsta’, ‘kinsta’ ) . ‘</a>.’; ?>
<?php } ?>
</div><!– .site-info –>
<?php
}
}
Moreover, because it is wrapped in a check to verify if a function with the same name already exists, that function is pluggable. Additionally, this means that if you write a new function with the same name in your child theme, it will overwrite this version of the function.
Begin by removing the remove_action() method you previously added to your child theme’s functions file. In addition, a new version of the storefront_credits() method must now be added. Besides, the line that begins <?php echo “a href=“https://woocommerce.com” is the component of the function that we want to change.
Furthermore, the simplest approach to achieve this is to copy the original Storefront function and edit it in your functions file. Then, let’s see the following code:
function storefront_credit() {
?>
<div class=”site-info”>
<?php echo esc_html( apply_filters( ‘storefront_copyright_text’, $content = ‘© ‘ . get_bloginfo( ‘name’ ) . ‘ ‘ . date( ‘Y’ ) ) ); ?>
<?php if ( apply_filters( ‘storefront_credit_link’, true ) ) { ?>
<br />
<?php
if ( apply_filters( ‘storefront_privacy_policy_link’, true ) && function_exists( ‘the_privacy_policy_link’ ) ) {
the_privacy_policy_link( ”, ‘<span role=”separator” aria-hidden=”true”></span>’ );
}
?>
<?php echo ‘<a href=”https://woocommerce.com” target=”_blank” title=”‘ . esc_attr__( ‘WooCommerce – The Best eCommerce Platform for WordPress’, ‘storefront’ ) . ‘” rel=”author”>’ . esc_html__( ‘Built with Storefront & WooCommerce’, ‘storefront’ ) . ‘</a>.’; ?>
<?php } ?>
</div><!– .site-info –>
<?php
}
Finally, don’t forget to save your functions file and visit your site again. Specifically, the credit message has been updated as follows:

>>> Read more: How to get the WordPress page ID and post ID easily
In conclusion
To sum up, the removal of the “Proudly powered by wordpress” is allowed, and it can be done in a variety of methods. Specifically, you can do that with a plugin, or by editing the code in your theme or using a child theme with ease. All in all, Arrowtheme hopes this post will bring you lots of helpful information as you want. Then, in case you are having any question on this topic, it is better that you contact us for more details.