How to Edit Shopify CSS on Your Shopify Stores
Nowadays there are many premium Shopify themes in the market for you to decorate your stores. However, in some cases, you will want to change some elements to customize your stores. So Shopify has provided you with a powerful tool to do so. It is CSS editors. If you are not familiar with Shopify or have little knowledge about it, this blog will instruct you on how to edit Shopify CSS in detail.
What is Shopify CSS?
A web application consists of 4 parts: business logic, content (HTML), interaction (JavaScript), and presentation (CSS). Wherein, CSS (Cascading Style Sheets) illustrate how HTML elements are to be displayed on the screen.
When the CSS code is read, the content transforms from black text on a white background to whatever creation has been illustrated by the collection of styles. When you want to edit the theme code in Shopify, they must include HTML, CSS, and JavaScript. Make sure that you know HTML and CSS before you edit the code.
Although CSS has developed recently, standard CSS does not allow us to reuse code segments within a stylesheet in an easy way. So developers tend to use CSS preprocessors (scripting language). They will help you transform into regular CSS syntax. One of the CSS preprocessors is Sass (systematically awesome stylesheets) which improves CSS language to create custom properties.
In Shopify, Sass syntax is used by a built-in compiler to convert and render.
Benefits of CSS in Shopify
Shopify does not use CSS individually. Instead, it uses SCSS to support CSS. There are some highlight features about them as listed below:
- They include Variables: It is a big plus point for SCSS because it can save some specific values that we can reuse later. Variables save you time by reducing time for repetitions and simple codes in standard CSS sheets.
- Nested syntax in CSS helps you work with coding more easily. Nesting can target elements more efficiently. As it combines other coding, it expresses more functionality. Therefore, nesting code assists you in reading the syntax, modifying code, and reducing time for simply rewriting repetitive selectors.
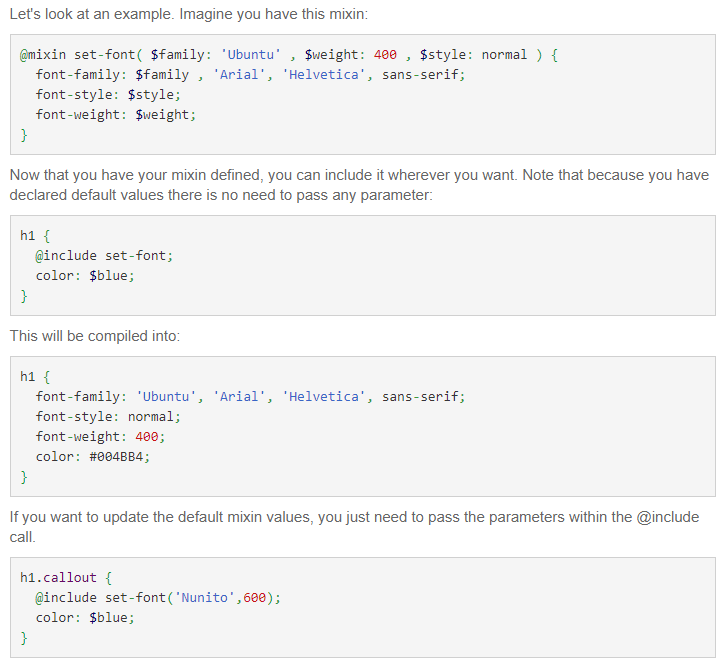
- Optimize Mixins: Mixins are a wider function than variables. It helps you choose the way content is shown without using repetitive variables. So it saves you time and effort. You can see an example of Mixins below.
How to Edit Shopify CSS on Your Stores
Here is a step-by-step to edit Shopify CSS on your stores:
Step 1: Make a backup
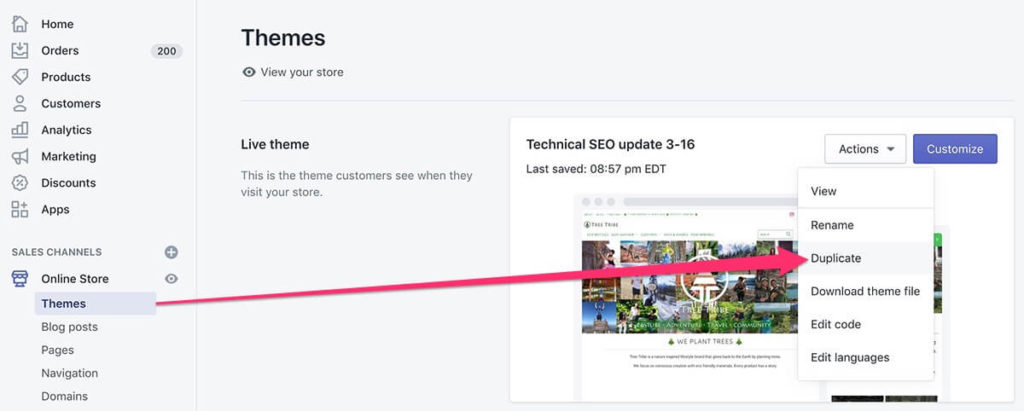
In case you are not confident in editing CSS, it is smart to make a backup. Click at Shopify admin > Online Store > Themes > Actions > Duplicate.
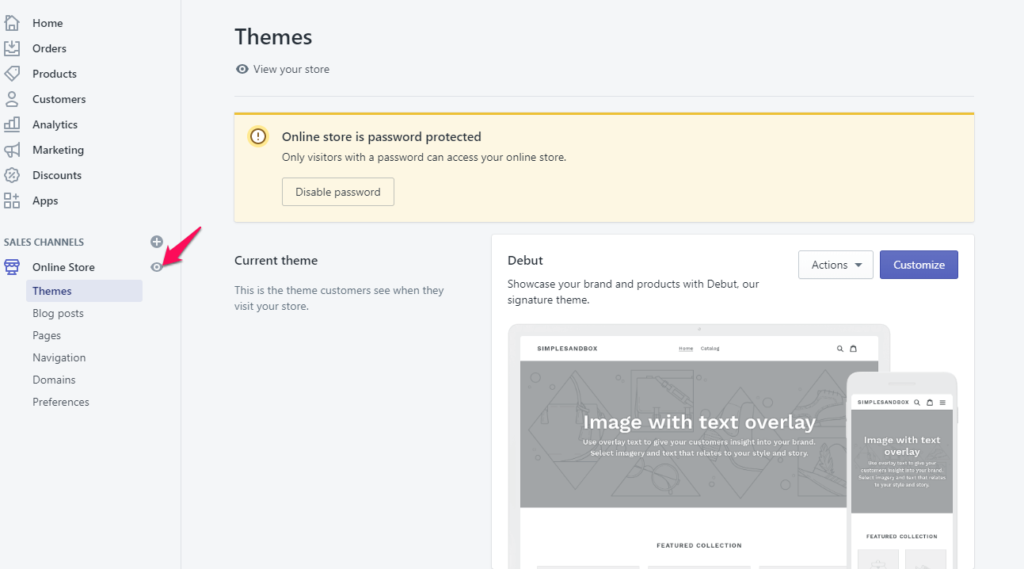
Step 2: Go to the Online Store
To the left of the page, you will see the “Sales channels”. Under this option, click on “Online Store”. After that, there is a range of options that will appear under it. It will automatically show the first option “Themes” page.
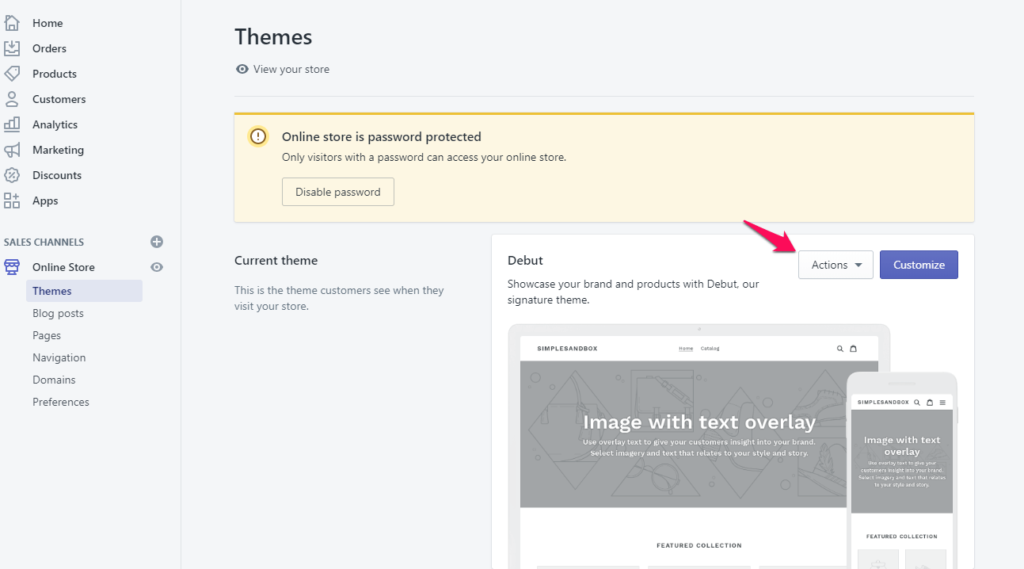
Step 3: Select the theme to edit
The Themes page shows all the Shopify theme options inside your store. The current theme will appear on the left hand of the Themes page. On the right hand, you will see a button “Action”. Click on it to see the droplist. Click “Edit code” to go on and choose the theme to edit.
Step 4: Select the Assets
After you open the Theme file editor, you can see 2 default categories Layout and Templates. The details of the 2 categories are automatically shown.
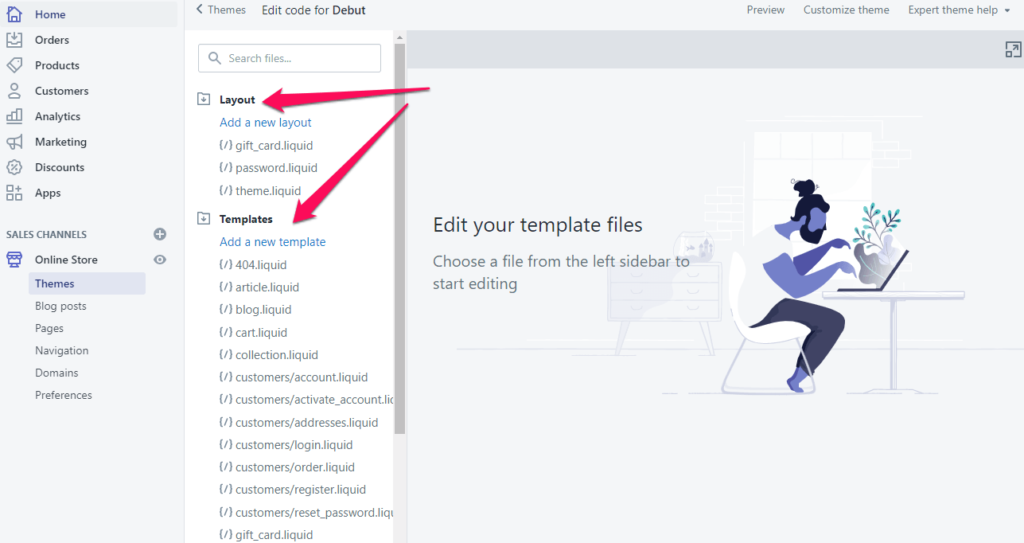
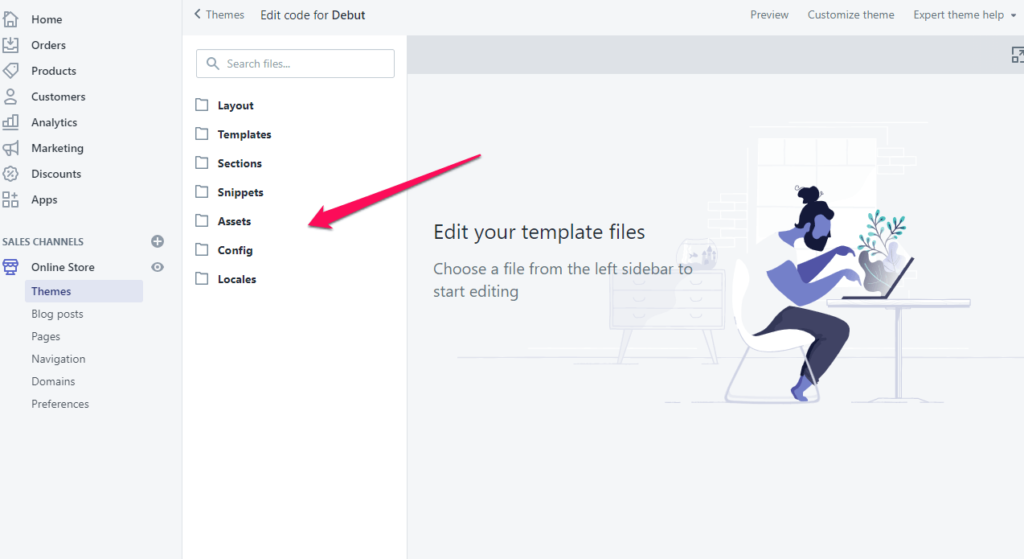
You can click the folder “Layout” and “Templates” to close the details of them. Otherwise, you can scroll down to find the title category “Assets”. Then click on “Assets” to see details.
Step 5: Choose the CSS file to edit
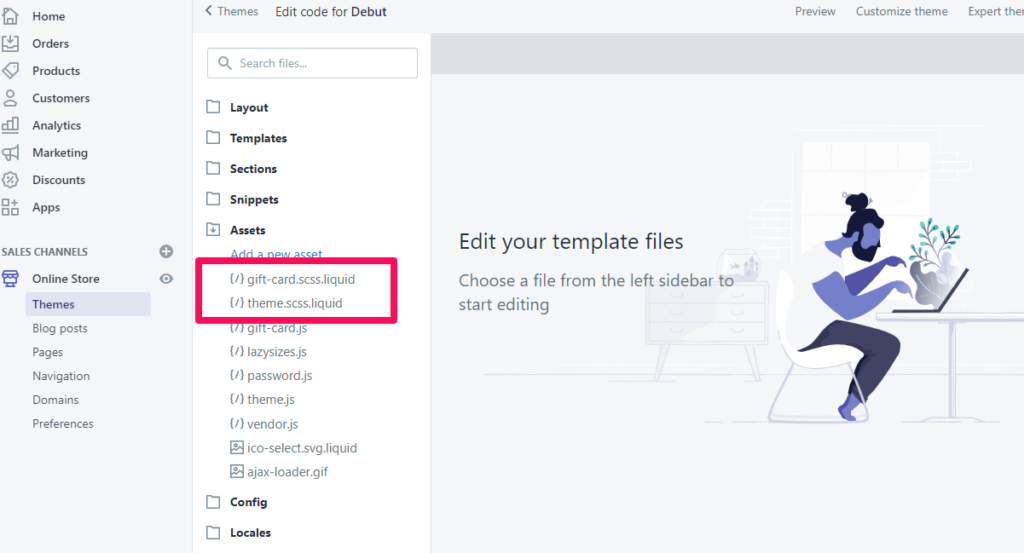
Each CSS file has a different name based on the developers. In the below images, we can see 2 CSS files including gift cards and theme. However, every CSS file’s name has the CSS.liquid extension. When you see your CSS files, click on them to view the detailed content.
Can You Edit More Than 1 CSS File At The Same Time?
Shopify allows you to edit multiple CSS files at the same time. You can see the file name’s tab and an “X” at the top of the editor page. It helps you to open and edit more than 1 file at the same time. You can move among these tabs as such tabs of web browsers.
However, to prevent you from missing any edits, we remind you to save all your work.
How To Create Shopify CSS Files?
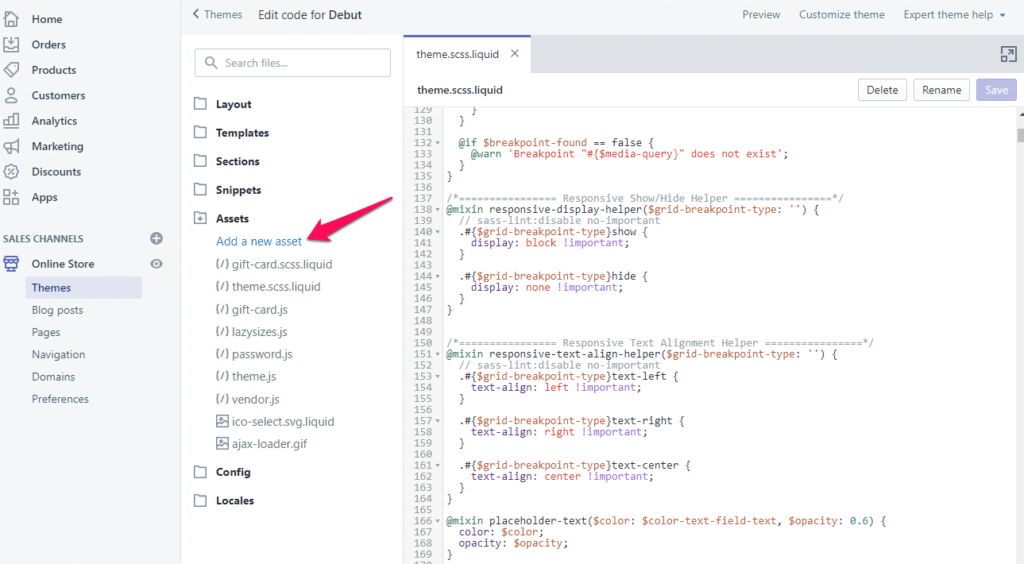
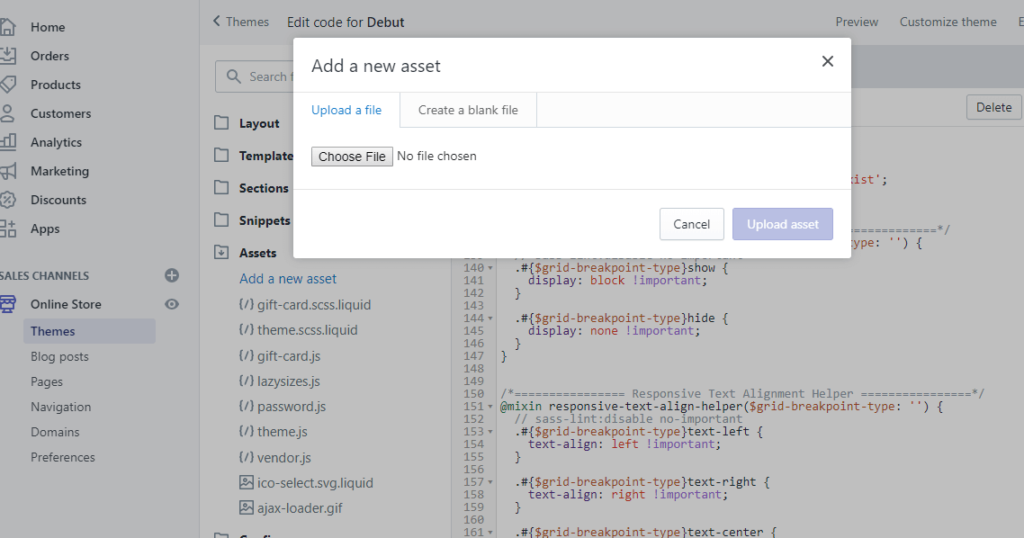
In the images below, you can see the category “Assets”. Below this category, click on “Add a new asset”.
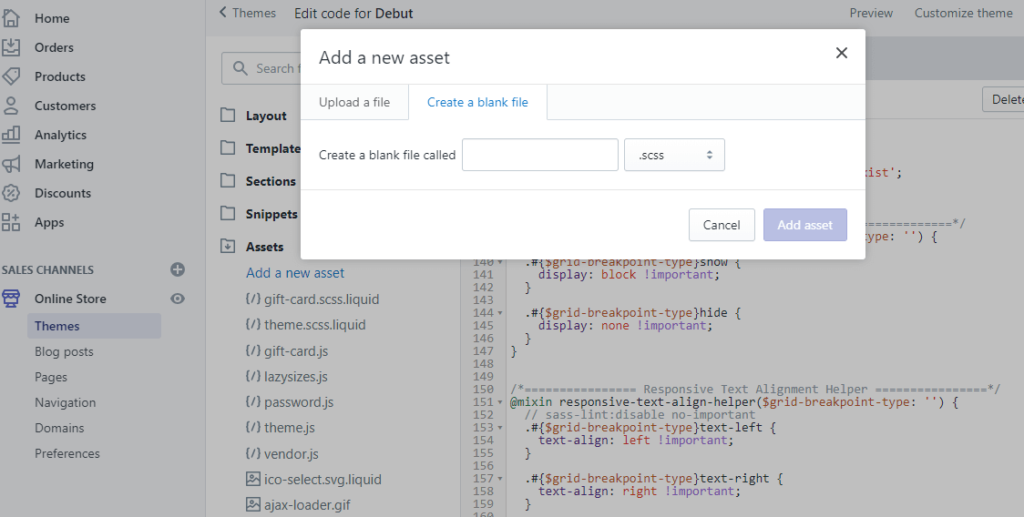
After that, you have 2 options: uploading an existing file or creating a blank file.
If you choose to create new ones, it will ask you to type a file name. Try to use a simple name and relevant. It will be used in your .liquid files when you refer to CSS.
When you want to remove an existing CSS file and upload another, you should change the name of the old file. Or you can change the theme’s code for the old CSS file’s reference.
In conclusion, if you face difficulties with these steps, watch this video for more detail. Besides, you can use our premium Shopify themes. Aside from that, there is one more way to help you save money while still maintaining a functional online store. These are our Shopify Packages, which are all-inclusive Ecommerce solutions.
Contact US – ArrowTheme:
– Email: [email protected]
– Facebook: Facebook.com/ArrowThemeTeam
– Website: ArrowTheme.com