The comprehensive guide to Woocommerce checkout page
The checkout page is the last thing shoppers see before completing their purchases. It can make the difference between whether they end up converting or abandoning your order altogether. Therefore, it’s essential to ensure that your WooCommerce checkout page is optimized well and functions in a way that increase your conversion Rate. The default configuration is simply, you may need to edit it out of necessity, or to test for a higher conversion rate. This post will show you many different methods to style and edit the checkout page in WooCommerce.
Why should you customize the checkout page in WooCommerce?
The checkout page is one of the most important webpages. It’s where the shoppers pays and you close the sale. Considering how many customers abandon their carts and how much competition there is nowadays, you should optimize the checkout to increase as many sales as possible.
Even though WooCommerce comes with a good default configuration, you may need to optimize the checkout page to boost conversion rates on your WooComerce store. Some of the functions you can implement to edit your WooCommerce checkout page including:
- Create a one-page checkout
- Change the checkout style and design with CSS
- Add, remove, or rearrange checkout fields
- Include content
- Make a field required or optional
- Include conditional fields and create conditional logic
- Add extra fees for shipping, packaging, and so on
- and more
How to find the default WooCommerce Checkout Page and Settings
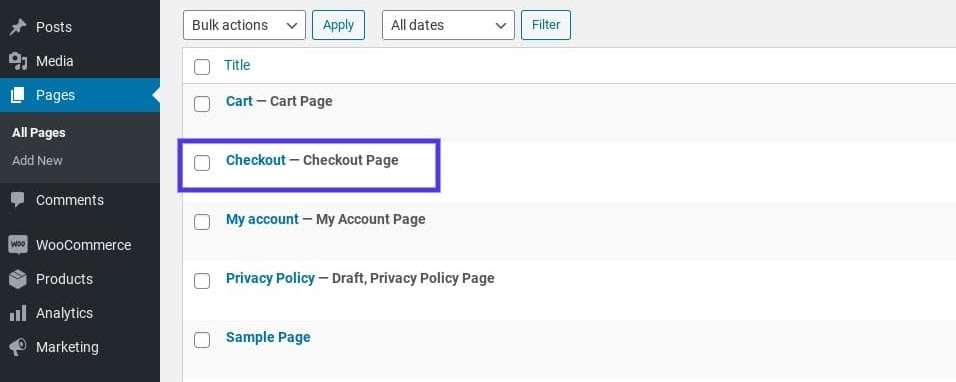
WooCommerce automatically generate a checkout page for your store once you activate the plugin. You can locate it by moving to Pages > Checkout in your admin dashboard:
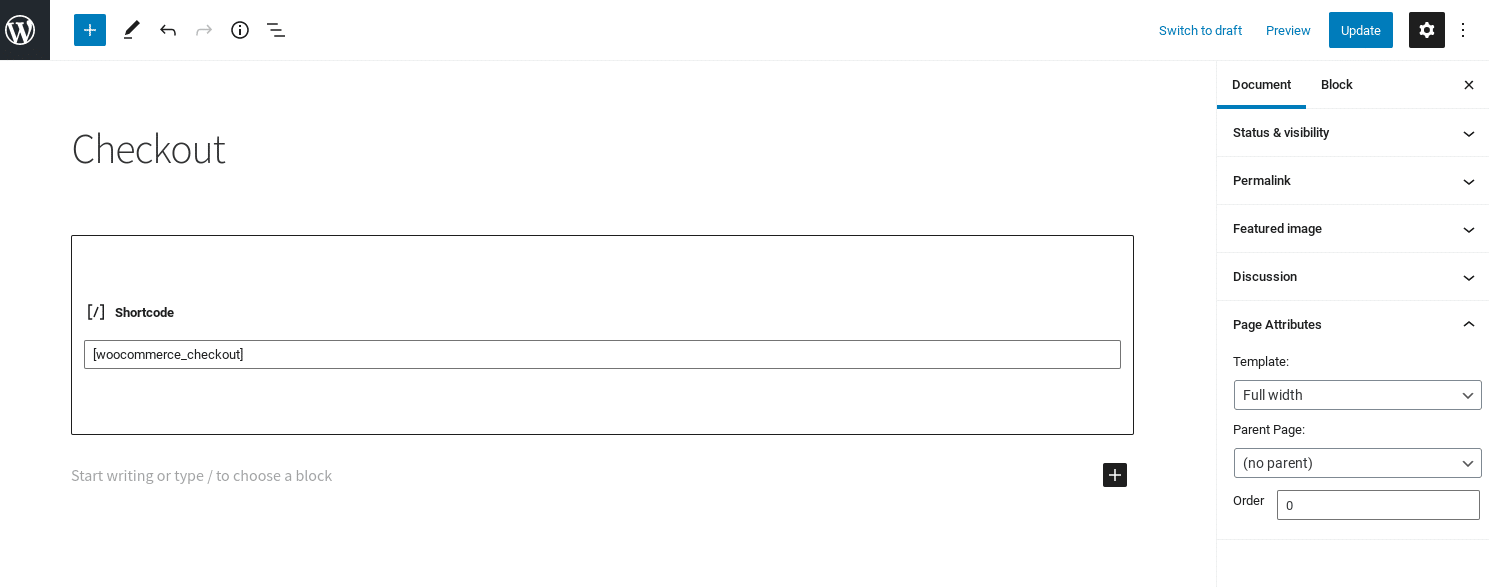
Next step, you can change this page just as you would any WordPress content. For instance, you can edit the page’s title and permalink, include a featured image, modify the page attributes, etc.
There are a handful of standard options for configuring this checkout page, some of which you can find under WooCommerce > Settings > Advanced:
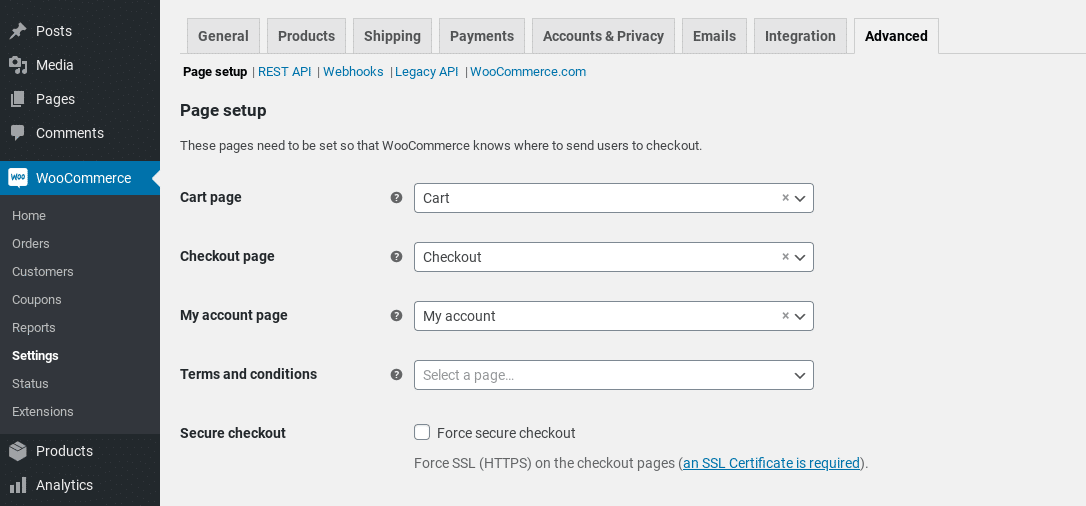
- Under the Page Setup section, you can choose a different page to use as the checkout screen for your website. Also, you also have the option to force a secure HTTPS connection.
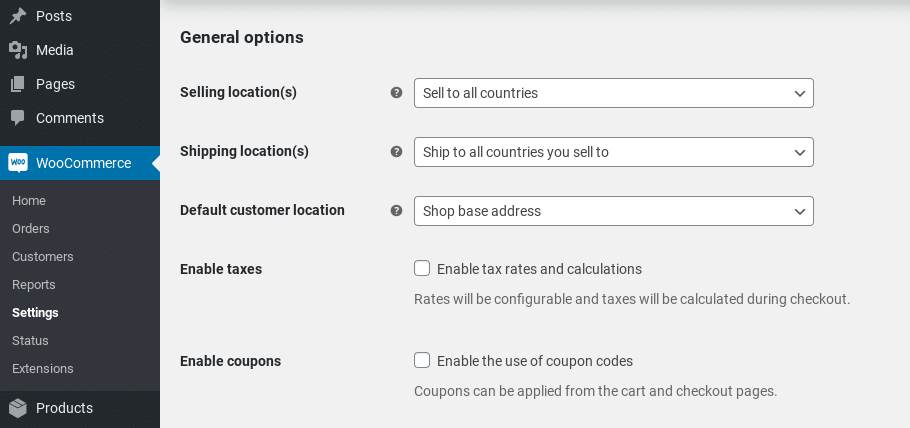
- Moving to General settings page, you can enable coupons to use checkout, and configure how taxes will be calculated:
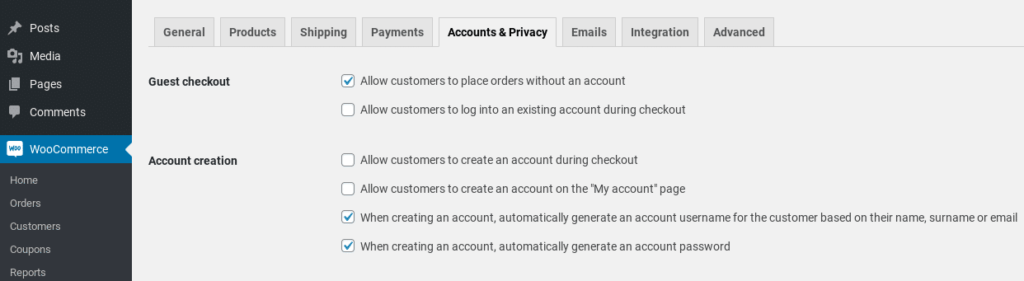
- Under the Accounts & Privacy tab, you can easily see a few options for account creation and guest checkouts:
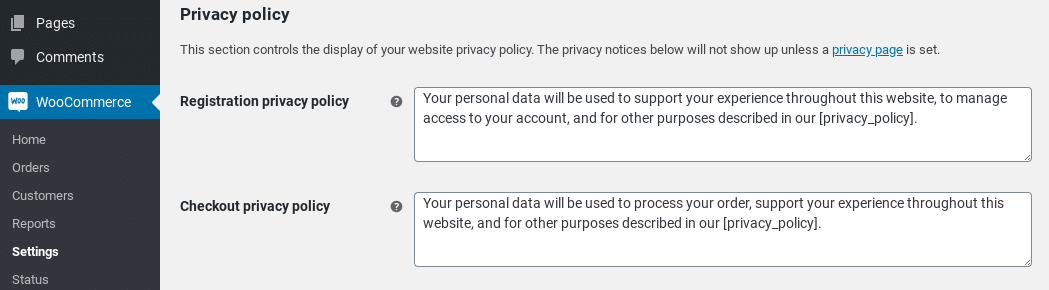
- Besides, at a Privacy policy section, you can modify the privacy policy text that show on the checkout page:
How to edit the WooCommerce checkout page with custom CSS
CSS classes may change depended on your theme or modules, but the default classes are usually available. You can customize these classes by using custom CSS in a child theme, or the customizer.
Here are the main high level tags, with classes and IDs you can use.
<body class="woocommerce-checkout">
<div class="woocommerce">
<form class="woocommerce-checkout"> <div id="customer_details" class="col2-set">
<div class="woocommerce-billing-fields">
<p class="form-row">
<div class="woocommerce-shipping-fields">
<p class="form-row">
<div class="woocommerce-additional-fields">
<div id="order_review" class="woocommerce-checkout-review-order"> <table class="woocommerce-checkout-review-order-table">
<div id="payment"> <ul class="wc_payment_methods payment_methods methods"> <div class="form-row place-order">
For example:
form.woocommerce-checkout input[type="text"] {
border-radius: 3px;
background-color: #ccc;
color: #444;
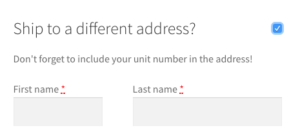
}Checkout Hooks Visualized
It permits you to have a visual idea of where the hooks are located.
Action hooks are used to add markup to the page. For instance, you can easily add a message to the customer about shipping details using the woocommerce_before_checkout_shipping_form hook.
add_action( 'woocommerce_before_checkout_shipping_form', function() {
	echo 'Don\'t forget to include your unit number in the address!';
});
It looks like this:
How to move, add, or remove Checkout Fields
One of the easiest method to customize checkout fields is using the Checkout Field Editor plugin. It offers a simple UI to move, edit, add, or remove any checkout fields. Moreover, you can edit anything about the fields such as type, label, position, and more.
After installing and activating this module, you can move WooCommerce => Checkout Fields to begin editing.
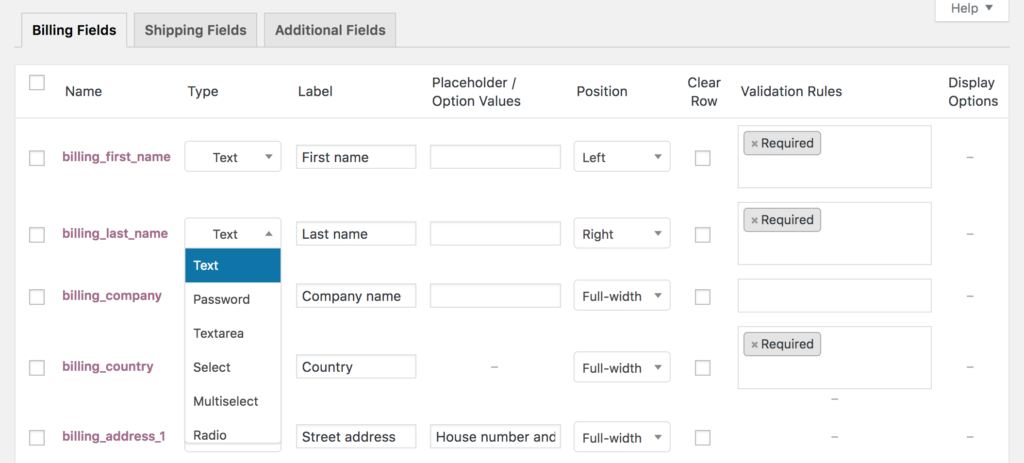
- To edit a field, you change the desired value and click save.
- To add a field, click Add Field,
- And to remove, check the field and click Disable/Remove.
Custom Code
Custom code is a bit trickier, but if you only want to make a small edit without purchasing a plugin, here’s how you do it.
WooCommerce has several filters available to edit checkout fields, including woocommerce_checkout_fields, woocommerce_billing_fields, and woocommerce_shipping_fields.
You can use the woocommerce_checkout_fields filter to manipulate all the checkout fields.
Remove the billing phone number field
// Hook in
add_filter( 'woocommerce_checkout_fields' , 'my_override_checkout_fields' );
// Our hooked in function - $fields is passed via the filter!
function my_override_checkout_fields( $fields ) {
  unset($fields['billing']['billing_phone']); return $fields; }
Add Shipping Phone Number Field
// Hook in
add_filter( 'woocommerce_checkout_fields' , 'custom_override_checkout_fields' );

// Our hooked in function - $fields is passed via the filter!
function custom_override_checkout_fields( $fields ) {
     $fields['shipping']['shipping_phone'] = array(
        'label'   => __('Phone', 'woocommerce'),
    'placeholder'=>  _x('Phone', 'placeholder', 'woocommerce'),
    'required' => false,
    'class'    => array('form-row-wide'),
    'clear'    => true
     );

     return $fields;
}

/**
 * Display field value on the order edit page
 */

add_action( 'woocommerce_admin_order_data_after_shipping_address', 'my_custom_checkout_field_display_admin_order_meta', 10, 1 );

function my_custom_checkout_field_display_admin_order_meta($order){
    global $post_id;
    $order = new WC_Order( $post_id );
    echo '<p><strong>'.__('Field Value').':</strong> ' . get_post_meta($order->get_id(), '_shipping_field_value', true ) . '</p>';
}
To edit a field, you can go to the field attributes. Let’s change the placeholder for Zip to Postal Code.
Change Field Placeholder
add_filter( 'woocommerce_checkout_fields' , 'my_override_checkout_fields' );

// Our hooked in function - $fields is passed via the filter!
function my_override_checkout_fields( $fields ) {
     $fields['billing']['billing_postcode']['placeholder'] = 'Postal Code';
     return $fields;
}
How to Directly Link Products to the WooCommerce Checkout Page
Another way you can improve the checkout experience for your shoppers is to generate direct checkout links. This is useful for sending shoppers straight to checkout from product and sales pages.
Create a direct checkout link manually
To generate and add a direct checkout link in WooCommerce, you can use the following URL: exampledomain.com//checkout/?add-to-cart=ID.
Note: you’ll want to replace “exampledomain” and “ID” with your domain name and the specific product ID that you’re linking to the checkout page.
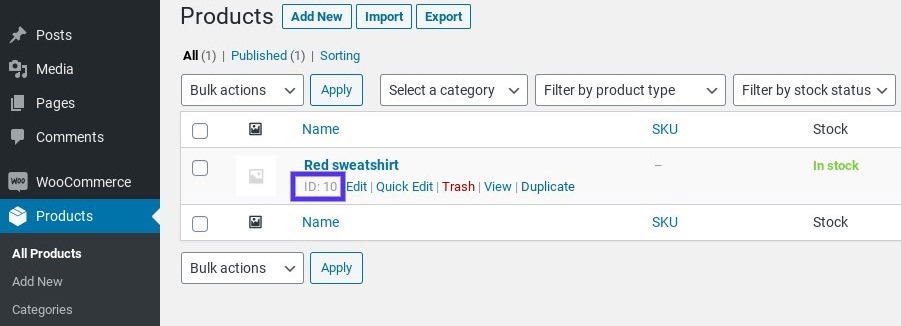
To find a product ID, move to Products > All Products in your admin dashboard. Browse to the product you need to create the direct link for, and then hover over the name of it to show the product ID number:
After you paste the product ID into the aforementioned URL, you can then place the link anywhere on your WooCommerce website. You can repeat this process for each of your items, even variable and grouped products.
Summary
In this simple guide, we showed you how to style and edit the checkout page in WooCommerce. Do you have any questions or want to share with us checkout customizations that you have applied to your website? Let us know in the comments section below.
Besides, whether you are looking to build robust Woocommerce websites, redesign existing website, or seeking a professional maintenance & Support service, our Woocommerce Development Packages provide you with a team of experts who are ready to help you achieve your business goals. Especially, you can get up to 30% off for all of your Woocommerce services.
You can reach us at Here. We’ll be happy to provide you with a free consultation