Easy ways to add a WordPress favicon to your website
WordPress favicons refer to the small icons that appear next to website names in browser tabs. Other locations that you are able to utilize your WordPress favicon are: browser bookmarks, iOS home screen buttons and so much more. If you take advantage of it correctly, it will definitely increase your brand recognition. In addition, it even helps you to improve the user experience on your website. With this reason, in this article, Arrowtheme will give you a comprehensive guide to add a WordPress favicon to your website in a few simple steps. Then, explore with us right now!
Why WordPress merchants need to use WordPress favicon
You will see the usefulness of a favicon when you open too many tabs at once. Besides, when consumers have many tabs open in their browser, a favicon makes it easier for them to recognize your website.
In fact, the title of your website may not always be displayed, it depends on the number of open tabs. This is the reason why including a WordPress favicon can assist your visitors have a better UX. Best of all, a favicon can help your site appear more professional and respectable, in addition to increasing brand recognition.
What’s more, if any visitor saves your website to their mobile device’s home screen, your favicon will appear as the icon. In particular, utilizing the emblem or related artwork for your brand’s favicon might help to make your site more recognizable and assist to create a more coherent appearance.
Create a WordPress favicon to your website
Previously, your favicon had to be a specific ICO file. However, as you know, all recent browsers now support the use of ICO, PNG, and GIF files for your wordpress favicon. Moreover, JPEG is also extensively accepted, although not in all Internet Explorer versions. As a result, it is less suitable for use as a favicon.
In addition, if you know how to use Photoshop, you can make a wordpress favicon on your own. However, using a simple cloud-based application to make your favicon icon set from an existing image is generally easier.
Alternatively, RealFaviconGenerator, a popular cloud-based version plugin, is a wonderful option thanks to these following reasons:
- First and foremost, it can also make app icons.
- Secondly, it offers PNG and ICO versions of favicon icons.
- Thirdly, after uploading your image, you may customize your favicon.
- Moreover, all you have to do is copy and paste the code provided by the plugin.
Not only that, you are able to refer to helpful favicon generators:
- Favicon.cc, which allows you to make your own favicon or upload an existing one.
- Favicon Generator is an outstanding tool that works in a similar way to RealFaviconGenerator.
Tips for generating a WordPress favicon you should know
Before designing your own wordpress favicon, you should consider a few design and formatting tips below. The most important thing to remember is that favicons should be 512×512 pixels in size. Besides, although your WordPress favicon will be a perfect square, you can crop a rectangle image before or after submitting it to WordPress. Plus, in case you add site icons using the Customizer, WordPress has built-in cropping functionality.
More crucially, you also keep in mind that your wordpress favicon will be shown as a 16×16 px square. As a result, you will want to select an image that will look excellent when reduced to those dimensions. It should have a height and width of at least 512 pixels, even though it will display at that size. Furthermore, you also need to go through some of the Google Guidelines for favicon creation and use. As a result, this will help your symbol display properly in search engines and browser tabs.
>>> Read more: Step by step to clear your cache in WordPress
Easy ways to add a WordPress favicon to your website
#1. Add a wordpress favicon with the WordPress Customizer
Typically, all WordPress websites (as of WordPress 4.3) contain a site icon function, which makes it simple to add and crop an image for use as a favicon. Hence, all you need is an image with a minimum resolution of 512×512 pixels.
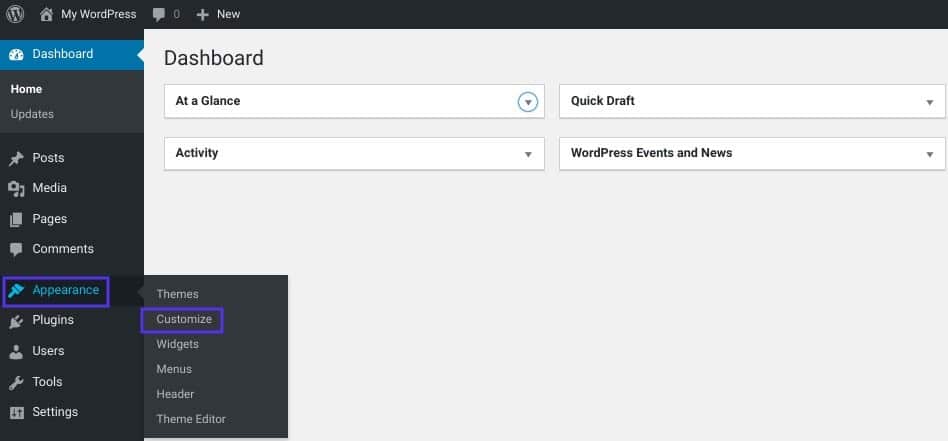
To begin, you must go to Appearance >> Customize in your WordPress dashboard to get started.
Then, you have to move to the Site Identity tab:
To continue, let’s locate the Site Icon section at the bottom of the page and select the Select site icon button:
Moreover, the WordPress Media Library will open in its default state. You have the option of using an existing image from your Media Library or creating a new one. Then, you must ensure the package you obtained from RealFaviconGenerator is unzipped if you used it to create your favicon.
After that, once you have found an image you like, right-click it and click Select from the bottom-right corner:
In addition, if your image isn’t already a perfect square, you are able to crop it. Furthermore, you can use the box to draw a box around the part of the image you wish to use for your icon. In particular, on the right side of the interface, you can see a preview of how your cropped image will look. If you’re satisfied with how things look, let’s click Crop Image to complete your selection.
Finally, in order to make your favicon active, all you have to do is choose Save & Publish. You can return to this interface at any time in the future to alter your wordpress favicon.
#2. Add a WordPress favicon by using a plugin
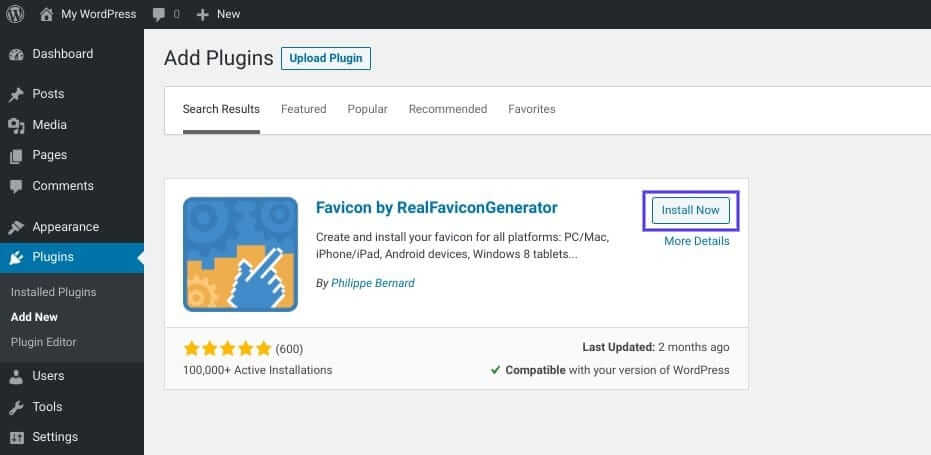
You are able to use a popular free plugin called Favicon by RealFaviconGenerator if you prefer a plugin option to the core WordPress site icon capability.
Basically, this plugin is as easy to use as WordPress’s default Customizer. However, it does include more device and app icon compatibility choices. To get started, you must go to your WordPress dashboard in order to install and activate this free plugin:
Additionally, to build your favicon set, let’s go to Appearance >> Favicon after activating the plugin. Following that, you must choose or upload an image with a resolution of at least 70×70 pixels (preferably 260×260 pixels):
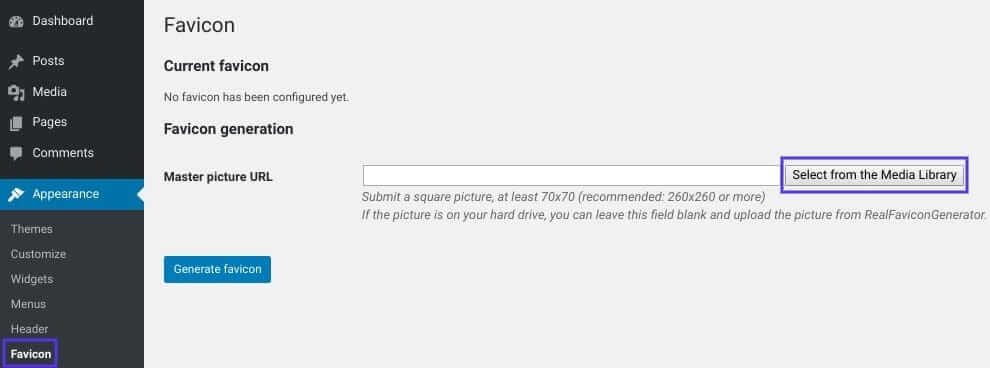
Then, you must choose your image and then click Generate favicon. As soon as you click that button, the plugin will transport you to the RealFaviconGenerator website, which is separate from your WordPress site. After that, you have to scroll down to Generate your Favicons and HTML code. Then, Real Favicon Generator will take you back to your WordPress dashboard while it works:
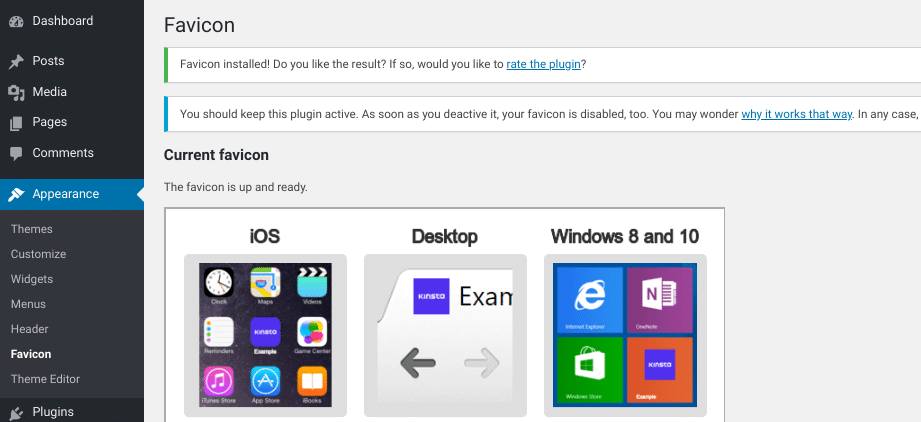
Your favicon will then be created and ready to use. In the plugin’s interface, you can see how it will look on different devices.
#3. Add a WordPress favicon to your website via FTP
If your host has cPanel, you can add a favicon to your WordPress website thanks to using File Transfer Protocol (FTP) or File Manager according to manual way. You will also need to make your own favicon image with this strategy. Besides, you can utilize the package from RealFaviconGenerator for this case, but the procedures still apply if you used a different program to add your favicon.
Then, you will need to do the following in order to manually add a WordPress favicon to your website:
- First and foremost, use an FTP program or the File Manager in your hosting cPanel to access your site’s files.
- Secondly, determine your site’s root directory and upload the contents of your favicon package there (favicons.zip)
In particular, the files should be located in the same directory as your wp-admin and wp-content directories. Then, you must take the code RealFaviconGenerator gave you before and do one of the following:
- In order to add it to your theme’s header, you have to use a plugin like Insert Headers and Footers.
- By editing the header.php file of your theme, you can paste it right into the <head> section of your theme.
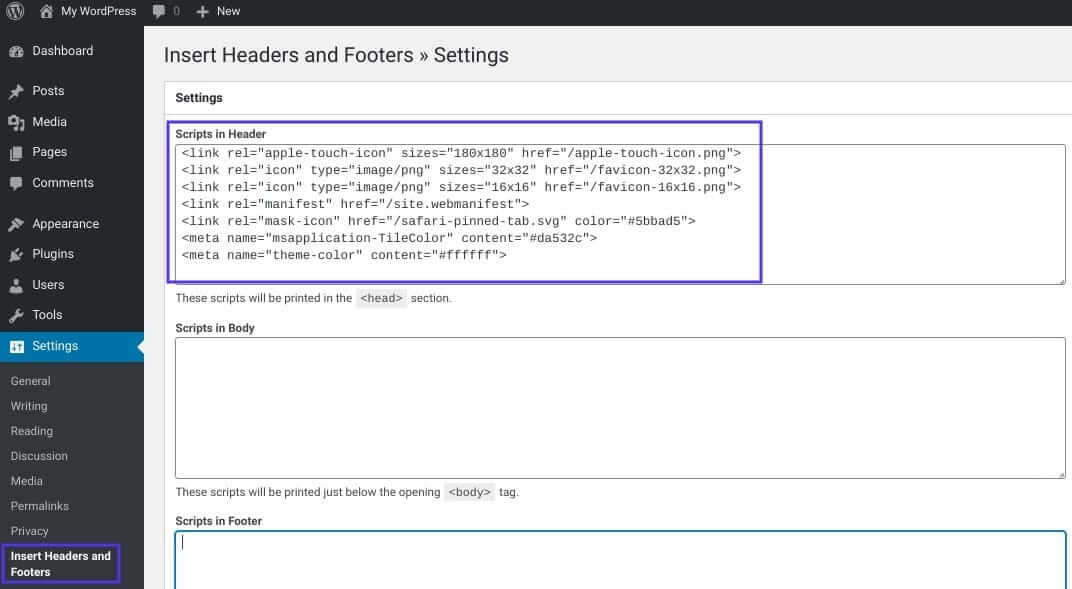
It is better that you utilize the Insert Headers and Footers plugin. This is because it ensures you won’t lose your favicon if you switch WordPress themes later. All you have to do is to install and activate Insert Headers and Footers to do so. Then, you must go to Setting >> Insert Headers and Footers, and then enter the following code into the Scripts in Header section:
Useful additional tips
The simplest approach to ensure that each site in your multisite network has its own favicon is to install a favicon plugin. Although you can enable distinct favicons for each network site by editing your theme’s files, you can find it is much more difficult than utilizing a plugin.
Moreover, to serve your favicon images, you might want to use a Content Delivery Network (CDN). Using a CDN to deliver those images will help you optimize your website even more.
In conclusion
A WordPress favicon can assist your website’s visitors have a better user experience by increasing brand recognition. Best of all, adding favicons is far straightforward thanks to a variety of options as we mentioned above. To sum up, Arrowtheme hopes this article will bring you a lot of helpful information you need about wordpress favicons. Then, in case you have any queries, let’s fill out our CONTACT FORM with your details. Additionally, Arrowtheme also offers outstanding WordPress Website Packages for you to build and develop your own website. Not only that, at this time, we are having an appealing sale program where you can have an opportunity to get a upto 30% off deal for any of our WordPress services. Thus, don’t hesitate to seize hold of this deal now!