How to add Sub Collections in Shopify: Best 2 Methods
As you know, Shopify is one of the most well-known ecommerce platforms for being simple to operate, even if you are without technical experience.
Although it is very simple to use, sometimes, you still need to customize the platform to meet your specific requirements. For instance, creating so-called sub-collections is a key requirement. Simply speaking, they are utilized to arrange the site’s structure so that child collections are nested within parent collections.
Hence, in this article, ArrowTheme will give you a detailed guide to add sub collection Shopify. Let’s explore with us right now!

Why should you add the sub collection Shopify to your store?
In fact, you should establish sub-collections for a variety of reasons. The first is the creation of a sub-collection that aids in improving UX as well as UI on your website.
To put it plainly, customers will find it easier and more convenient when purchasing on your website. Besides, they don’t have to spend a lot of time looking for the item they want.
By improving the user experience, you will reach more potential consumers. As a result, your store will quickly enhance revenue and conversion rates.
Best of all, constructing a sub-collection Shopify or sub-category is fairly straightforward.
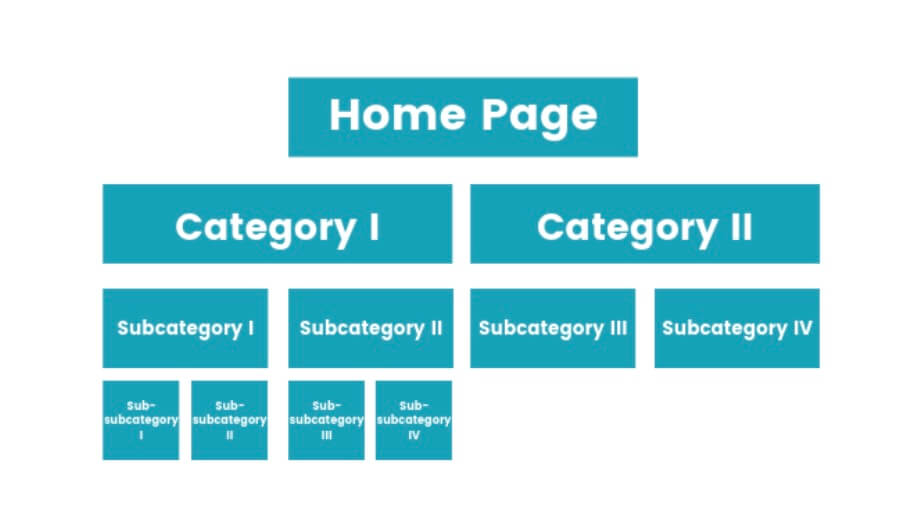
Use link lists to create a collection tree before you get started
You can add a sub-collection to Shopify by utilizing link lists before starting. Hence, it will ensure that you understand the desired structure.
In particular, when constructing a sub-collection, one thing to keep in mind is how to handle parent categories or large and significant categories. Besides, generating subcategories for the collection tree is extremely simple.
Following that, you just need to complete two steps: firstly, you need to build all parent categories, and then, use the navigation linked list to create a hierarchy.
The following tasks must be completed:
- First and foremost, create all of the collections first, then add a navigation link list to the hierarchy.
- After that, you must make a new collection and write down the collection handle (parent collection).
- Then, as with typical Shopify collections, you have to generate all of your sub-collections.
- The following step is to go to Shopify’s navigation page and build a new linked list.
- Then, you need to give it a name that is relevant to the parent collection and a handle that relates to the parent collection. In particular, to avoid dealing with namespaces in the future, you should prepend the handle with a “collection-“.
- Lastly, all you have to do is add all your sub-collections to the list to complete.
Moreover, there are no limitations on adding or creating sub-categories with Shopify. Thus, depending on the quality of the product and the design of your website, you can create anything in any way you want. Plus, you can also choose to manually add sub-categories or to add them based on specific requirements.
Additionally, because there are no rules or constraints in place, you may easily name your sub-collections. And then, establishing their order whenever a new variation of a product becomes available.
As a result, now you have completed your sub-categories and can begin adding them to your Shopify store.
How to create a sub-collection Shopify?
1. Create sub-collections Shopify via the navigation menu
When it comes to effective ways to add a sub-collection in your Shopify store, the first and most basic method does not necessitate any technical knowledge. With only a few clicks, you can create as many sub-collections as you want.
Moreover, you can quickly adjust the structure and appearance of the website using the admin panel. For more details, let’s perform these actions in the “Navigation” section. You should perform the following steps to make the changes:
Step 1: To begin, you must log in to your Shopify store.
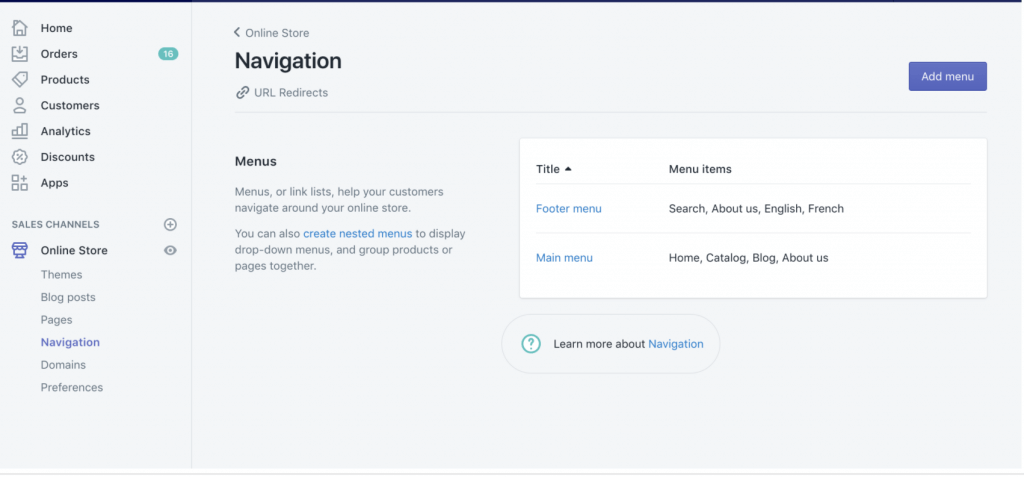
Step 2: As soon as you log in successfully, you must click on the “Navigation” section.

Stage 3: Then, click on “Add menu”.
What’s more, in this phase, there are two possibilities:
You can update the menu choice and skip this step if you’ve already created it. All you have to do in this situation is click on it to go to the menu editing page.
On the other hand, if you don’t already have a primary menu, the first thing you should do is make one. In order to do so, you have to select “Add menu”.
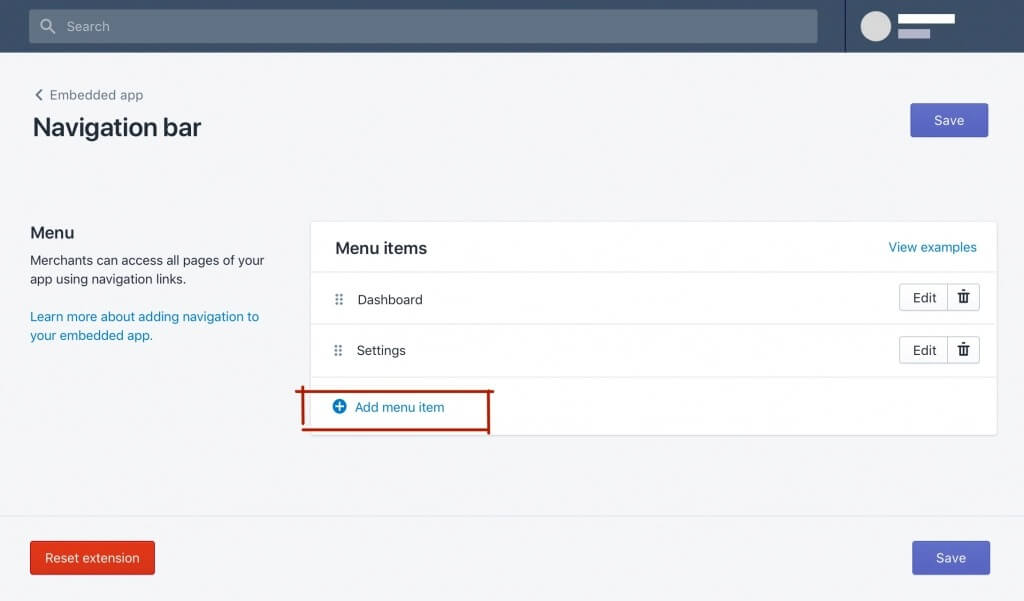
Step 4: After that, you must add menu items
In this stage, menu collections must be added. By selecting the relevant collection and clicking “Add menu item”, you may accomplish this.
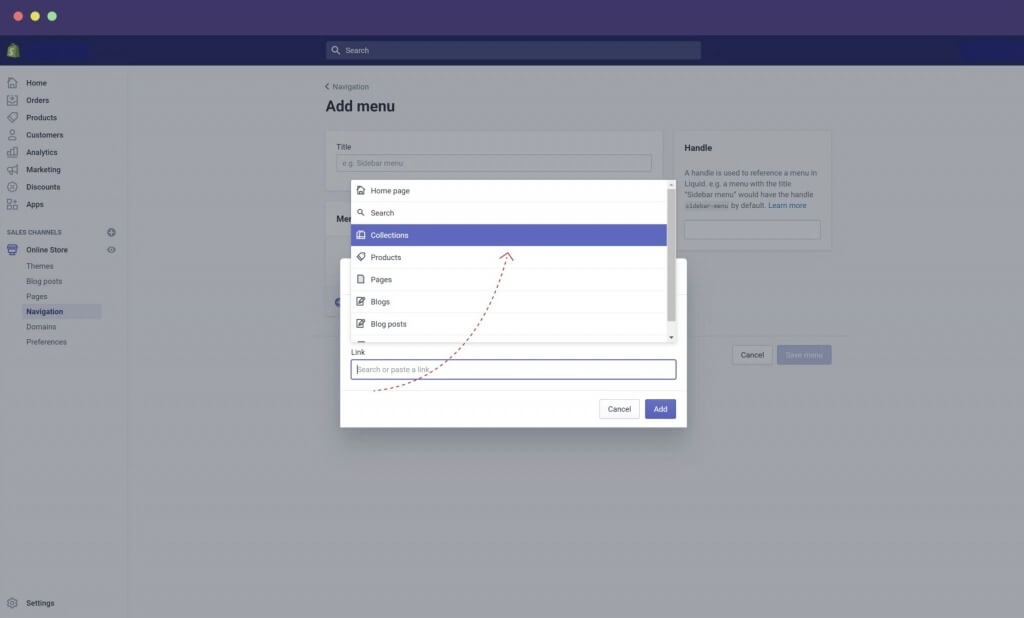
Step 5: To proceed, you must add collections
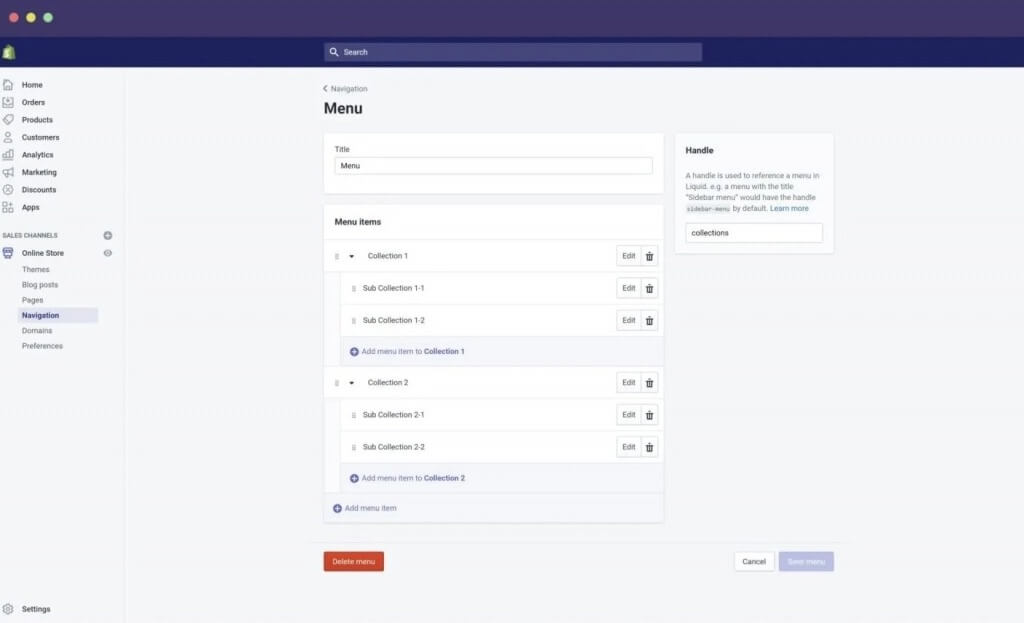
As soon as you generate a parent collection, you should add the sub-collection Shopify you planned to in the collection tree.
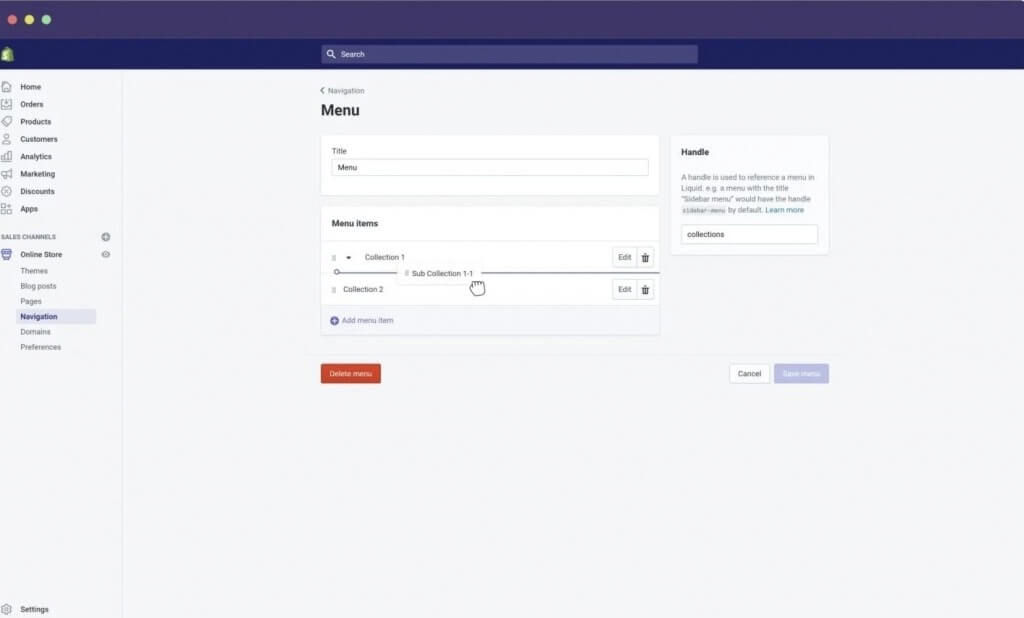
Step 6: Drag the sub-collections
In this step, let’s drag the collections you just added into the parent collections and nest them in the correct order as the collection tree to turn them into sub-collections.
Step 7: Save the menu
The final step is more crucial because you have to save all the operations performed by clicking on the “Save menu” section to complete.
2. Feature collections within a collection
The two methods for creating sub-categories below differ slightly from the first. These strategies are harder to use, but they increase your chances of forming sub-collections.
Option 1: Generate a collection page
Step 1: Create a new page
In the Shopify admin, you have to create a new page. You just need to only write the handle of the menu that was just constructed in the “Content” section. Then, in the “Templates” box on the bottom right, don’t forget to select “page.list-collection”.
Step 2: You must insert the page’s template page list-collection.liquid
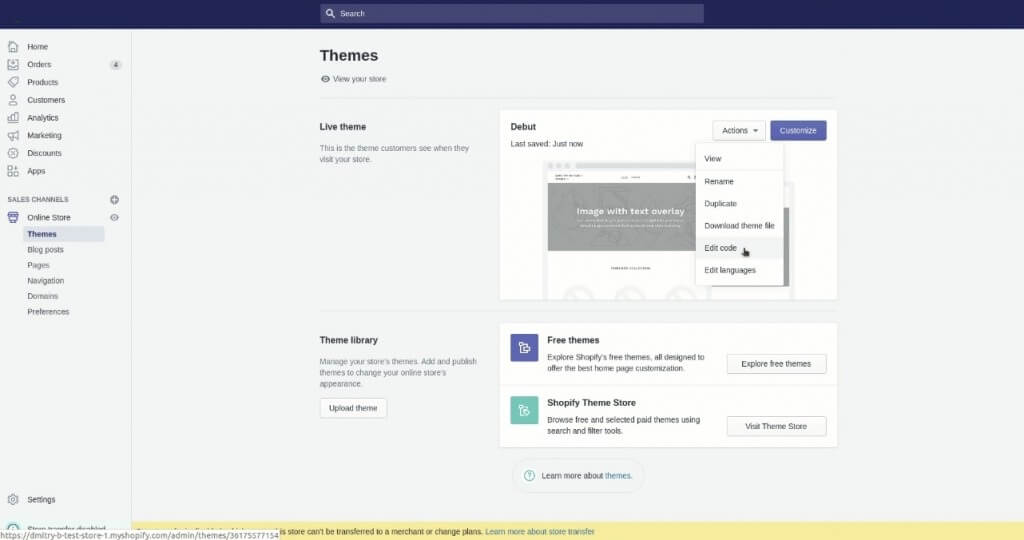
Once you have finished building the page, you have to go to “themes” and then “action” in order to edit the code.
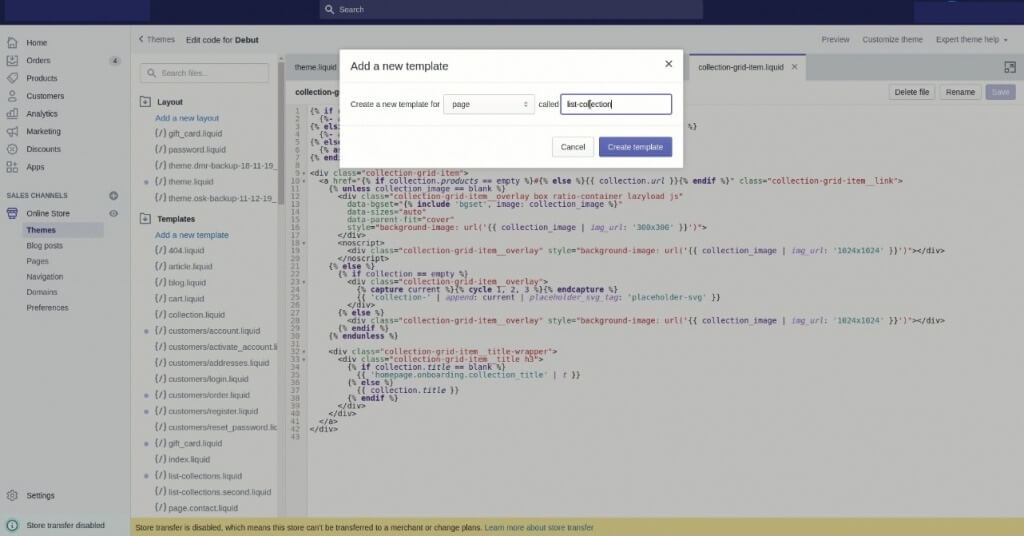
After that, you must locate the templates directory and select collection-grid-item-liquid from the list below:
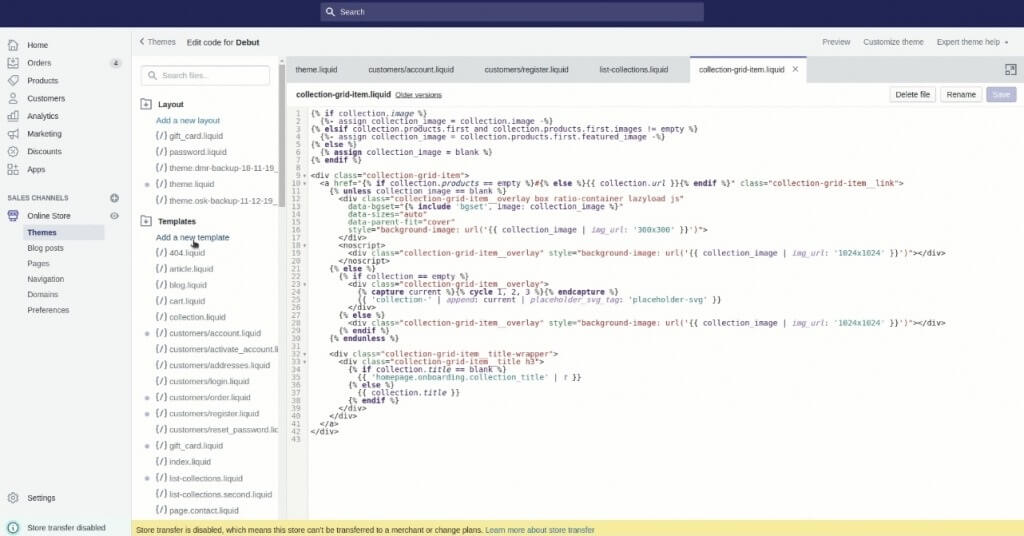
After that, on the left side of your screen, you must click “Add a new template” and generate a new template for “Page” named list-collection.
Step 3: Create a menu
You need to return to “Navigation” and select the add menu in this stage. Then, let’s input the title while keeping an eye on the handle.
Then, first and foremost, all you have to do is make the collection.
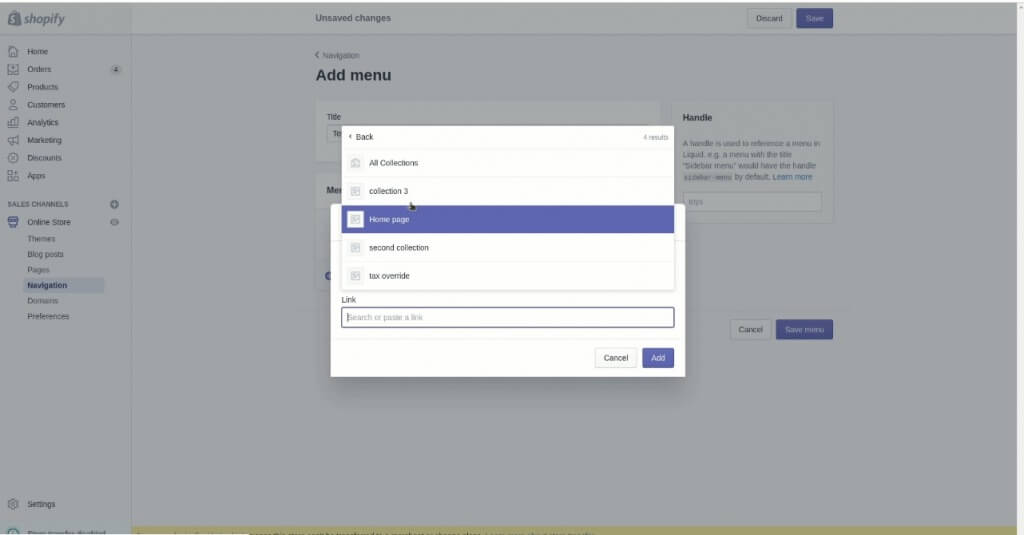
Step 4: Link to the items to feature
In this stage, you need to connect the newly generated sub-collection to the desired parent collection.
Step 5: Save to complete
The final stage is to save your work, and you will have a collection page with links to other collections.
Option 2: Utilize a template called “collection.sub-collections.liquid” with a collection
This method is the most challenging because it necessitates some HTML understanding. Thus, you will need to follow the steps outlined below to accomplish this.
Step 1: Products
You should check to see if all of your products have tags by going to your product page. Keep in mind that a product may have many tags and belong to multiple sub-collections.
Step 2: Theme settings
You have to check the drop-down menu in order to see if your theme is available. Moreover, many themes enable you to activate a drop-down menu that allows you to filter collections by product tag. Specifically, you must go to “Online Store” and then “Themes” to do so.
Additionally, when visiting the collection page, you should see the “Collection Pages” tab in the theme editor. Then, let’s select “Collections”.
Alternatively, in case your theme provides the option to enable tag filtering, there will be a checkbox next to an option that says something like “Enable Tag Filtering By Tag”. After that, you need to check the box and click “Save” to finish. This should allow you to filter your shop and create a sub-collection Shopify.
Step 3: Edit code
If you examine your theme and find that it lacks the above option, you will need to add code to the theme files to enable it. For more details, to do so, you must go to “Actions”, then “Edit Code”.
Step 4: Templates
In this step, you can create a new collection by clicking “Add a new template” by manually adding code for the entire structure in the sub-collections.liquid template.
Step 5: Adding the code
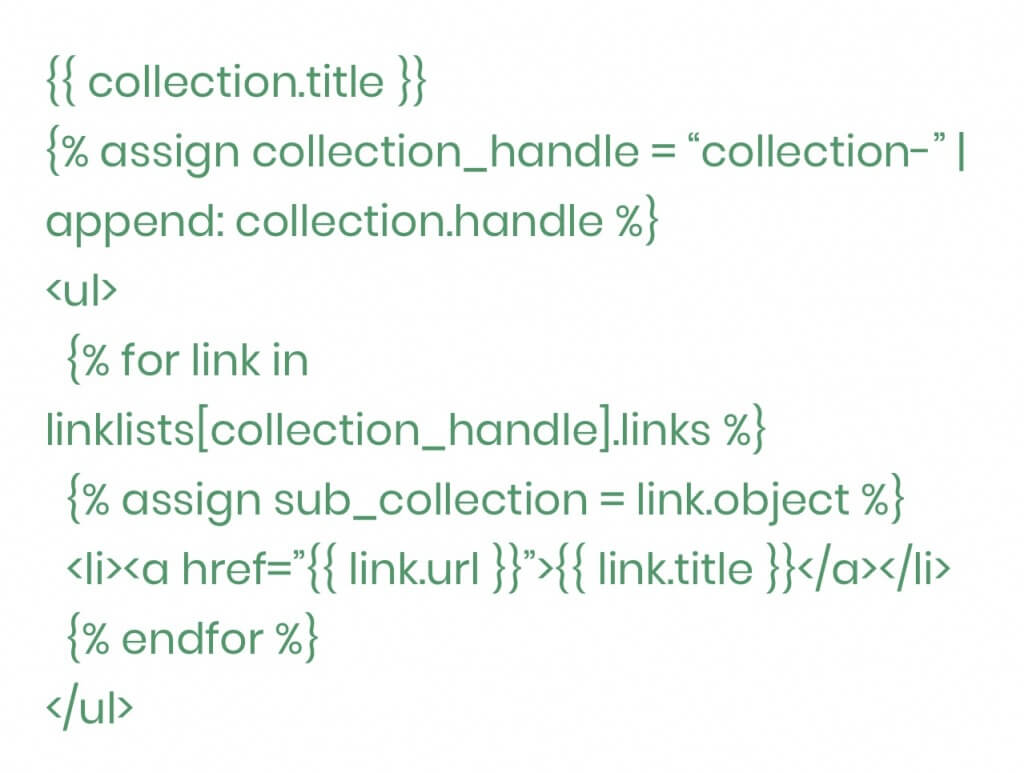
Step 6: Replace “collection.sub-collections” in the default template
In the settings, you have to repeat this procedure. The selected collections will be split into sub-collections if you execute the procedures correctly.
In conclusion
All in all, the above are the most popular and efficient approaches to adding a sub-collection on Shopify. All you need to do is carefully examine the instructions of each approach before making the right decision to choose the most suitable one for you.
However, in case you are having trouble adding sub-collections to your Shopify business, ArrowTheme would be pleased to assist you. Being one of the most reputable Shopify development providers, we offer Shopify packages that can solve any problem for your site. Our experts will take your requirements, consult the best solution, and implement your specific requirements.
For more details, let’s CONTACT US to get free consultancy.
Read More: Shopify theme store: The best-selling themes on TemplateMonter