How to Publish Shopify Store: Step-by-step
If you are planning to run a Shopify ecommerce store yet don’t know anything about how to publish Shopify store, you’ve been to the right destination. Because in this blog, Arrowtheme will deliver you the simplest way to implement it, just only through six easy steps. So, let’s explore it right now!
How To Publish Shopify Store With Ease?
In order to help you publish your Shopify store effectively, we will instruct you in 6 simple steps. Then, let’s refer to them now!
1. Build A Domain And Add It To Your Website
The first step of the process about how to publish Shopify store is generating and adding a domain to your website. First and foremost, the main reason why you need to pick a domain name is that it is an online address and your consumers will use it to find you. Besides, Shopify can also assist you with obtaining a domain for the name, which will be added to your store seamlessly.
What’s more, if you don’t know anything about website hosting, this will save you a lot of time. A name costs $9-$14 USD each year. And because Shopify handles the hosting, you won’t have to deal with any third-party companies to keep your site up and running. In addition to that, you can also buy a domain from a third-party provider like GoDaddy or Bluehost.
Amazingly, these domains are frequently available for as little as $11 a year. After you’ve purchased the domain, you’ll need to manually redirect the DNS records, which we’ll go through in the next part. However, as you can see, purchasing a name from Shopify might save you a lot of time and effort if you don’t know anything about website hosting.
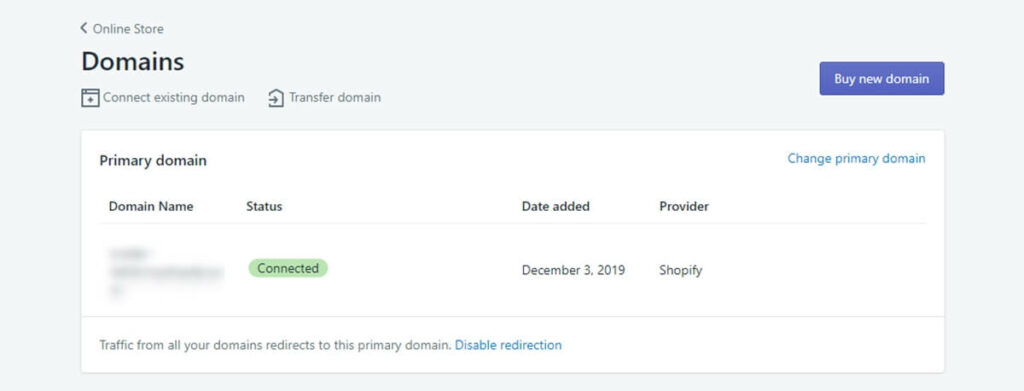
Then, all you need to do is go to the Online Store in the left navigation to add a new domain. Then go to Domains and use the Add an existing domain tool to add your domain name.
After that, you will notice the status Connected once you’ve connected.
2. Update DNS Records
Coming to the second step that will let you know how to publish Shopify store is updating DNS records. First of all, this is the right time you must change your DNS records if you use a third-party domain provider. In fact, DNS stands for Domain Name System, and it is a system that connects a domain name to a specific IP address. Because your hosting and domain providers are different, you’ll need to update this.
Moreover, in case you register your domain name with GoDaddy, for example, the name server that manages your DNS record is GoDaddy’s generic name server, such as NS1.godaddy.com. Then, as soon as you update your DNS records, the domain name will point to the correct IP address, such as store name.shopify.com.
Now, you have to log in to your domain and make the following DNS record changes:
- Replace the @ or main A record with this IP address: 23.227.38.32.
- Without the HTTP, add or update the www CNAME in your Shopify store link: storename.myshopify.com. On the domains settings page, you can see this.
3. Delete Any Storefront Passwords
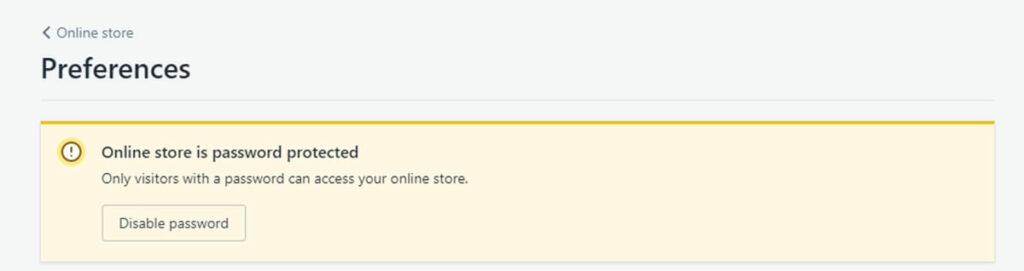
You want to implement how to publish Shopify store, removing any passwords for the storefront is the step you can’t ignore. For more detail, If Shopify has password-protected your store theme, you should keep in mind that password is disabled before launching.
In addition, it’s much simpler to miss this if you’re the shop administrator because you can access your Shopify store as long as you’re logged in. In particular, even if you don’t remember turning this feature on, it’s worth spending a few minutes double-checking.
Furthermore, this option can be found by going to the Online Store page and selecting Preferences. After that, you have to scroll down to the Password protection section and uncheck the box labeled Enable password. Additionally, you can leave a message for your visitors if you need to use the password option. And, you can see it in the image above.
4. Create Primary Domain
If you keep your passwords enabled, you’ll get a message like this, which will allow you to quickly access the password disable option.
When you first install your store, you will be given a default subdomain under the myshopify.com domain. Although you can still use this address to access your site, a custom domain name will give your store a much more professional appearance. There are also some SEO advantages.
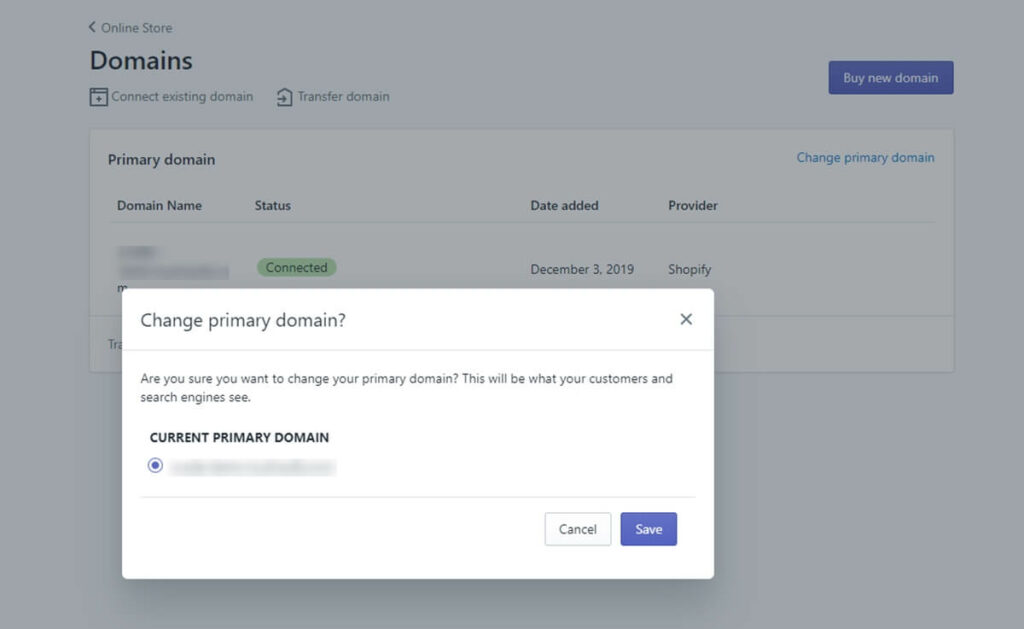
Shopify’s control panel allows you to register a domain for a reasonable price. So, it’s very easy for you to find these settings in the Domains section of the Online Store menu. Then, you are able to choose a primary domain if you have more than two.
What’s more, you can make your primary domain the option that does not contain myshopify.com once you’ve acquired your domain and finished pointing your external domain to Shopify.
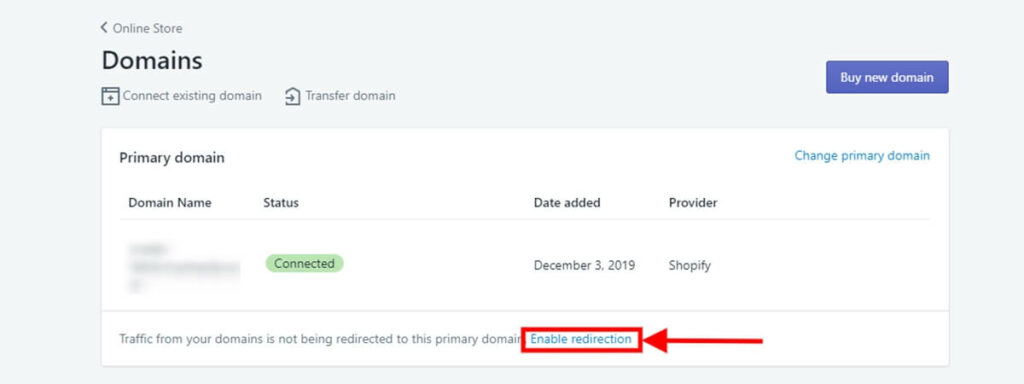
Especially, the most crucial component of this step is ensuring that the Redirect all traffic to the primary domain option is enabled. This choice informs the search engine of the specific web address where your Shopify store is located, avoiding any further confusion.
5. Adding Additional Domains If Necessary
Steps 1 and 2 can be repeated for as many domains as you want. And, the primary domain will automatically redirect all other domain names. With the option to Set as primary next to each domain name, you can modify this configuration at any moment.
For instance, in order to make your store stand out from the rest, you can buy all of your Shopify store’s domains with different endings, such as.biz,.org, and.me. Hence, whenever you want, you can choose one of these as your primary domain.
Please keep in mind that the amount of domain names you add to your store has no bearing on the SEO of your site.
6. Your Shopify Store Can Be Published Successfully
Congratulations if you were able to complete all of the steps about how to publish Shopify store listed above and gain a great outcome. You should now have a completely functional and operational Shopify online store. You can still adjust any component of your store using the admin backend dashboard, so don’t worry if you’re not satisfied with something.
The Essential Checklists To Publish Shopify Store
1. Check Title And Meta Tags Carefully
Shopify will fill in the meta description tags and titles for you based on your product description and names by default. However, given how these tags can affect search engine optimization, you should pay special attention to them.
Simply speaking, a good title tag should accurately explain the content of the page it is associated with, whether it is a product, instructional, or promotional page. Moreover, it’s also crucial to identify ways to naturally incorporate relevant keywords whenever possible.
Spend some time developing the greatest terms possible for your title tag, which is the first thing a searcher reads on the search result page.
In terms of meta tags, on search engine results pages, they are frequently displayed directly after the title tag. Then, this is an excellent opportunity to improve the visibility of your store in search engines and persuade searchers to click.
In particular, it’s a good idea to include some of the following items in your meta tags:
- Contain “action words” that explain what the user can and should do with the page.
- Fill in any alternate names that you didn’t have room for in the title tag.
- Give a full description of what’s on the page, a list of features, or some instances of what’s on the page.
- Build an attractive atmosphere by presenting a unique perspective.
2. Put A Test Order
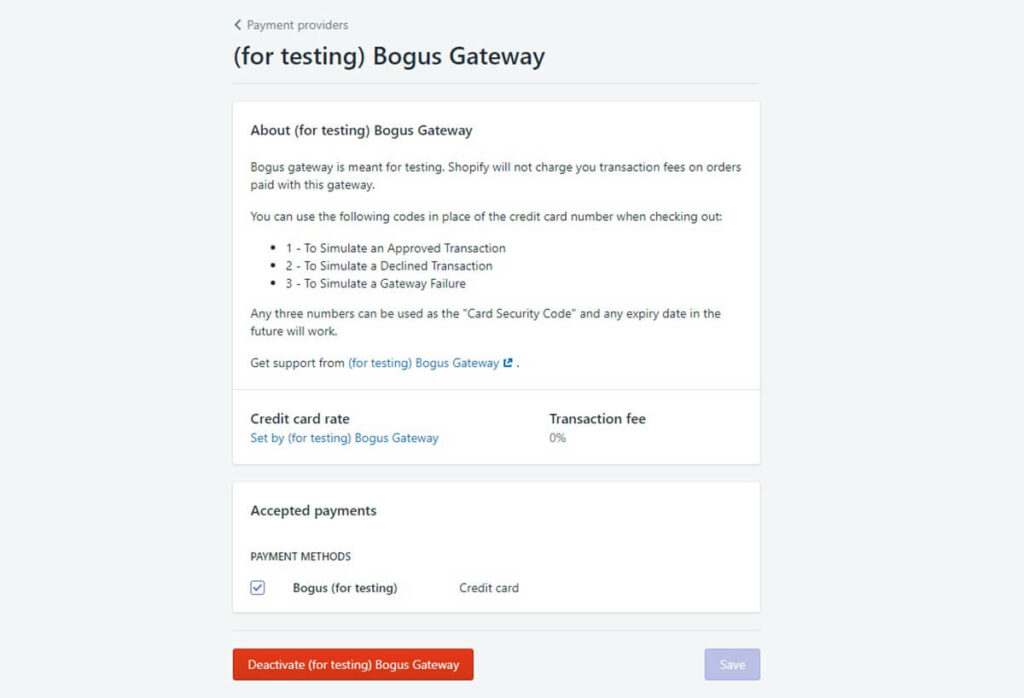
Firstly, you may ensure that your settings for your store’s operating process are right by placing a test order. You may test this by mimicking a transaction with Shopify’s Bogus Gateway.
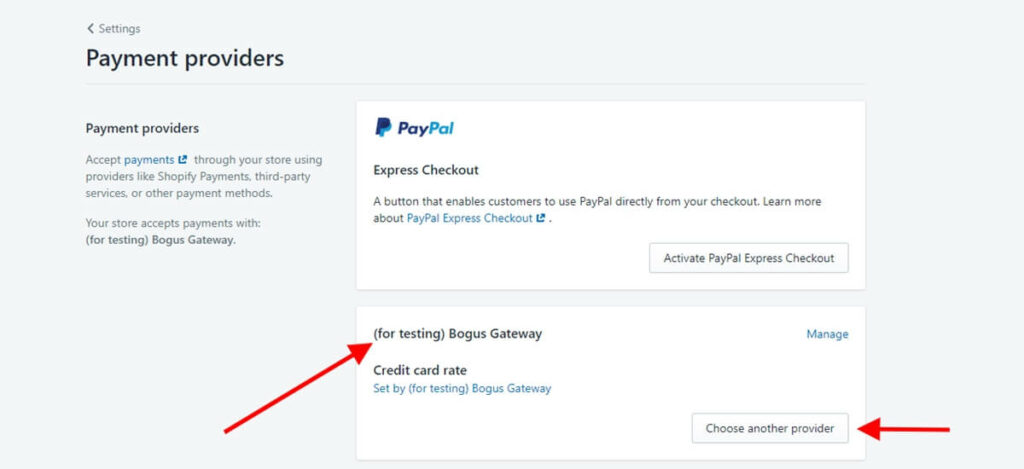
- From the backend dashboard of your store, go to Settings and select Payment providers.
- If you have a credit card gateway active, make sure you disable it before proceeding by going to Edit, selecting Deactivate, and then confirming.
- Select a third-party supplier in the Third-party providers area.
- To find and click on (for testing) Bogus Gateway, scroll down the list or type Bogus into the search box. Then press the Activate button.
- Visit your business and place an order as if you were a real customer.
This is a free service. However, you must keep in mind that you must cancel and return the order exactly as you placed it. The transaction fees will not appear on your statement as a result of this.
3. Check The Notification And Email Address
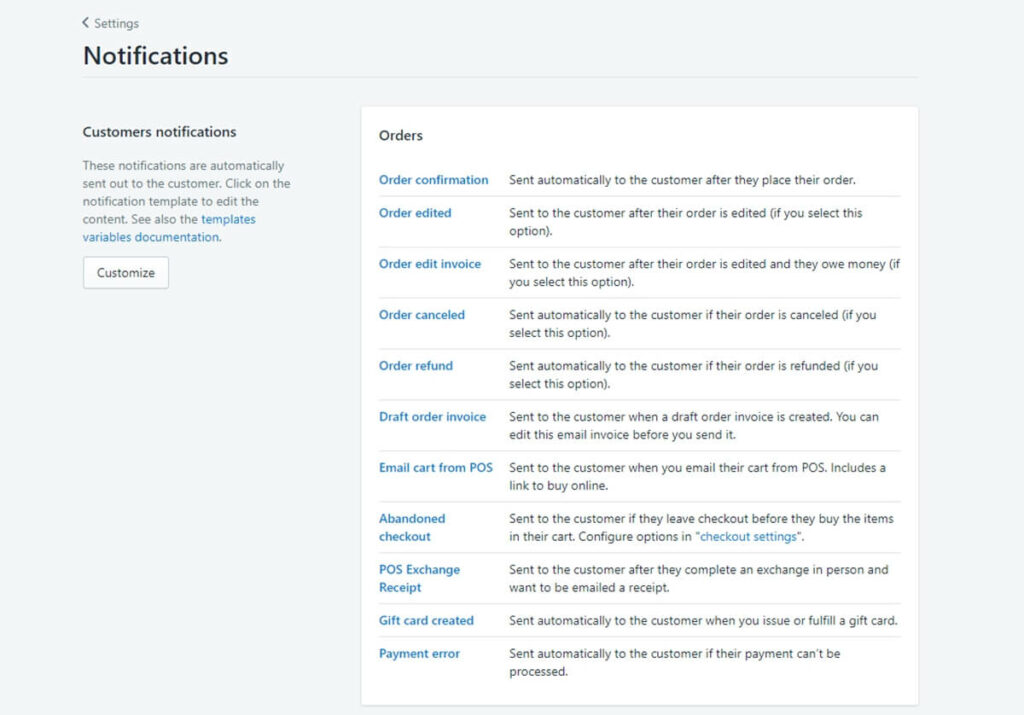
Check that you can receive notifications when clients place orders on your Shopify site before going live.
Go to Options and then Notifications to access the notification settings. The Order Notifications section allows you to double-check the proper email address.
Other notification settings, such as shipping, delivery, customer, and staff order notifications, can also be changed. Then, you should set up one or more more notifications to ensure that no online orders go unnoticed. Perhaps you could include your own email address or the email address of another trusted employee.
4. Prepare Email Registration Forms
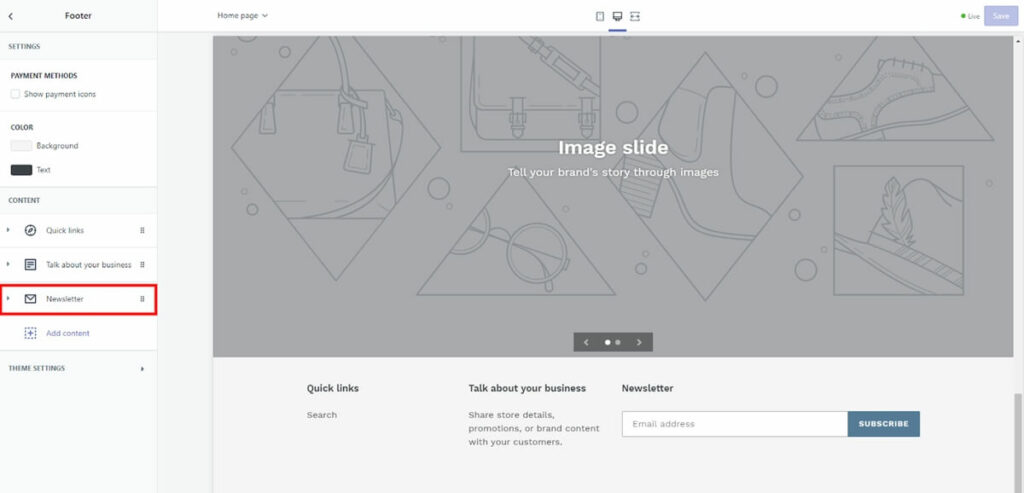
In case your Shopify theme has built-in email registration forms, double-check that you’ve connected them to your email marketing service, whether it’s MailChimp or Shopify’s built-in system.
Besides, it’s easy to overlook these settings because the signup forms appear normal even if they aren’t correctly configured.
In particular, collecting email addresses from visitors or customers will drive a lot of traffic to your site. Furthermore, to change the settings for the email registration forms, go to the main admin dashboard and select Online Store. Then go to Themes and pick Customize Theme from the drop-down menu. The email list options are located in the footer panel.
5. Daily Check
In terms of technique, you don’t have to do this every day. But at the very least, do it before you open your shop. Before you launch your store, there are a few things you should double-check:
- Make sure all of the links on the site are working and there are no 404s. Broken Link Check can be used to scan your entire business.
- Make a last content check to see if there are any missing images or problems in the copy. Make sure your website makes a good first impression.
- Create a list of all active coupons and any promotion launch codes you’ve prepared. If you have an older store, be sure you can still use the old coupons or codes.
In Conclusion
To sum up, the above article is a collection of useful information on how to publish shopify store. Arrowtheme hopes thanks to these, you can implement successfully. In addition to it, we also bring you many smart checklists you should know to develop your store.
Furthermore, Arrowtheme also comes with Shopify Website Packages that allows you to choose from suitable services to build and complete your Shopify ecommerce site.
Contact US – ArrowTheme:
– Email: [email protected]
– Facebook: Facebook.com/ArrowThemeTeam
– Website: ArrowTheme.com