Shopify cart attributes: How to generate it and solve the issue that is unsavable
Continuous the series of ArrowTheme with Shopify tutorials, today, we will deliver you all useful information about Shopify cart attributes, specifically how to generate it and the simple way to solve its issue is unsavable.
Have you ever met this problem when working with Shopify? If you have been and don’t know how to solve it effectively, let’s explore this blog now!
What are Shopify cart attributes?
First and foremost, Shopify maintains a lot of information about each order in its database, such as the exact time the order is placed, the subtotal, and the delivery address.
Then, Shopify cart attributes allow you to customize an order by adding additional custom data. As you may not know, even before an order is placed, cart characteristics can still be valuable even before an order is placed.
Because they are stored on Shopify’s server for the duration of the customer’s session or until checkout, they are a type of server-side cookie. And, this means that within your liquid template logic, you can adapt a customer’s experience based on their basket data.
What’s more, making an AJAX request via Cart.JS is your best way if you want to set a cart attribute along the customer’s journey to influence their purchase experience.
It’s easy to use this generator if you only require the ability to take additional data right before checkout.
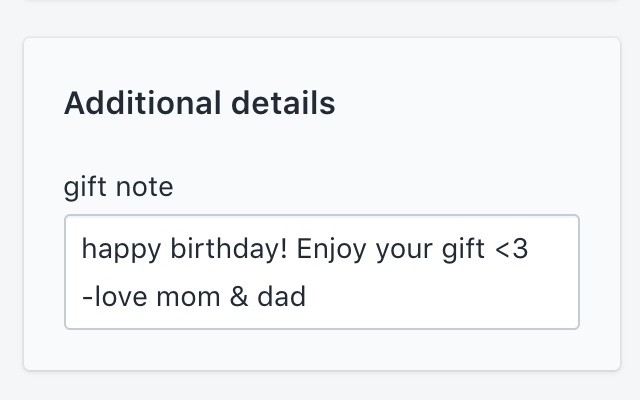
After that, you should keep in mind a WARNING. This depends on where you look, Shopify refers to the cart attribute by a few different names. If you have a gift-note attribute, you may use the following code in your liquid template to access it:
cart.attributes.gift-note.
However, in the API, they’re known as note attributes. Then, we will illustrate this through the following lines of code:
note_attributes:[
{
"name":"gift-note",
"value":"Happy Birthday - from Mom and Dad :)"
}
]
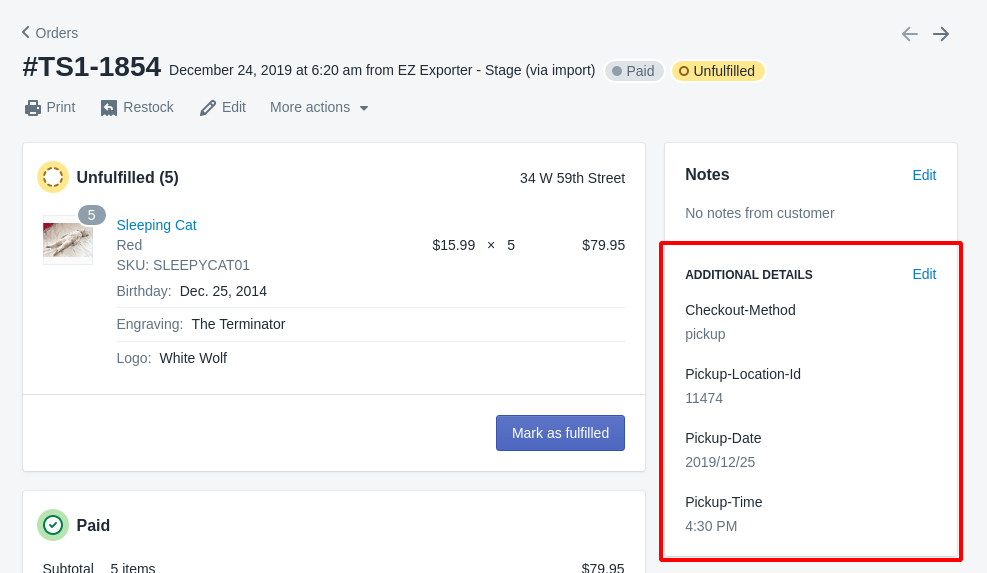
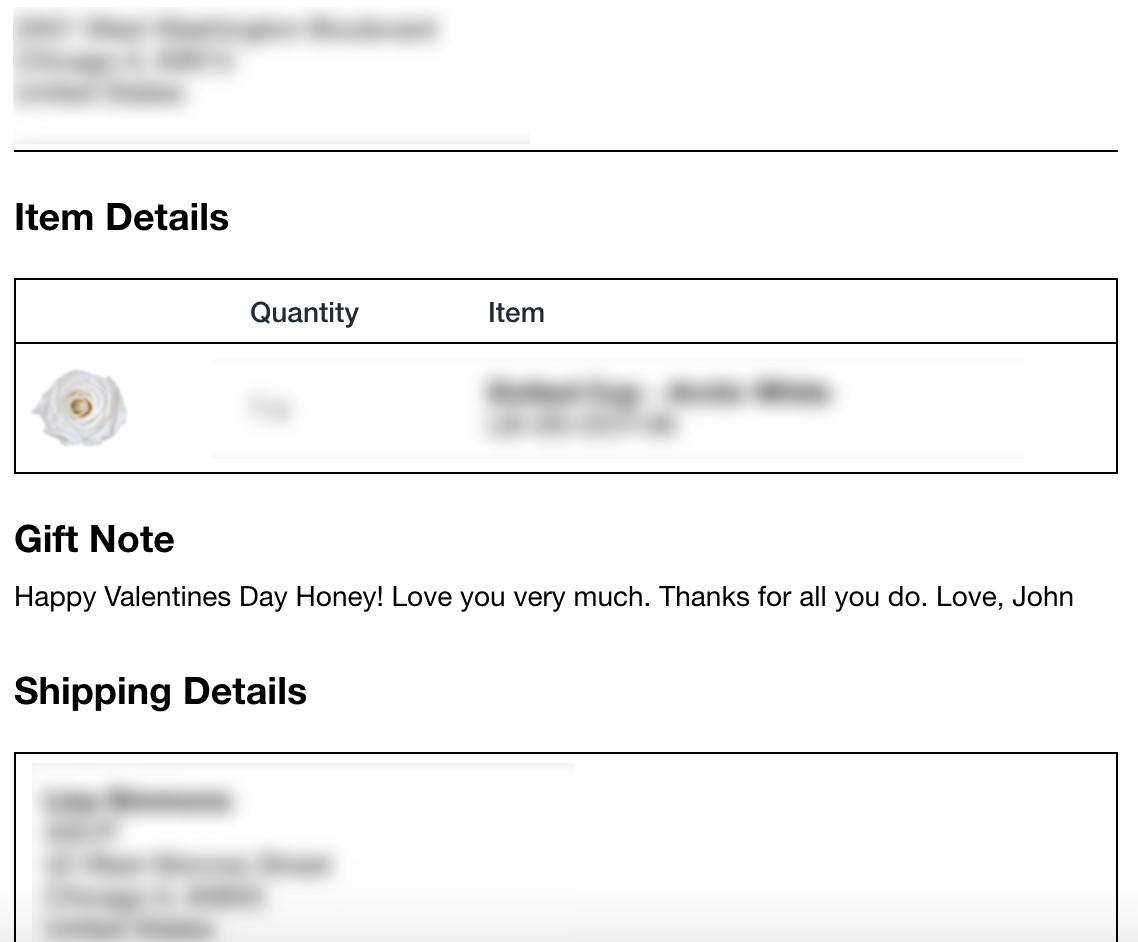
Finally, they are referred to as Additional Details in the admin dashboard. From the order admin page, you can easily access and change this information.
On an order page, the further details section is located beneath the tags. It will not appear at all if there are no more details.
Best way to create Shopify cart attributes
Amazingly, you can use Shopify cart properties in a variety of ways after an order has them.
Besides, adding additional data to your packing slip templates and email notifications is an excellent place to start.
If you want to add cart attributes to Shopify, let’s follow our instructions below:
{{ attributes[‘gift-note’] }} or {{ attributes.gift-note }}.
In fact, it’s really straightforward to allow customers to contribute data before checkout, but there was no convenient method to add cart attributes once the order was placed.
Best of all, this is possible thanks to our new Chrome browser plugin.
How to solve the issue of Shopify cart attributes that are unsavable?
First and foremost, you have to add a text box if you wish to collect more information for a Purchase Order Number. Besides, take note that the Shopify UI Elements generator can also be used to create alternative elements, such as a radio button or a text box.
#1. To begin, you should open your theme, and then select Edit Code.
After that, navigate to the cart-template.liquid file. Put the following code anywhere you want the data to be collected.
For a Purchase Order, we do so as follows:
<p class="cart-attribute__field"> <label for= “purchase-order">Purchase Order</label> <input required class="required" id="purchase-order" type="text" name="attributes[Purchase Order]" value="{{ cart.attributes["Purchase Order"] }}"> </p>
#2. Coming to the next step. For more detail, at the end of your custom.js.liquid file, add the following code to save the Shopify cart attributes.
Now, you should refer to the code below to know more in detail:
$(document).ready(function () {
$('#input-id').on('change keyup keydown', function () {
$.post('/cart.js', {
attributes: {
'Cart Attribute Name': $(this).val()
}
}).done(function () {
});
});
});
#3. As soon as you follow the instructions below, you will complete the process of solving this issue.
In conclusion
All in all, do you know how to generate Shopify cart attributes and solve its issues through our blog? ArrowTheme hopes you say YES.
However, if you encounter any problem, let us know and we will help you solve it immediately. To have a leg up in the global market, aside from Shopify cart attributes, you should visit other Shopify tutorials in our blog.
More than that, ArrowTheme also provides Shopify packages with the assistance of an experienced team of Shopify professionals who can address any of your issues.
In particular, we are offering a tempting discount of up to 30% off for all of our Shopify services at this time. If you require any assistance with Back-end/Front-end Updates, Support and Maintenance services and so much more, please CONTACT US as soon as possible to take advantage of this great offer.
Read More: Continue shopping button: What does it mean and how to add it to your cart on Shopify