How to manage product categories, tags and attributes in Woocommerce
In order to continue the series of WordPress tutorials, Arrowtheme (powered by AHT Tech JSC) will deliver you the topic of woocommerce product attributes. In this article, we give you a comprehensive way to add and manage product categories, tags and attributes in Woocommerce. Let’s explore with us right now!
Woocommerce product attributes
In fact, Woocommerce product attributes have two uses that are important to WooCommerce:
- First of all, you are able to use WooCommerce widgets. Following that, you can choose a specific attribute to filter products by using “Filter Products by Attribute”. Moreover, customers can filter products in your store depending on the attribute if you add this widget to your sidebar.
- Besides, the second method is via variable products. In order to make a variable product, you must first define an attribute for the product. Best of all, these characteristics can subsequently be utilized to distinguish between various versions.
For instance, in case you are selling apparel, two logical attributes are “color” and “size” will allow customers to search across categories for a color that matches their style and kind, as well as clothing in their size.
>>> Read more: How to create and use custom post type in WordPress
How to add and edit woocommerce product attributes?
#1. Set global attributes
In order to add, update, or remove attributes, you need to go to Products >> Attributes. You may add woocommerce product attributes as well as their terms here quickly in an easy way.
- To begin, you must add a Name.
- (Optional) you can include a Slug. To put it plainly, this is the URL-friendly version of the name.
- Then, if requested, you need to enable Archives. In fact, if this option is enabled, you will be able to see a page with all goods that have this property. What’s more, if you have this option enabled and “black” is one of the color possibilities, you may add http://yourstore.com/pa_color/black/ to your menu to only show black clothes – pa stands for “product attribute”.
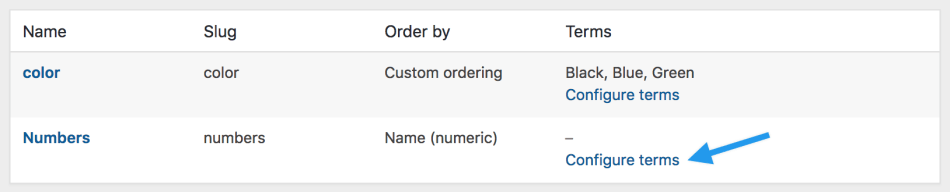
- After that, you can choose Default sort order. Then, you need to select between “Name”, “Name (numeric)“, “Term ID”, or “Custom ordering” and configure the terms by dragging and dropping terms in the list. In case the values are numbers, “Name (numeric)” is far more important. Besides, if you choose “Name”, the results are sorted alphabetically, with 1 and 10 coming before 2. Moreover, when you choose “Name (numeric)”, the results are sorted according to the numerical value.

#2. Choose Add Attribute
The woocommerce product attributes are added to the right-hand table, but it has no values.
Then, choose the “Configure terms” text in order to add attribute values.
Next, you need to create a new “Attribute name”, with “Attribute name” taking the name you supplied the attribute in the previous step by default.
Moreover, you are free to enter as many values as you want. Reordering your values is possible if you choose “Custom ordering” for the attribute.
#3. Add global woocommerce product attributes to product
You are able to add the attributes you have generated to your products.
- To begin, you must go to Products >> Add Product (or edit an existing one).
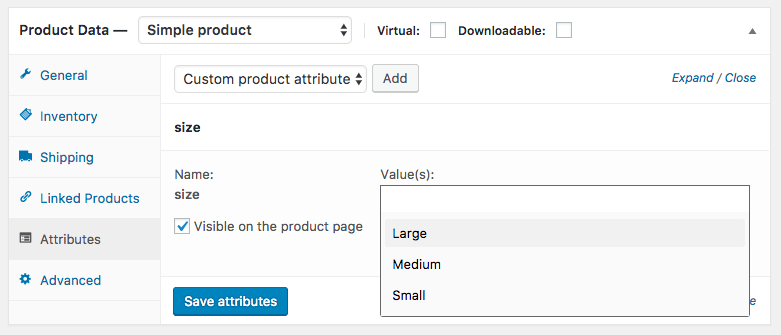
- In the Product Data, you must go to the Attributes tab. In the dropdown menu, you can select any of the attributes you have established.
- Then, don’t forget to choose the Add option.
You can select phrases that you added earlier if you selected a global attribute that you previously established.
Add custom attributes
You have to add an attribute that you only wish to utilize for one product. In fact, this is a good idea if you have a product with a lot of different variations.
- Firstly, in order to add a product, you must go to Product >> Add Product.
- Then, let’s select the Attributes tab to continue.
- Follow the steps above after selecting the Custom product attribute from the selection.
>>> Additional post: How to display posts from a specific category in WordPress
Woocommerce Product categories
Woocommerce product categories are the most common method of grouping products with comparable characteristics. In particular, if you desire, you can also create subcategories. For example, if you sell clothing, you might offer categories such as “t-shirts”, “hoodies” and “pants”.
Way to add/ edit Woocommerce product categories
First and foremost, the Products> > Categories page is where you manage your categories. In fact, you are able to add, delete, and modify product categories in the same way that you do on your WordPress articles.
- To begin, you must add a Name.
- Then, adding a Slug is optimal, which is the URL-friendly form of the name.
- In case this is a subcategory, you need to select a Parent.
- After that, you need to enter a Description (optional) that will be displayed in some themes.
- To proceed, you must select the type of display. Besides, make a decision on what appears on the category’s landing page. What’s more, the default for “Standard” is your theme’s default. Plus, only the subcategories will be displayed if you select “Subcategories”. In terms of “Products”, it is a category that solely shows products. Below that, “Both” will show subcategories and products.
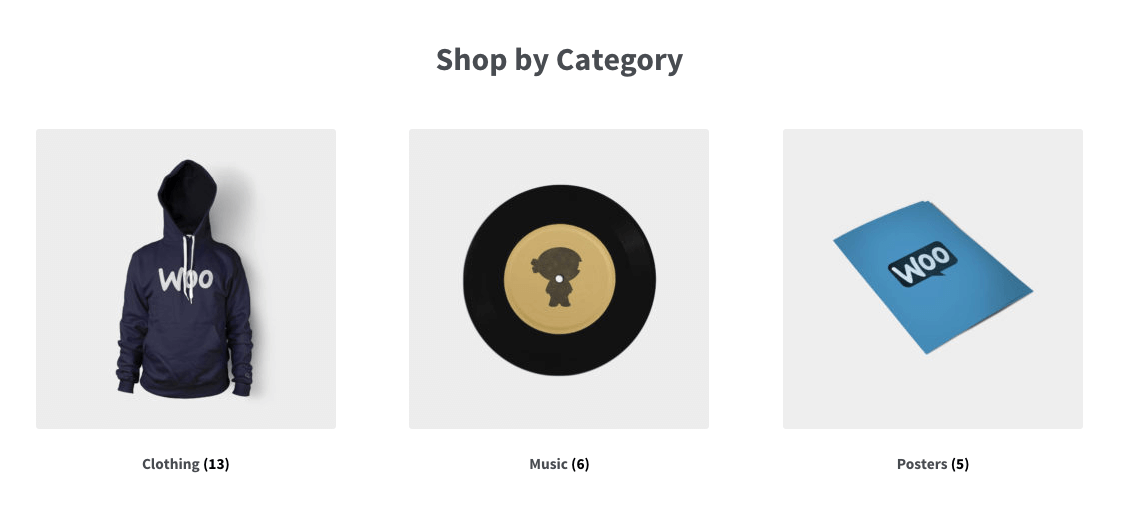
- Then, you can upload/Add Image (optional): Some themes contain pages with images of product categories. Thus, this is an ideal idea.
Additionally, on the homepage template of Storefront, you can see that product category photos are displayed by default.
Reorder categories
What’s more, you can utilize dragging and dropping in order to reorder categories. For more details, this order is used by default on the front end when the categories are shown. Plus, this applies to widgets as well as the product page’s category/ subcategory views. Because every product must be assigned to a category, hence, if the product is not assigned to any other category, the default category will be used. As a result, this category will be titled “Uncategorized” by default and will not be able to be deleted. On the other hand, you are able to rename the category. Best of all, you can also use the row actions beneath the category name to change the default category. After that, the “Uncategorized” category can be eliminated because it is no longer the default.
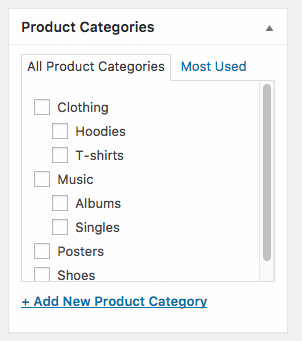
Furthermore, you can choose this new product category from the list when adding a new product via Products >> Add Product. Not only that, you can also go straight to Products >> Add Product and select the “Add New Product Category” option.
Alternatively, bear in mind that product_cat is the taxonomy. Best of all, the filtering feature becomes AJAX-enabled for friendlier use once there are 100 categories.
Product tags
In addition to product categories, product tags are another technique to link products together. Tags, unlike categories, do not have a hierarchy, hence there are no “subtags”. For instance, in case you sell garments and have a lot of flower prints, you might create a “flower” tag. Then add that category to the menu or sidebar so that cat fans can quickly access all flower-themed t-shirts, sweatshirts, and jeans.
How to add and edit Product tags?
In fact, tags work in the same way as product categories and can be added similarly. Plus, product_tag is the taxonomy.
In conclusion
To sum up, this article lets you know how to manage woocommerce product attributes, product categories and tags. Overall, Arrowtheme hopes you can gain as much useful information through this post.
Moreover, if you are new to Woocommerce and need assistance from a reputable partner, Arrowtheme with our Woocommerce website packages are the best solution for you. Every Woocommerce service from Development, Updates to Maintenance & Support services, no matter what your needs are, we will all deliver you the most effective methods for you. Best of all, we are having a sale program upto 30% for all of our Woocommerce services. Hence, don’t hesitate to achieve this appealing deal by filling out our CONTACT FORM right now!