How to set up shipping zones in Woocommerce (The step by step guide)
When it comes to the process of adding shipping zones in Woocommerce, you must first create shipping zones. Then, you have to add methods to those zones, and finally, rates to your methods. In this article, Arrowtheme will deliver you the comprehensive instruction to set up Woocommerce shipping zones with some simple steps. Hence, let’s explore with us right now!
>>> Read more: How to add affiliate program in Woocommerce to increase your brand value and grow revenue
What are Shipping zones?
Shipping zones refer to geographical areas to which you are able to send your packages. Depending on your requirements, you can be as detailed as you like, down to regions and zip codes, or you can keep it more general.
Besides, customers can only view the methods that are available for their address and zone. In particular, keep in mind that only one zone corresponds to each customer.
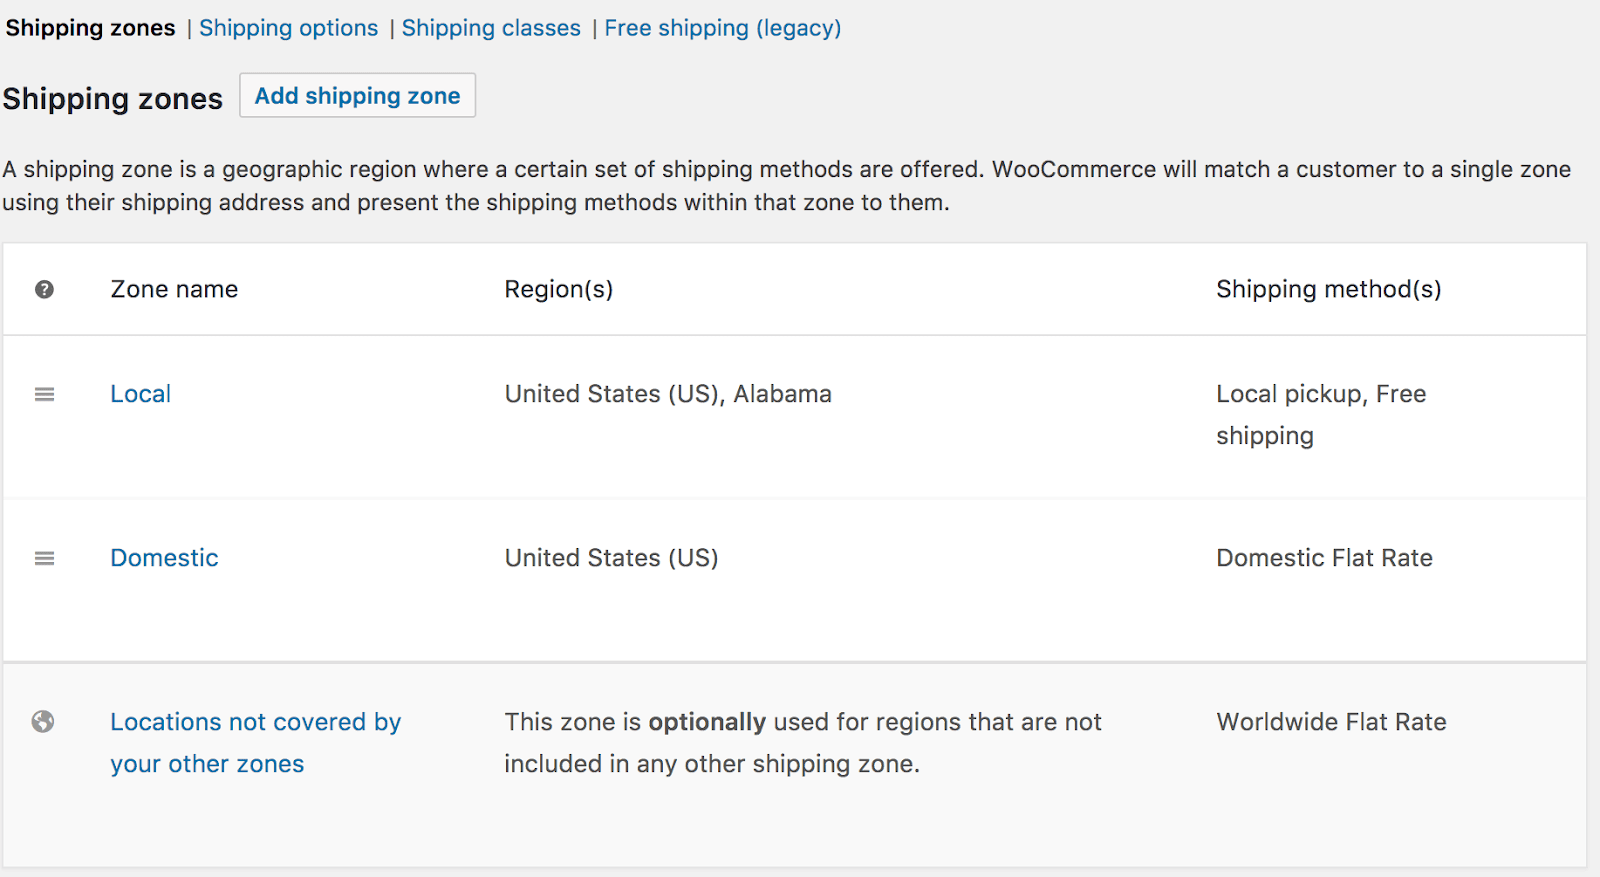
Let’s take a look at the following example to see which Woocommerce shipping zones you can create:
| Woocommerce Zone name | Region | Shipping methods |
| Local | California ZIP 90210 | Local pickup |
| Domestic | All US states | Two Flat rates called “standard” and “priority” |
| Europe | Countries in Europe | Flat rate shipping |
Best of all, you can create as many shipping zones as you want, each with its own set of shipping options.
How to add and manage Woocommerce shipping zones?
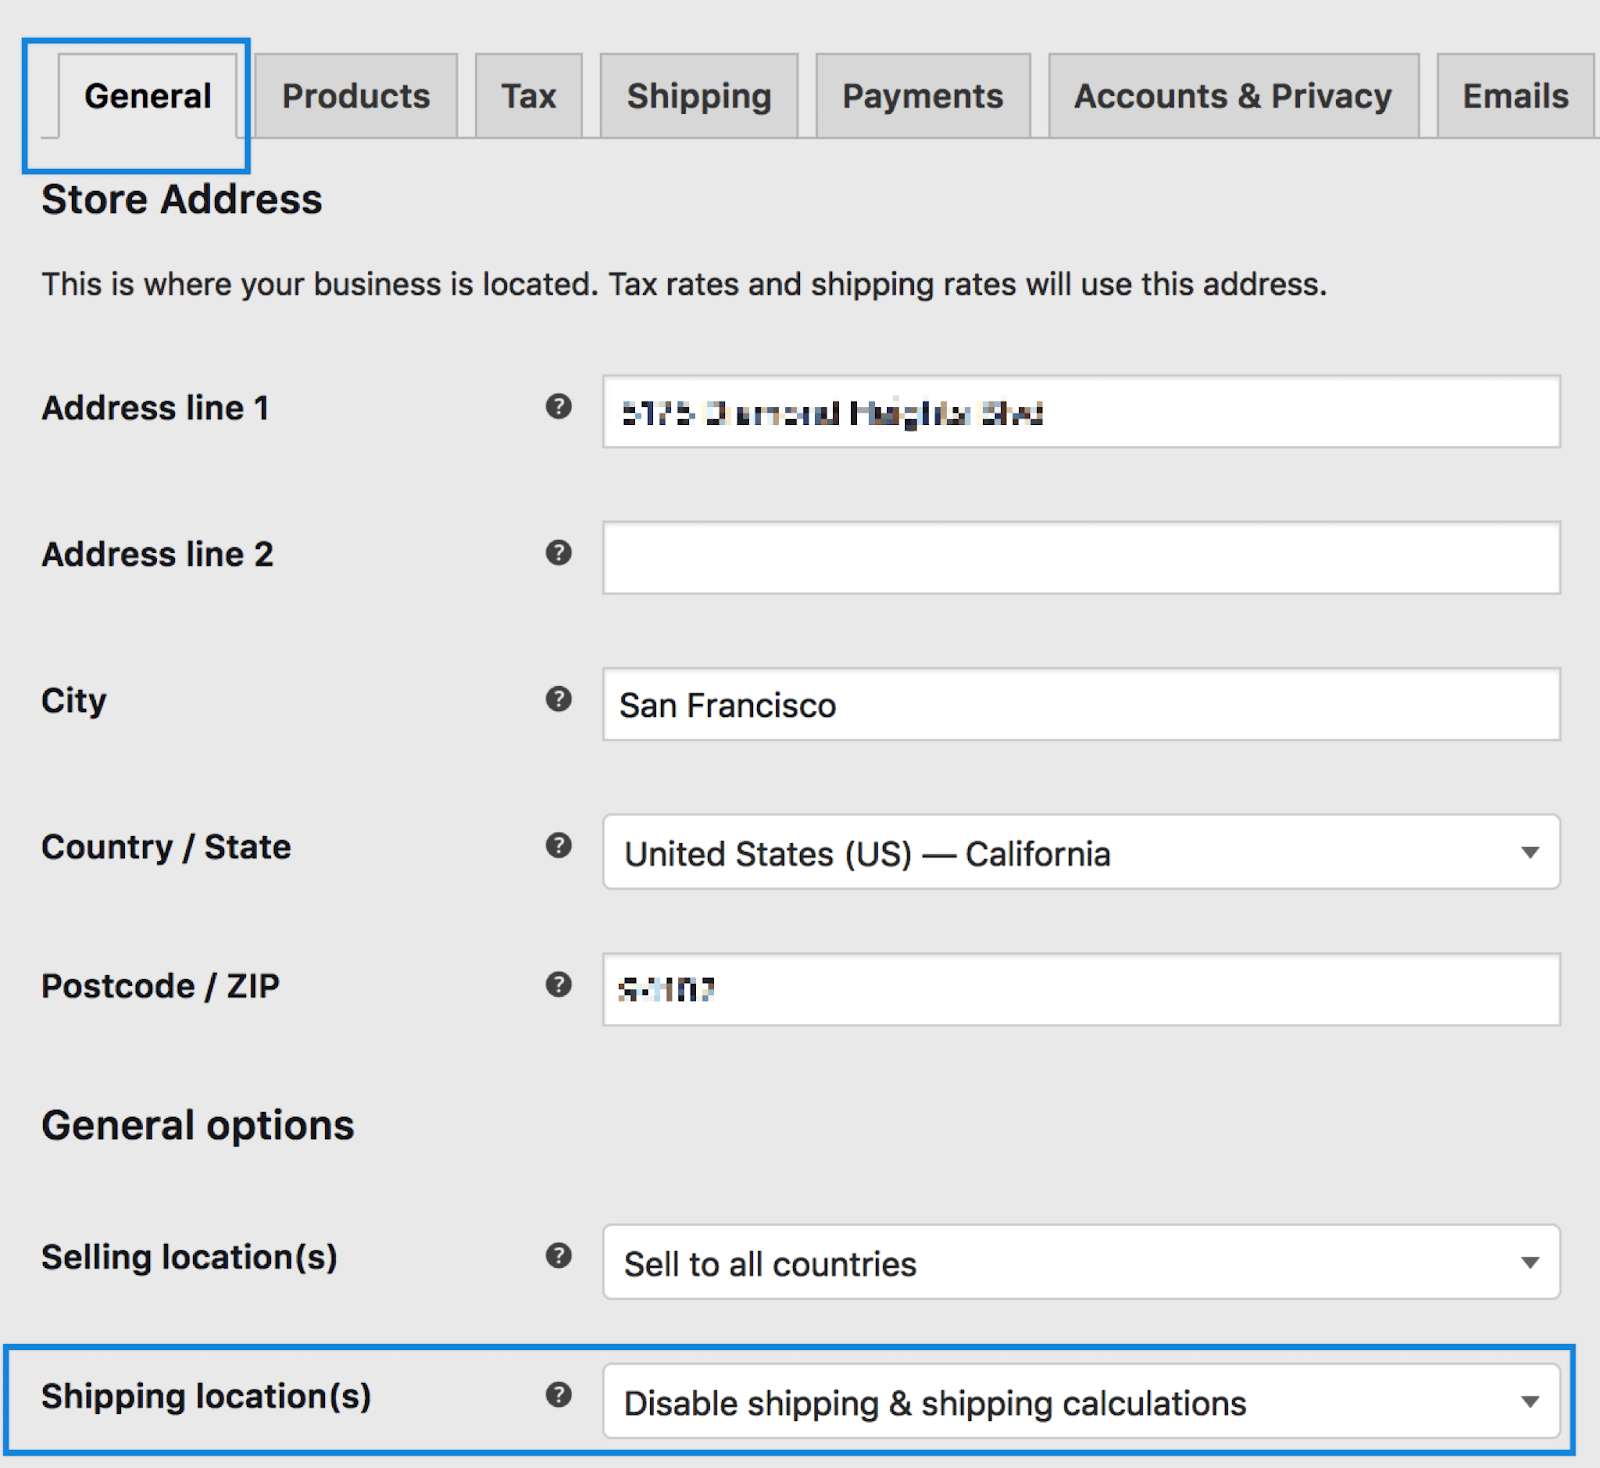
You need to go to WooCommerce >> Settings >> Shipping if you want to set up Woocommerce shipping zones. However, in case you don’t see the Shipping option, all you have to do is return to WooCommerce >> General and check the settings under Shipping Location(s). In particular, you are able to enable shipping options there.
Moreover, when you first go to WooCommerce >> Settings >> Shipping, you will see a request to create a new zone, as well as a default zone.
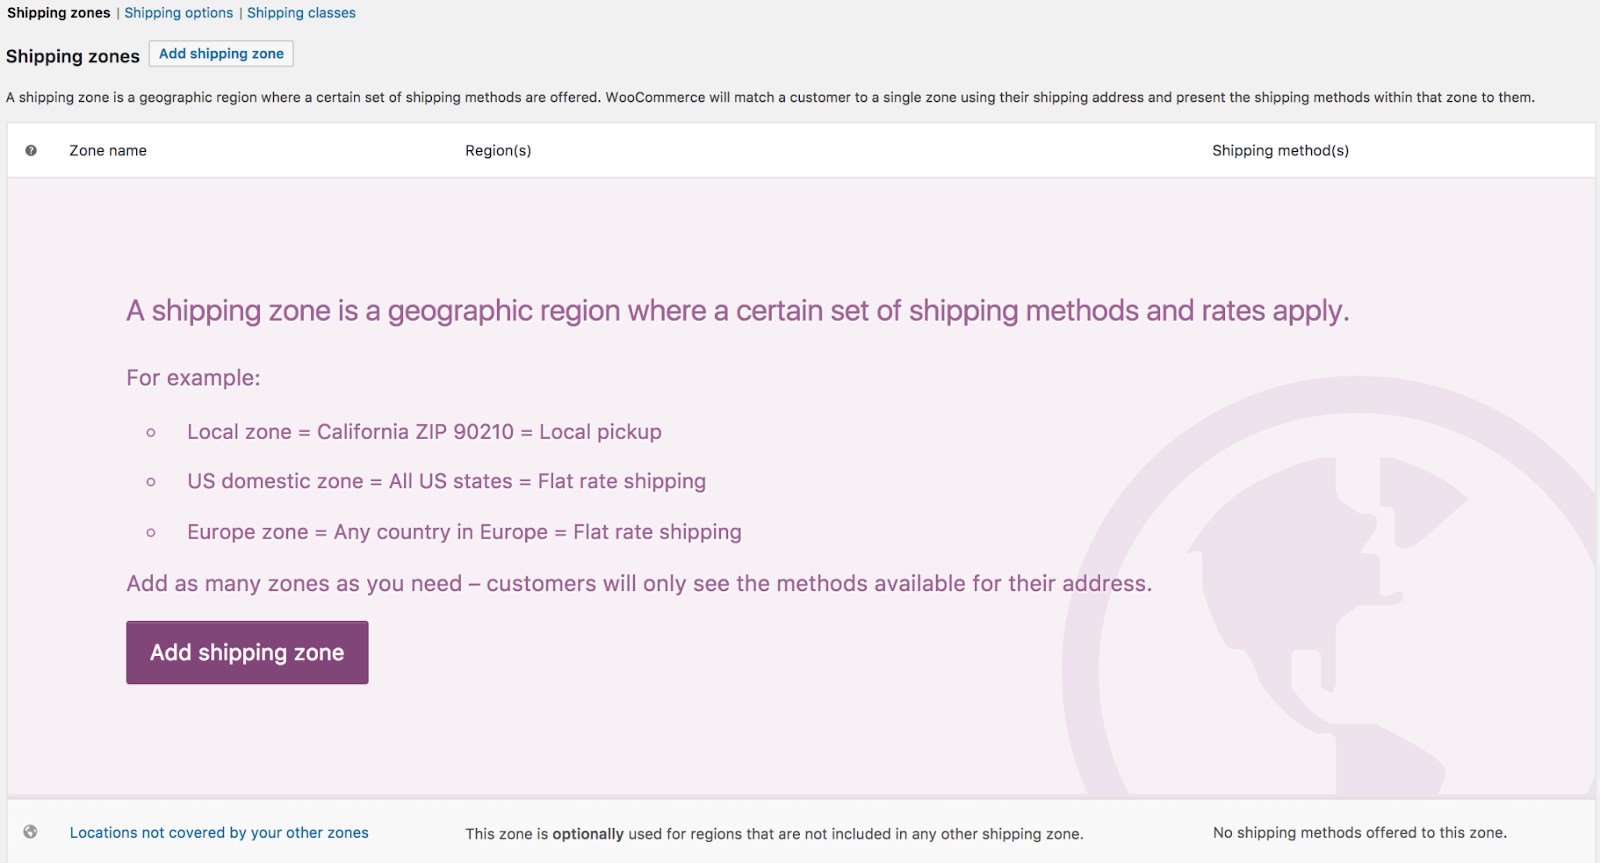
What’s more, customers who do not match any of the custom zones you add are routed to locations not covered by your other zones. Adding methods to this zone is entirely up to you and your requirements.
Not only that, you can also exclude regions from shipping by creating a zone for that region and assigning no shipping methods to it, because zones match from top to bottom.
How to add a new shipping zone?
- To begin, you must go to WooCommerce >> Settings >> Shipping >> Shipping Zones in order to configure your shipping zones.
- Then, at the top, you need to click Add shipping zone.
- After that, you have to choose the Zone Regions that are applicable and give it a descriptive name. Specifically, a) Countries, b) States, and c) Continents are all examples of regions.
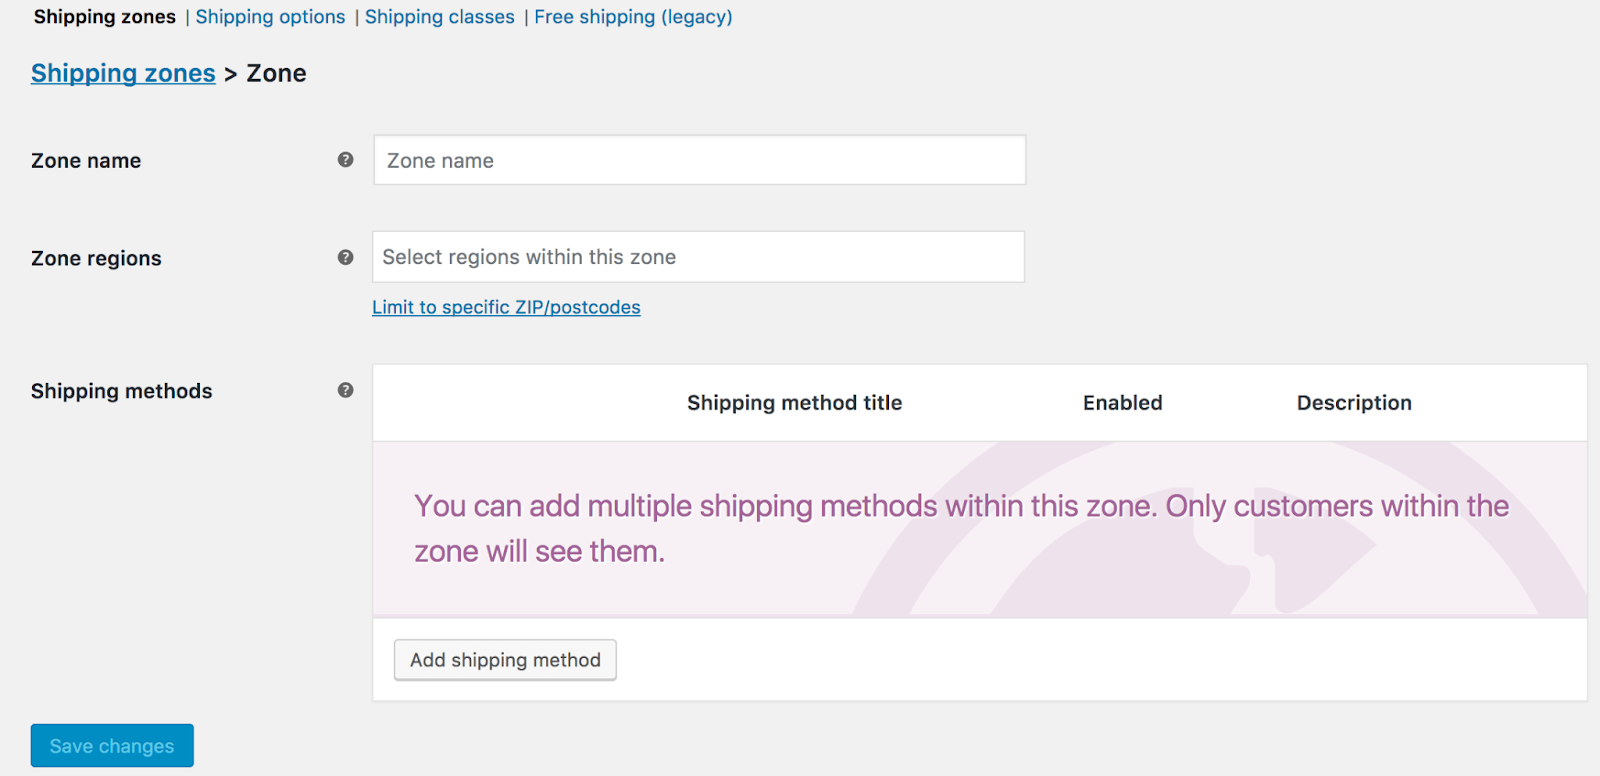
- To further filter which consumers match this zone, you must select Limit to certain zip/postcodes (if available). For instance, you have to set a local zone with a specified set of postcodes (one per line), a range of postcodes (e.g. 90210…99000), or use wildcards (e.g. CB23*).
- After that, you can choose from the available shipping methods for this zone.
- Finally, don’t forget to click Save changes to finish.
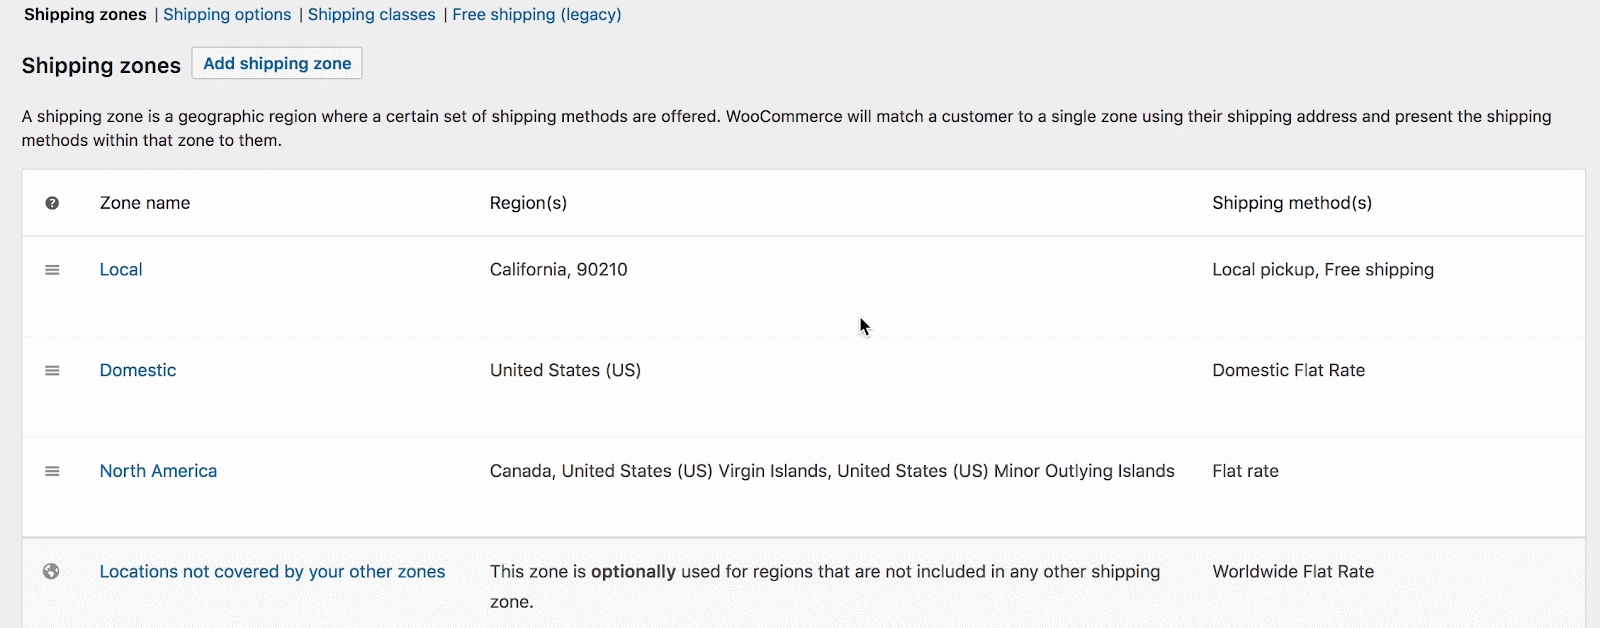
In the following image, you will know how to set up Woocommerce shipping zones through the example of three zones: Local, Domestic, and North America.

How to sort Woocommerce shipping zones?
From top to bottom, Woocommerce shipping zones match customer addresses, especially, the first to match the customer address is always used. Besides, Locations not covered by your existing zones are utilized if there are no custom zones to match.
In order to sort shipping zones in Woocommerce, let’s follow these steps below:
- First and foremost, you must go to WooCommerce >> Settings >> Shipping >> Shipping Zones to configure your shipping zones.
- Then, you need to hover over the far left handles and click. Plus, on the screen, a four-point icon emerges.
- After that, let’s drag and drop to proceed.
Way to edit Woocommerce shipping zones
- To begin, you must navigate to WooCommerce >> Settings >> Shipping >> Shipping Zones if you want to configure your shipping zones.
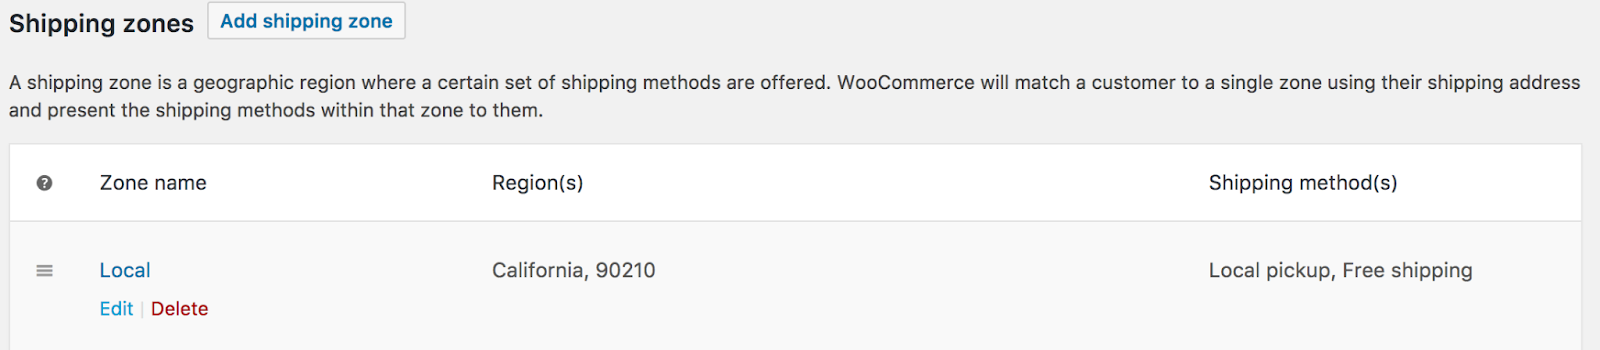
- Then, when you hover your mouse over Zone Name, the options named to Edit and Delete will display.
- To continue, you have to choose Edit to bring up a screen with options for changing the name, territories, and shipping methods.
- Finally, remember to Save changes to complete.
Delete a Woocommerce shipping zone
- To get started, let’s move to WooCommerce >> Settings >> Shipping >> Shipping Zones to configure your shipping zones.
- Then, as soon as you hover your mouse over Zone Name, you will see the options to Edit and Delete.
- After that, if you want to delete a shipping zone, you must click the Delete option.
How to add shipping methods to zones?
- As similar to these guides above, the first step you must do is to go to WooCommerce >> Settings >> Shipping >> Shipping Zones to configure your shipping zones.
- Next, you need to select Edit by hovering over the Shipping Zone you want to edit.
- Then, on the next screen, let’s scroll down to Shipping Methods.

- After that, using the button, you can disable an existing Shipping Method. On the other hand, if you want to use a different shipping method, you can select Add Shipping Method.
- The last stage is Save changes to finish.
How to remove shipping methods from Woocommerce shipping zones?
- To begin, you must go to WooCommerce >> Settings >> Shipping >> Shipping Zones in order to configure your shipping zones.
- Then, you have to select the Edit option by hovering over the Shipping Zone you want to edit.
- After that, on the screen that displays, let’s scroll down to Shipping Methods to proceed.

- Then, you have to hover over the Shipping method that you want to remove, and then choose the Delete option.
- Finally, remember to Save changes option to finish.
How to control the shipping method selected by default?
Customers’ default shipping method is the top listed, enabled shipping method in the zone to which they correspond. Besides, customers who meet the Local Shipping Zone are selected for Local Pickup in the following screenshot sample.
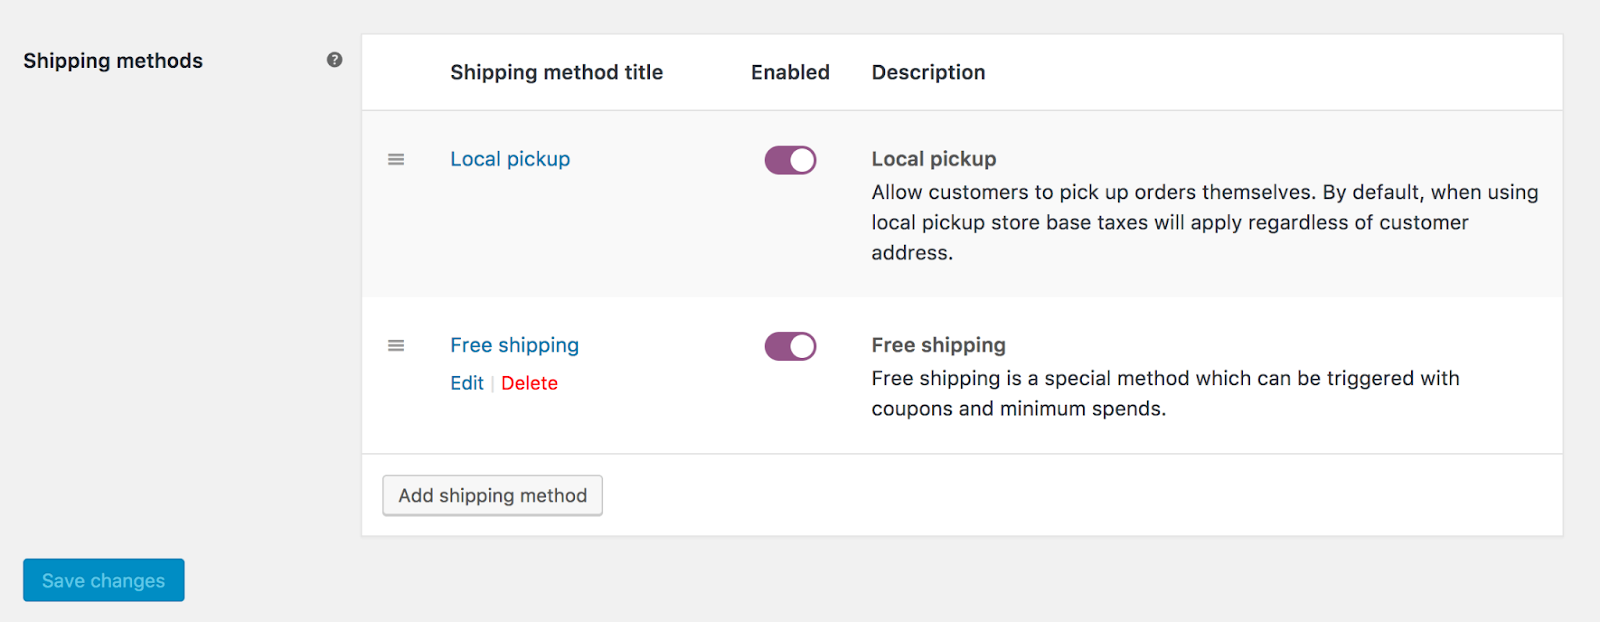
What’s more, using the handles on the left, drag and drop to reorder shipping methods, and then Save Changes. In addition, in the same screen, you can also modify how delivery methods are ordered in the cart page. All of the shipping methods you picked will be sorted in the cart page in the same order as they were in this screen. Alternatively, Woocommerce shipping methods appear in the basket in the same order for clients who match the Local shipping zone parameters:

Customization
In fact, the customer is presented with all methods in a zone by default. Following that, you can use the following snippet to conceal other ways if you have conditional free shipping and want it to be the only one shown if it’s available:
1 <?php
2 /**
3 * Hide shipping rates when free shipping is available.
4 * Updated to support WooCommerce 2.6 Shipping Zones.
5 *
6 * @param array $rates Array of rates found for the package.
7 * @return array
8 */
9 function my_hide_shipping_when_free_is_available( $rates ) {
10 $free = array();
11
12 foreach ( $rates as $rate_id => $rate ) {
13 if ( ‘free_shipping’ === $rate->method_id ) {
14 $free[ $rate_id ] = $rate;
15 break;
16 }
17 }
18
19 return ! empty( $free ) ? $free : $rates;
20 }
21
22 add_filter( ‘woocommerce_package_rates’, ‘my_hide_shipping_when_free_is_available’, 100 );
In conclusion
All in all, this article delivers you a detailed step by step guide to set up and manage Woocommerce shipping zones. Arrowtheme hopes you will gain a lot of useful information and knowledge to add it in Woocommerce successfully.
Not only that, we also offer Woocommerce Website packages that include lots of outstanding solutions. For instance, you haven’t updated your online site in a long time? Plus, are you looking for Woocommerce Maintenance & Support that is dependable and of high quality? Fortunately, our Maintenance & Support services include all you require. Specifically, you can get a 20% discount if you subscribe to the Monthly package, or a 30% discount if you subscribe to the Annual subscription. Finally, in case you need any consultancy, don’t hesitate to CONTACT US.