What Is Mailchimp Popup & How To Add It To Shopify
Do you own an online store? Do your methods to run your online store effectively? So in this blog today, ArrowTheme will recommend to you one of the effective ways to boost your revenue.
That is the Mailchimp Popup. If you do not have any about it, don’t worry. We will start now with the definition of the Mailchimp popup and how to add it to your Shopify stores.
What Is The Mailchimp Popup?
Mailchimp is an email service provider that allows you to segment your contact lists into various groups and send personalized, conversion emails. It’s a perfect choice for new marketers, entrepreneurs, and bloggers.
Moreover, the Mailchimp popup is a website popup campaign that collects potential customers. And then send them to your Mailchimp account. Therefore, you can arrange new email addresses into specific contact lists. Finally, you can send your campaigns via customer’s email.
Why Should Add The Mailchimp Popup For Shopify Stores?
Emails are important in bringing online retailers closer to their customers. As a result, email remains one of the most effective ways for sellers to communicate with buyers in the shortest time possible. According to email marketing statistics, more than 90% of people use emails as their primary method of communicating with their business partners.
Therefore, an email marketing strategy for eCommerce will help you convert new visitors into customers and encourage existing customers to buy more and become loyal customers. That is why integrating a Mailchimp popup into Shopify is thought to be a great approach to building strong relationships with your customers.
How To Add The Mailchimp Popup To Your Shopify Stores?
Adding a Mailchimp popup to Shopify stores is a fantastic method to make a long-term relationship with your customers. Because it will help you convert visitors into subscribers and drive purchasing behavior.
The following is the way to add the Mailchimp popup to your Shopify stores:
Step 1: Insert Mailchimp Pop-up Code To Shopify
Follow the steps below to generate a site code in Mailchimp
- 1. Firstly, you have to go to your MailChimp account and sign in.
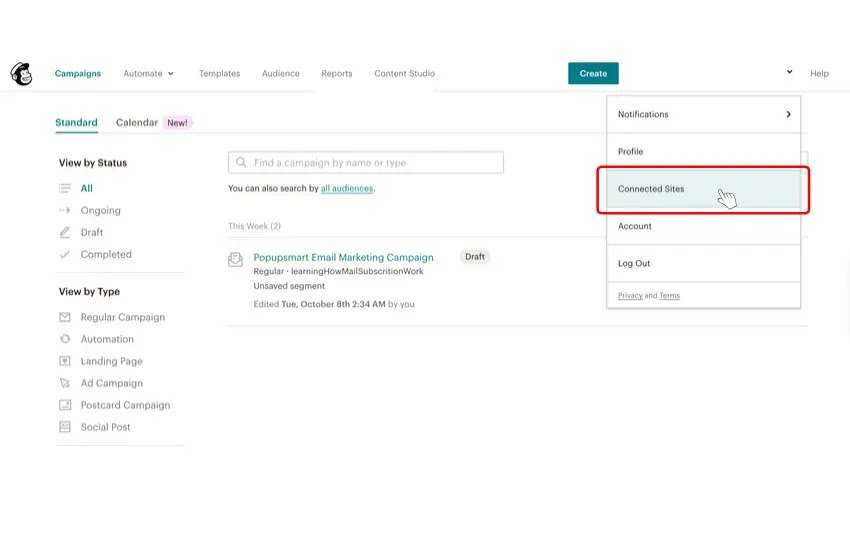
- 2. Secondly, you have to go to the “Connected Sites” section of the website. Click “Add Another Site” if you’ve connected a site before.
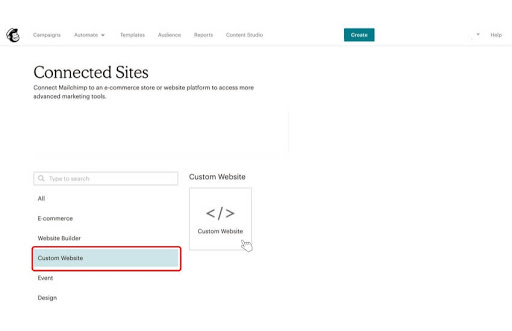
- 3. In the Connected Sites section, select “Custom Website”
- 4. Fill up the “Enter Site URL” section with the URL of your website.
- 5. For linking the drop-down menu, choose “Select Audience” and select your target audience.
- 6. Select “Get Code”.
- 7. To save time, copy the code provided to your clipboard. So now we’ll work together to implement the custom code to the chosen Shopify store.
- 8. Log in to your Shopify store in a new tab.
- 9. Select “Themes” from the drop-down menu under “Online Store” on the left navigation menu.
- 10. On the Themes page, go to the “Actions” drop-down menu and select “Edit Code.”
- 11. Go to the {/}header.liquid section to edit the header code.
- 12. Before closing the < /header> tag, copy the code to your clipboard.
- 13. Finally, go back to your Mailchimp account and click “Check Connection” on the “Connect Sites” tab.
Step 2: Connecting Mailchimp To Shopify By Zapier
Zapier allows you to connect your MailChimp account with your Shopify store to send automated abandoned cart emails, order alerts, and more.
Do you know how to connect them? Here’s how to do it:
- 1. If you haven’t yet signed up for a Zapier account or logged into Zapier, so let’s do it
- 2. Pressing the “Make a Zap!” button
- 3. Select your “Trigger App” as Shopify
- 4. Select the event for which you want the Zap to be triggered.
- 5. Choose “Save & Continue”
- 6. In the “Connect Account” box, log in to your Shopify store
- 7. Choose “Save & Continue.”
- 8. Choose Mailchimp as your action app
- 9. When the Zap is activated, you can choose the action Mailchimp takes
- 10. Choose “Save & Continue”
- 11. To activate your MailChimp account on Zapier, enter your MailChimp login credentials in the “Connect an Account” box
- 12. Click “Save & Continue”
- 13. To learn more about your potential customers, customize your Zap
- 14. Apply a test to the data collected by Zapier during the creation of your zap
- 15. Finally, configure your account settings and, if all goes well, activate the Zap
So now you’ve successfully linked your MailChimp account to Shopify using Zapier!
Conclusion on Mailchimp Popup
All the above information is about the definition of Mailchimp popup and how to add it to your Shopify stores. However, in our blog, there is still a lots of useful information. In case you want to dig more about the Shopify tutorial. Do not hesitate to contact us at.
Contact US – ArrowTheme:
– Email: [email protected]
– Facebook: Facebook.com/ArrowThemeTeam
– Website: ArrowTheme.com