Beginner’s Guide: How To Create A Shopify Store
Learn how to create a fantastic online shop with Shopify’s website builder today!
Do you have a great product idea and want to learn how to create a Shopify store?
Shopify is the perfect platform for you! Shopify is an easy-to-use eCommerce platform that allows anyone to create a professional-looking online store in minutes, even if they have no experience with web development.
In this blog post, we will walk you through the step-by-step process of creating a Shopify store.
By the end of this blog post, you will have everything you need to start selling on Shopify!
How to Create a Shopify Store – Step-by-Step Guide
Before you start, we recommend exploring Shopify’s pricing plans and understanding the Shopify fees associated with each plan.
This way, you can choose the plan that best suits your needs and budget.
If the Shopify plans or features don’t meet your requirements, there are the best Shopify alternatives that may be a better fit.
Or else, proceed with our comprehensive guide, walking you through the process of how to create a Shopify store now!
Lusion – Multipurpose eCommerce Shopify Theme
We provide an amazing Shopify theme with fast and responsive designs. Let’s find out!
Step 1: Creating a Shopify Account – How To Create a Shopify Store
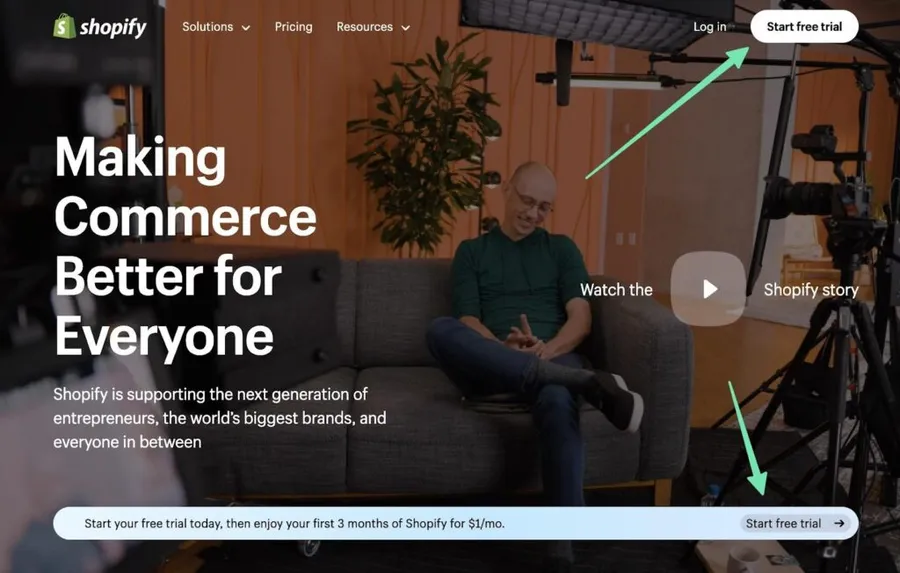
To kickstart your journey on how to create a Shopify store, visit the Shopify official website and click the Start Free Trial button.
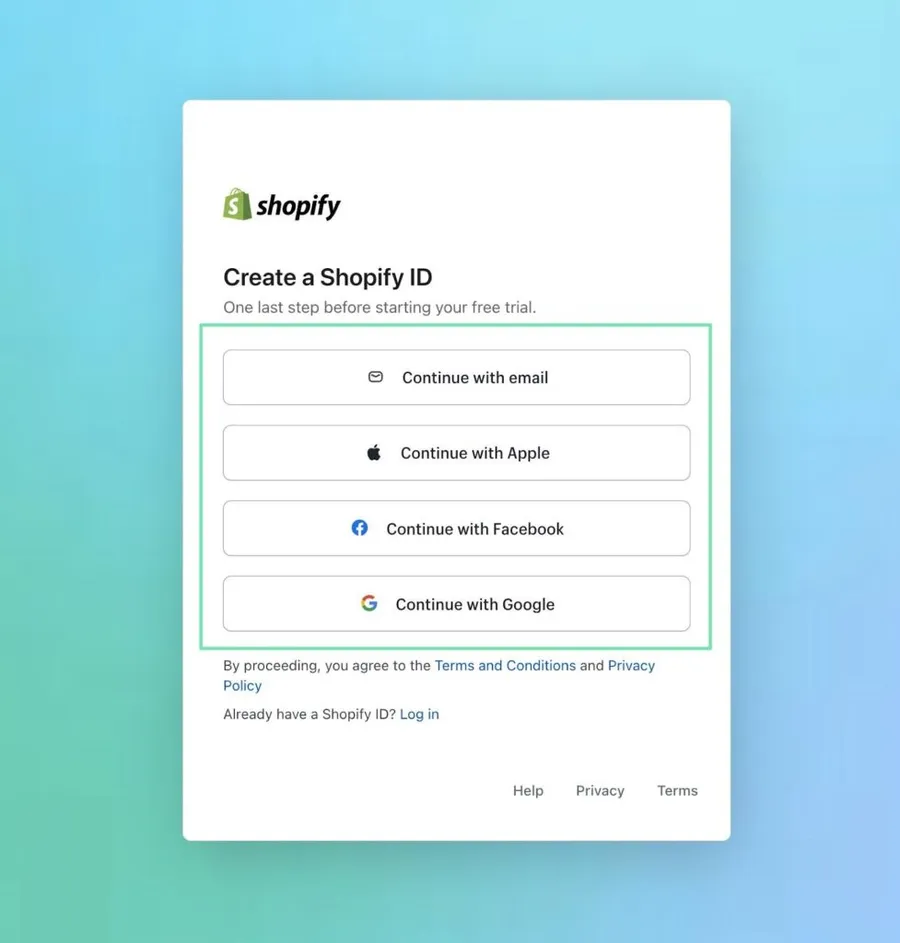
Enter some basic information about your business or skip all (of course, you need to do it again later). You can create a Shopify account using your email or opt for a quick login through social media buttons.
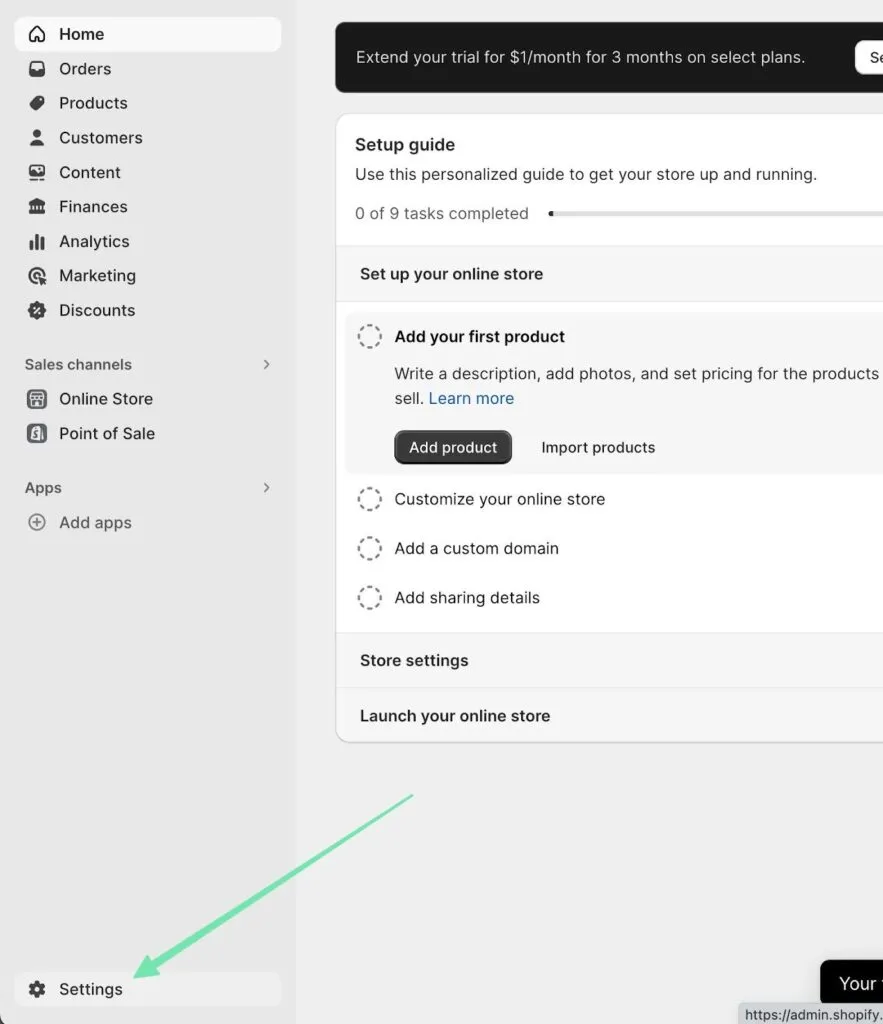
Once logged in, you will be taken to the main Shopify dashboard, where you can manage anything about your store, including marketing, analytics, finances, orders, products, and more.
A Setup Guide is also available to help you setup your store quickly.
Step 2: Setting Up Your Shopify Store – How To Create a Shopify Store
Before you start designing your store and adding products, you need to configure some basic settings.
To do this, click on the Settings button in the bottom left corner of the dashboard.
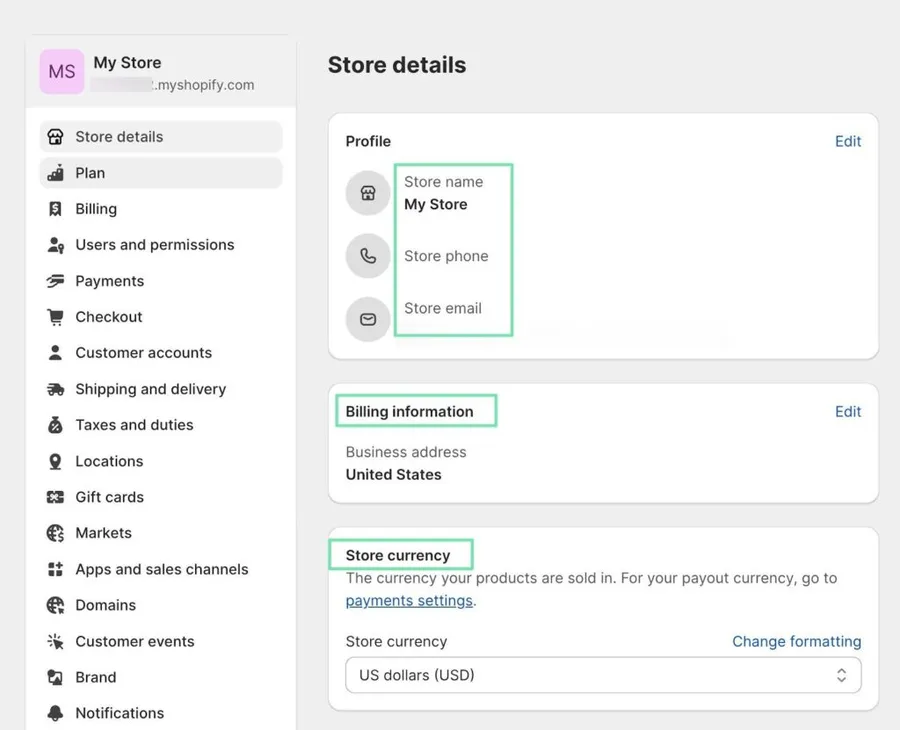
On the Store Details page, fill in any missing information, such as:
- Store name
- Store phone
- Store email
- Billing information
- Store currency
- Time zone
On the left side of the Shopify dashboard, you’ll see a menu with a variety of options.
It’s important to review all of these options, but there are a few in particular that you should focus on when setting up your store:
- Shipping and delivery: This is where you can set up your shipping rates and options.
- Locations: If you have multiple store locations, you can manage them here.
- Taxes and duties: This is where you can set up tax rates and duties for your products and services.
- Markets: This is where you can choose which markets you want to sell in.
- Apps and sales channels: This is where you can install and manage Shopify apps and sales channels.
- Brand: This is where you can customize the look and feel of your store.
- Notifications: This is where you can set up notification preferences for your store.
- Languages: This is where you can choose the languages that your store will be available in.
- Policies: This is where you can create and manage your store’s policies, such as shipping policies and return policies.
- Custom domains: This is where you can connect a custom domain name to your Shopify store.
The Shipping and delivery section is particularly important to focus on when setting up your Shopify store.

To set up your shipping options, go to Settings > Shipping and delivery. From here, you can:
- Create shipping zones and set shipping rates for each zone.
- Set up free shipping for certain orders or products.
- Offer calculated shipping rates based on the weight and dimensions of the order.
- Configure local delivery and pickup options.
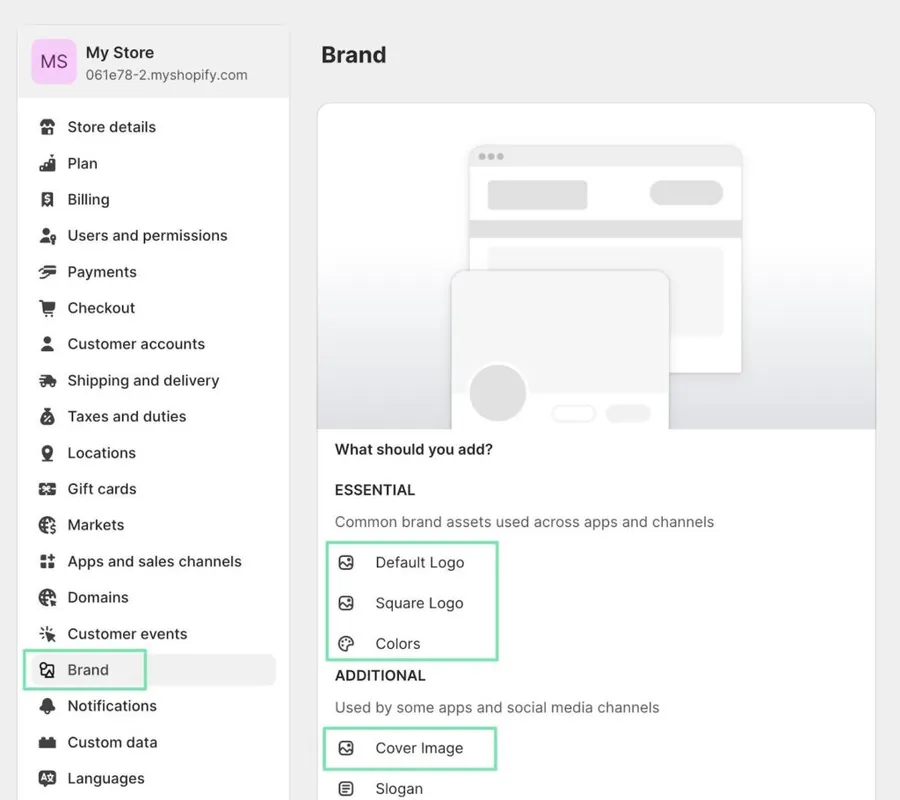
It’s important to take the time to create a consistent and professional brand image. To do it, simply go to Settings > Brand.
It allows you to customize your brand assets, such as your logo, slogan, and colors. These assets will be used throughout your online store and marketing materials.
Step 3: Choosing a Theme – How To Create a Shopify Store
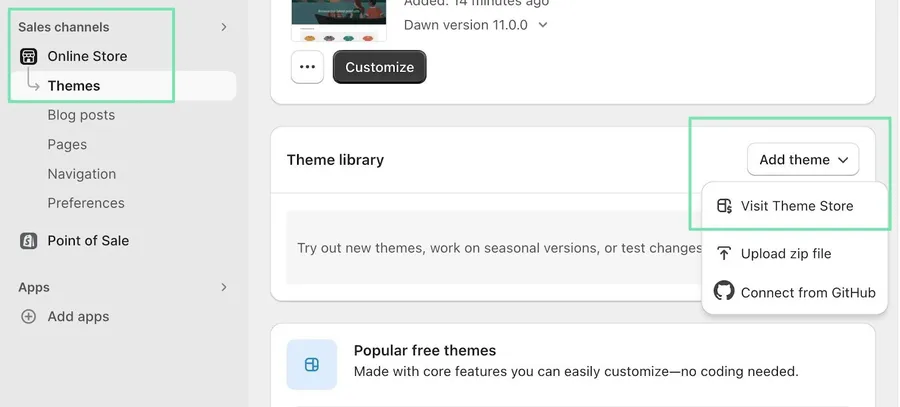
Shopify offers a wide variety of themes to choose from, including over 150 free and paid themes.
To view all available themes, navigate to Sales Channels > Online Store > Themes in your dashboard and click Add Theme > Visit Theme Store.
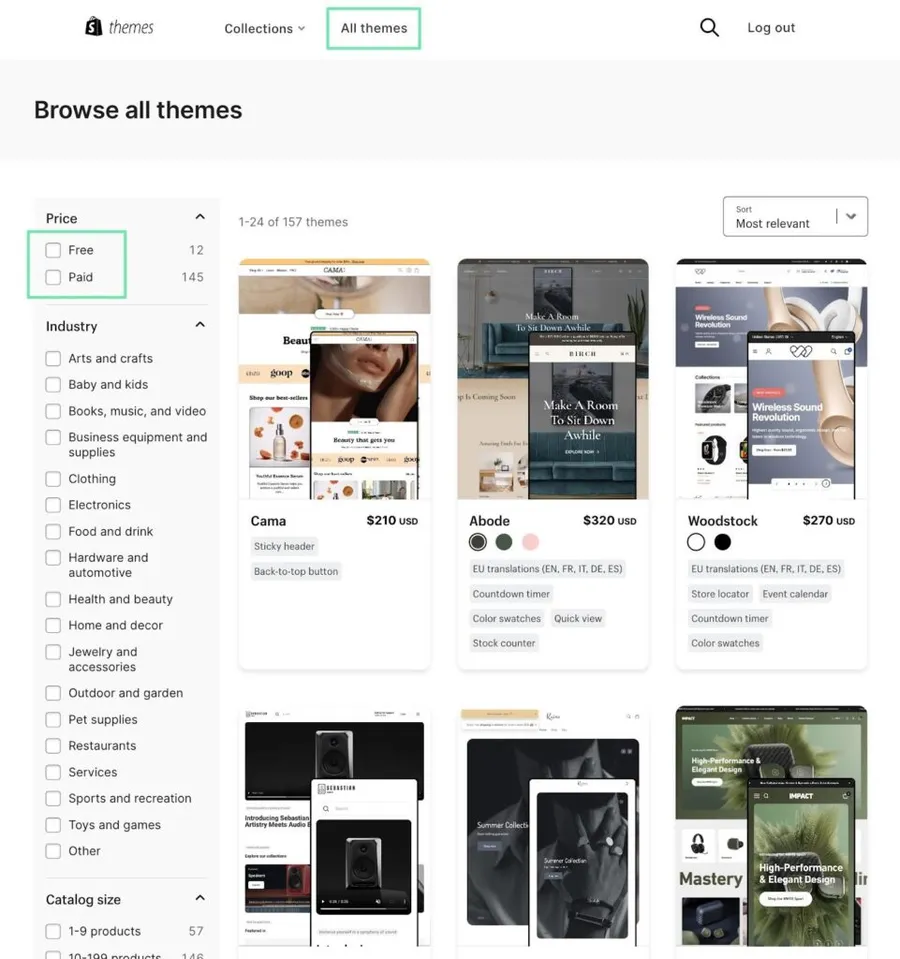
When browsing the collection of themes, consider your brand and product offerings. You can filter by theme type (free or paid), industry category, or other criteria.
If you are looking for a premium theme with powerful features and customization options, consider Storepify. Storepify offers a variety of pre-built demos, product filtering and sorting, social media integration, a blog, a mobile-friendly design, and advanced customization options.
Once you have found a theme that meets your needs, click the Try Theme button to add it to your store. You can then customize the theme to your liking.
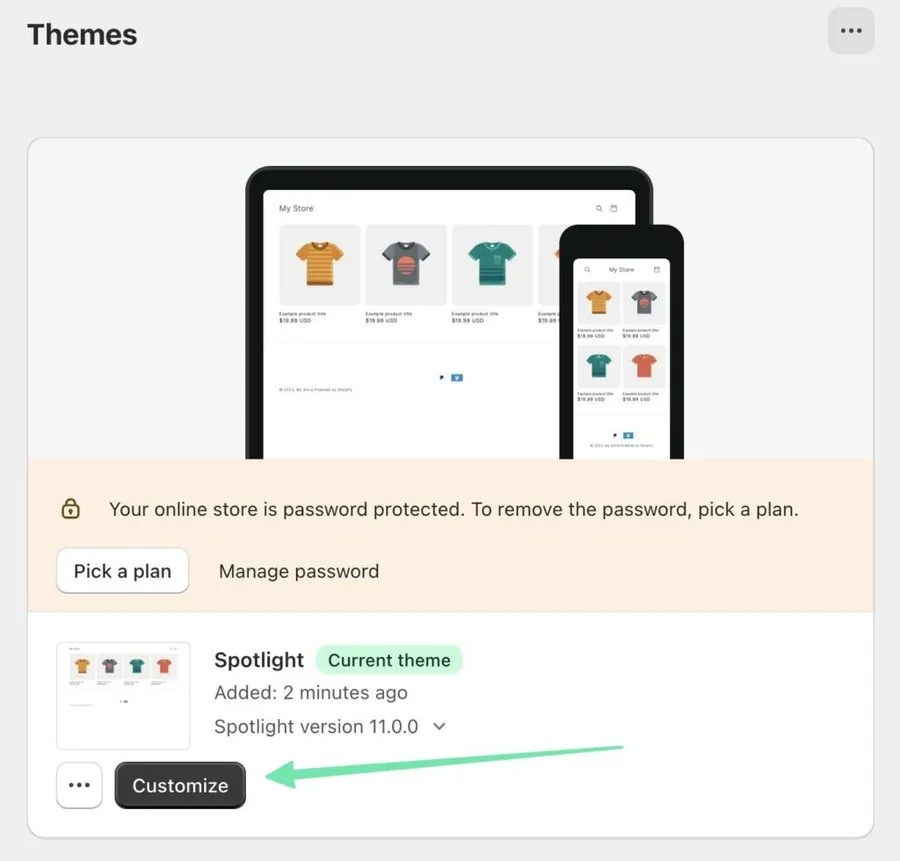
Once you are ready to make the theme live, click the Publish button in the Themes section of your dashboard.
Step 4: Customize the Look of Your Theme – How To Create a Shopify Store
After choosing a theme, you can change its look to match your brand. You can modify colors, fonts, media, and layouts without any coding from the Shopify dashboard. It’s one of the step of how to create a Shopify store.
To open the editor, go to Themes > Customize for your current template.
The left panel is divided into three areas: Header, Template, and Footer. Each area can hold sections and blocks, which are the building blocks of your website. To add a section or block to the Template area, click the Add Section or Add Block button.
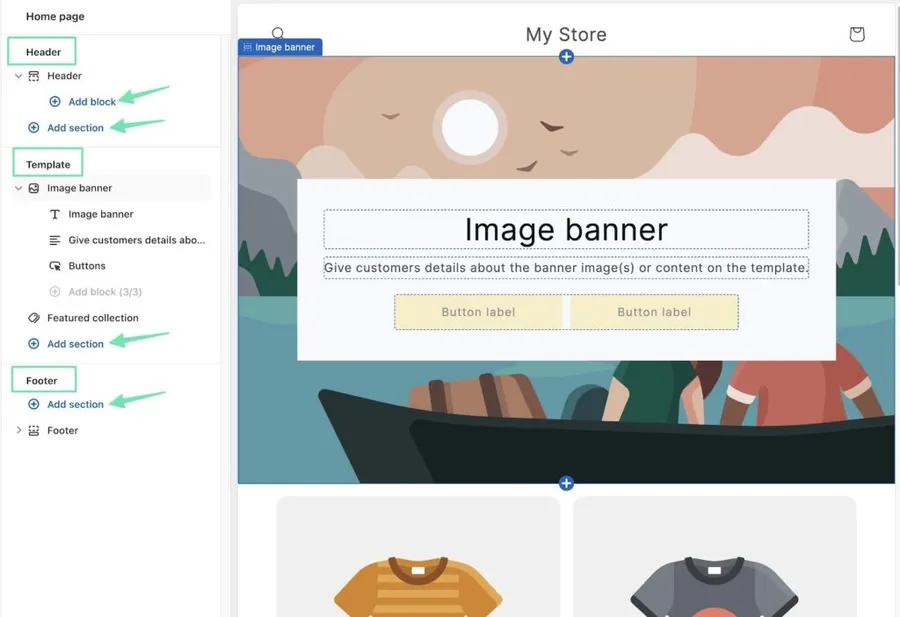
Each template has its unique blocks and sections, but Shopify also has many default sections that you can use with any theme.
Step 5: Creating Products and Services to Sell – How To Create a Shopify Store
Creating and selling products on Shopify is a breeze. So how to sell on Shopify?
Simply go to the main dashboard and click Products > Add Your Products.
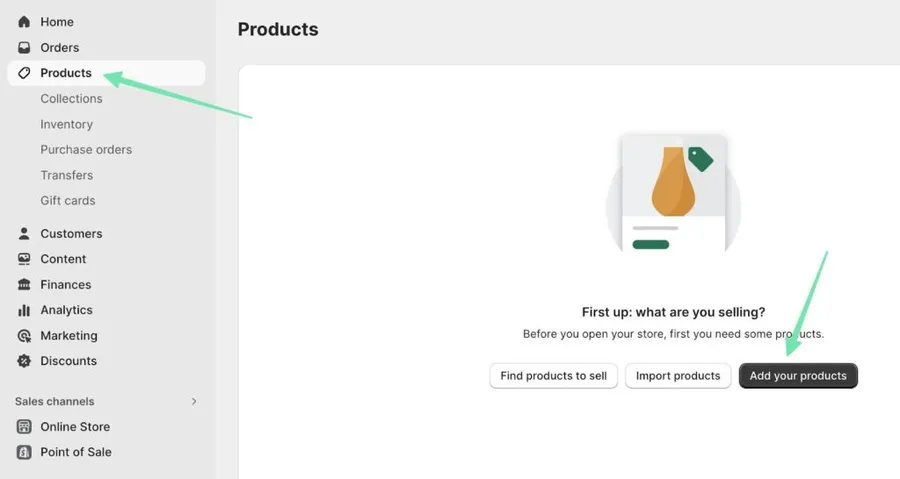
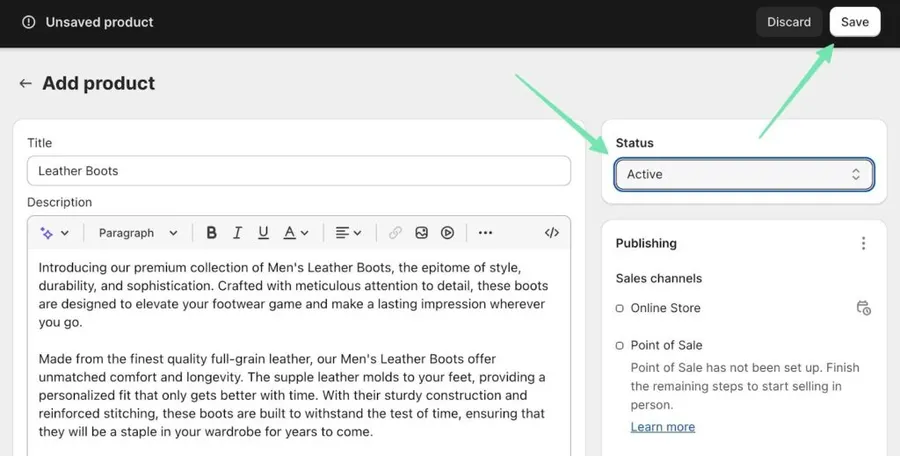
Enter the product details, such as images, descriptions, and pricing. You can also manage inventory, shipping, product variants, and SEO.

Once you’re happy with the product page, set the Status to Active and click Save to publish it to your website.
Step 6: Setting Up Shopify Payments for Payment Processing – How To Create a Shopify Store
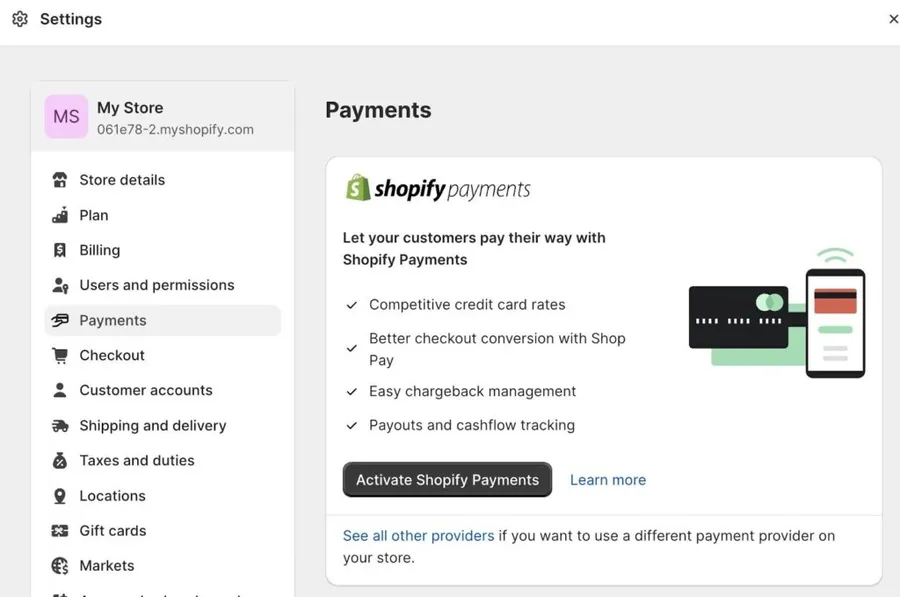
How to set up Shopify store for payment. To accept payments on your Shopify store, you can use Shopify Payments or a third-party payment provider.
Shopify Payments is an integrated payment gateway that offers 0% transaction fees and fast payouts.
To activate Shopify Payments, go to Settings > Payments and click Activate Shopify Payments. You’ll need to provide your contact information, connect a bank account, and turn on Shopify Payments.
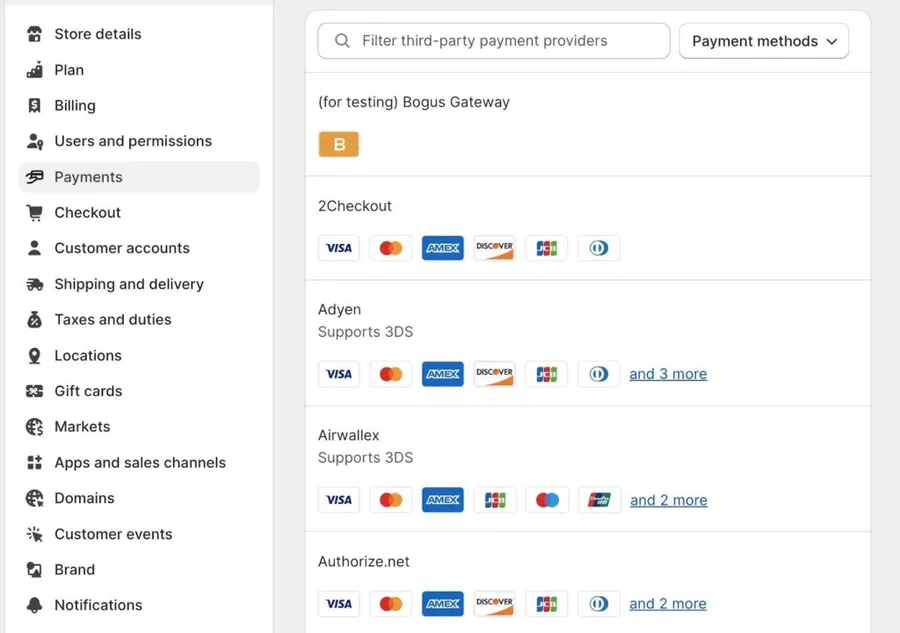
If you’re unable to use Shopify Payments, you can choose a third-party payment provider from the list available in the Payments section of the Shopify dashboard. Some popular third-party payment providers include Authorize.net, 2Checkout, and Adyen.
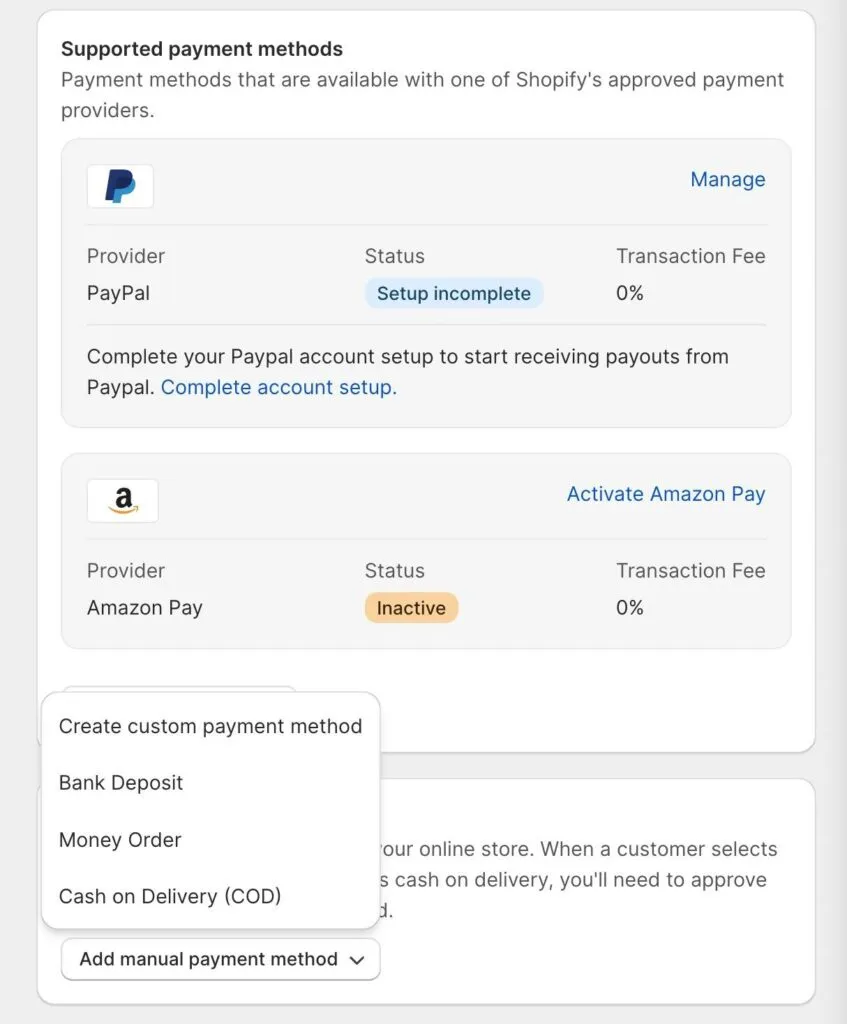
In addition to credit card payments, Shopify also offers a variety of other payment options, such as digital wallets (Amazon Pay, PayPal), and manual payment methods (money orders, cash on delivery, bank deposits). You can add these payment options on top of your main credit card processor.
Step 7: Adding Relevant Apps to the Shopify Website Builder
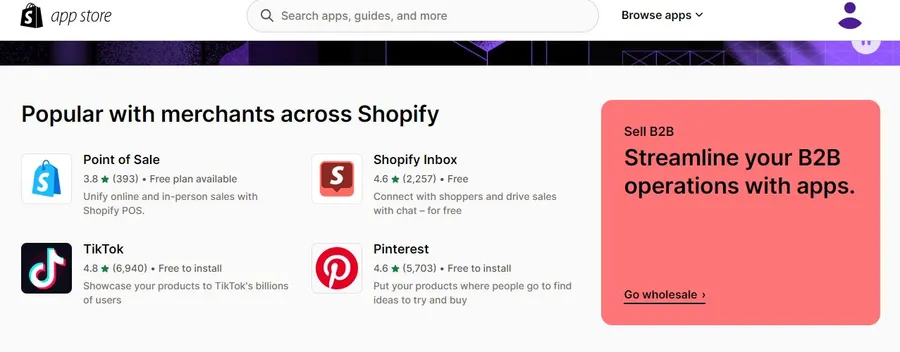
Shopify merchants can install apps from the Shopify App Store to enhance their store’s functionality.
Apps are available for a variety of categories, such as product sourcing, sales channels, shipping management, user experience, marketing, and store management.
When you find an app that you want to install, click the Install button. You will then be asked to agree to the terms of service and integrate the app with your store.
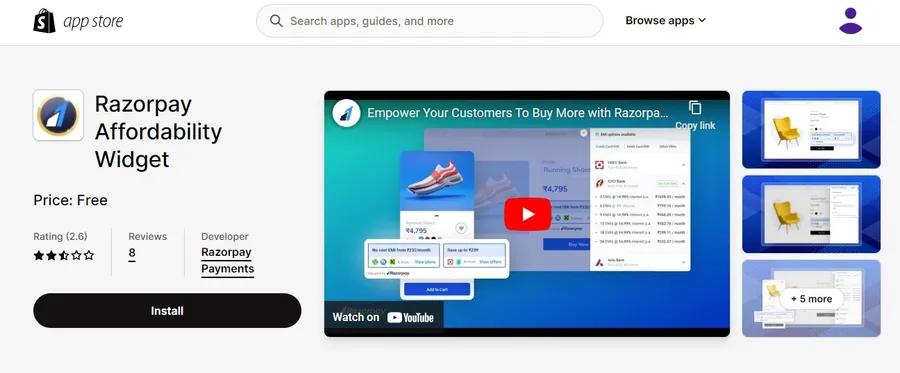
Once an app is installed, you can find it in the Apps section of your Shopify dashboard. Many apps are free to use, but some have limited functionality or require a paid subscription.
Step 8: Configuring Your Shopify Marketing Tools
How to create a Shopify store for marketing tools? Shopify’s built-in marketing tools let you promote your store without relying on third-party apps. These tools include discounts, email campaigns, SEO tools, and social media integration.
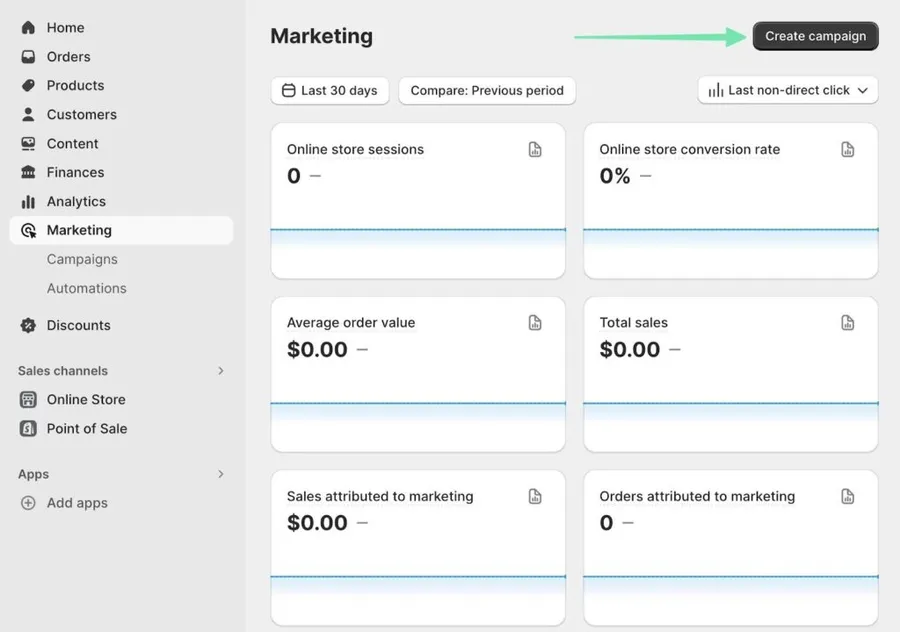
To access the built-in marketing tools, go to the Marketing tab in your Shopify dashboard. There, you can create campaigns for email marketing, Microsoft Bid Strategy, social posts, SMS, and more.
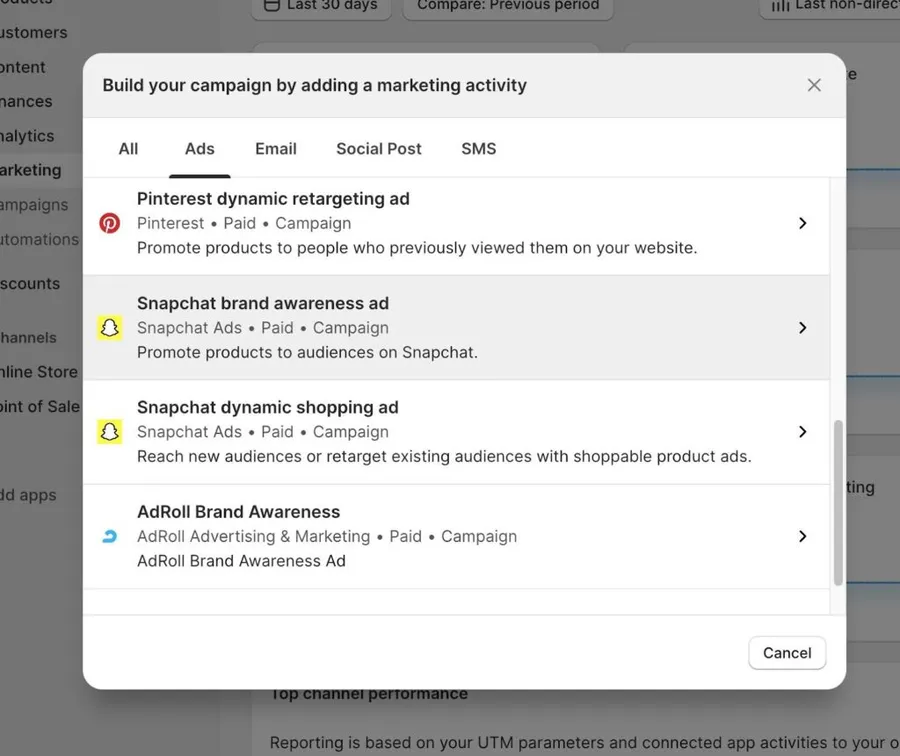
When creating campaigns, be sure to sync your store products and customize the ads. Shopify can automate your ads, but it’s always best to review and edit them manually.
Step 9: Launching Your Online Store
Before launching your Shopify store, double-check everything, test the checkout process, and make any final adjustments.
Test your store on all devices and major browsers to make sure it looks good and works well. To test your store, switch it to test mode.
Once you’re confident that your store is ready, launch it and start selling on Shopify!
Read More: How To Write SEO Product Descriptions: 7 Best Tips