Tips To Use Shopify Tags With Best Practices
Maybe you have heard a lot about tags, but do you know about Shopify Tags and how to use them effectively to develop your Shopify ecommerce stores? If NO, this article is for you. In this article, Arrowtheme will deliver you many helpful tips such as: how to add Shopify product tags, simple ways to remove them and so on. So, what are you waiting for without exploring them right now!
What Does Shopify Tags Mean?
As you probably know, Shopify tags are considered as the labels that are used to categorize items such as products, customer information, orders, blog articles, transfers, refunds, and more. Then, you can simply search and add filters to a drop-down menu thanks to using your specified tags. Best of all, without fear of losing information, you can transfer and organize all types of tags.
What’s more, on your ecommerce store, you may always see the complete array of tags. In particular, Shopify product tags include three advantages: they are invisible to customers, they arrange search results for users, and they allow you to manage the items page.
When Should You Use Shopify Tags?
First and foremost, in order to improve the management of your business, Shopify product tags are used to organize the items and customer information in your ecommerce store. Besides, you may designate information for your team to reply to enquiries regarding individual draft orders by creating a custom set of tags.
Not only that, you can also change the name of the tag you make, apply filters to a specific section and so on. Furthermore, Shopify tags give ecommerce websites a unified manner to improve communication and marketing strategies.
How To Create Shopify Product Tags?
Firstly, if you want to manage your ecommerce store effectively, you’ll need to know how to generate tags in Shopify. Simply speaking, Shopify tags make it simple to arrange products, customer orders, blog entries, and other items.
Besides, tags also make it easy to improve the complete customer experience, including ordering, customer service, shipping and so much more. Then, you should follow three steps below to understand the way to create Shopify tags.
Step 1. In Shopify, you must go to the details page for a specific product, transfer, customer, blog post, order, or draft order.
Step 2. Enter the name of a tag you want to add in the Tags area, or choose one from the list of current tags. If you give a new tag a name, it will be created automatically for future usage in the section.
Step 3. Finally, you should keep in mind to save.
For more detail, Shopify product tags attached to orders and draft orders can be up to 40 characters long. Products, transfers, customers, and blog articles can all have tags with up to 255 characters.
Especially, the Shopify tags aren’t case sensitive. And, Approved and approved, for example, are the same tag. In your tags, you can only use letters, numbers, and hyphens. Accented letters and other symbols might filter out search results.
In addition, each product, customer, transfer, blog post, order, and draft order can have up to 250 tags.
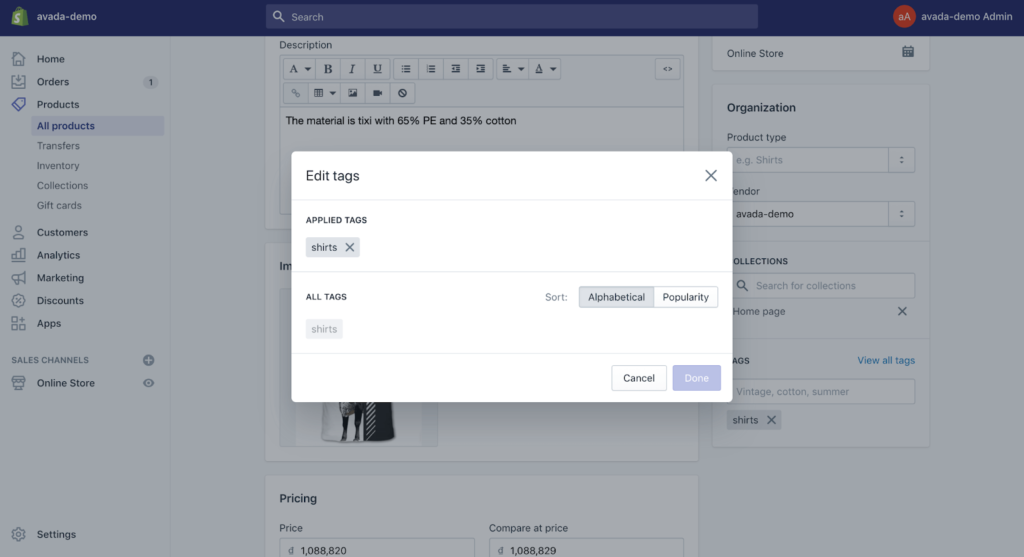
What’s more, on the View all tags page of a product, transfer, customer, blog post, order, or draft order information page, you can add, remove, and view the full list of tags. Now, let’s refer to the steps below:
Step 1. Click View all tags in the Tags section.
Step 2. Choose a tag from the list.
Step 3. Click Apply changes.
Way To Remove Shopify Product Tags
If you want to remove Shopify tags from your items, transfers, customers, blog posts, orders, or draft orders, all you have to do is applying our instructions below:
Step 1. In Shopify, go to the details page for a specific product, transfer, customer, blog post, order, or draft order.
Step 2. Select the tag you want to remove by clicking the x next to it. Only that product, transfer, customer, blog post, order, or draft order has the tag deleted.
Step 3. Save the file.
Besides, on the product, transfer, customer, blog post, order, or draft order details page, you can also delete a tag from the View all tags list. Let’s see how we can remove it through three steps instructions below:
Step 1. Click View all tags in the Tags section.
Step 2. In order to delete a tag, click the x next to the tag’s name.
Step 3. Apply the changes by clicking the Apply button.
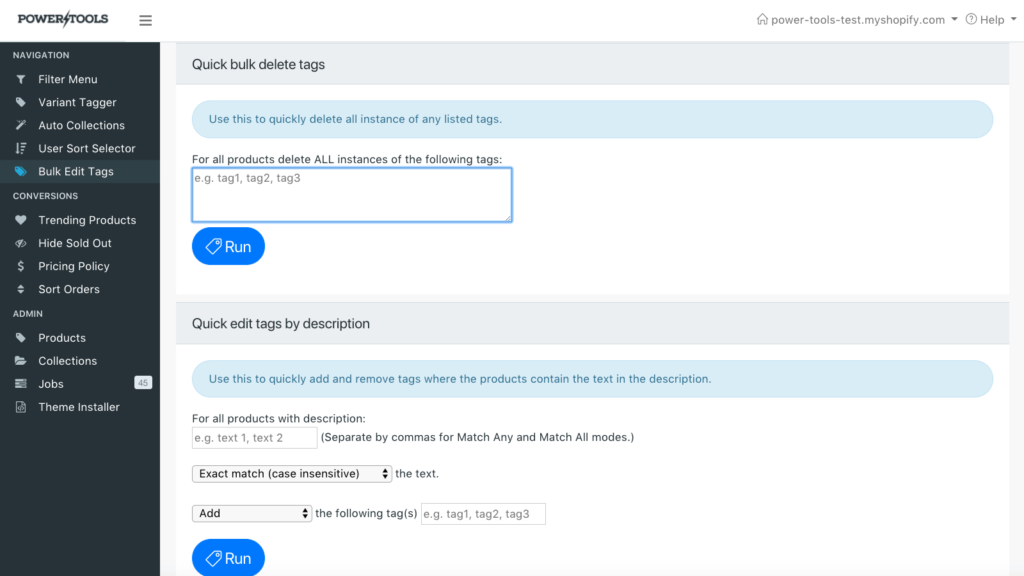
How To Add Or Remove Shopify Product Tags In Bulk?
Using bulk actions on Desktop, you are able to add and delete tags from numerous products, transfers, customers, blog posts, orders, and draft orders. While on Mobile, order tags can be inserted and withdrawn in bulk.
Simple Way To Bulk Editing Product, Transfer, Customer, Blog Post, And Draft Order Tags
Step 1. Click Products, Transfers, Customers, Blog Posts, or Draft Orders from your Shopify admin.
Step 2. Make a note of the product, transfer, customer, blog post, or draft order you’d like to tag.
Step 3. Shopify tags can be added or removed by clicking Add tags or Remove tags.
Step 4. In order to add or remove tags, click the checkboxes next to them.
Step 5. Save the file.
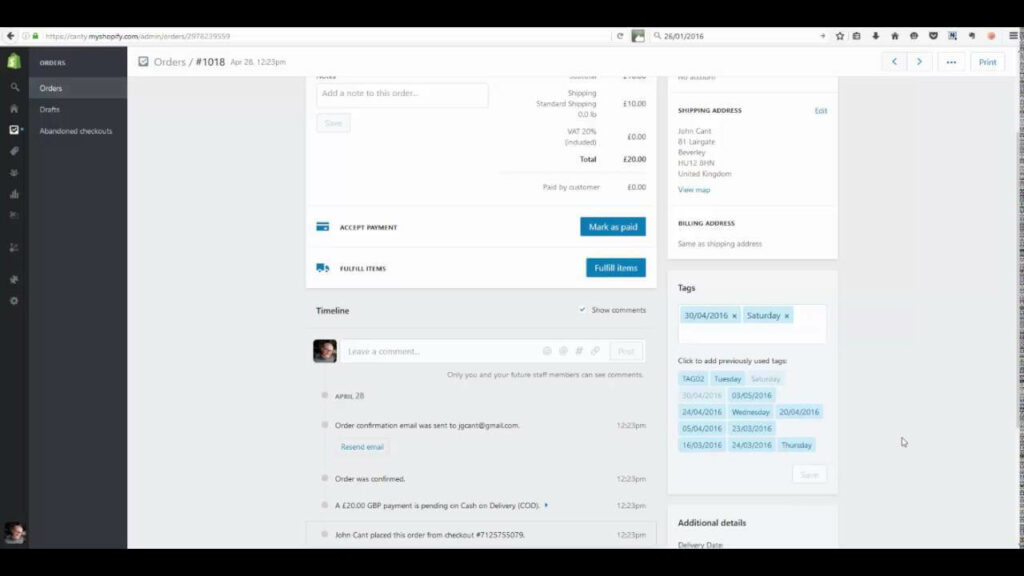
Steps To Edit Order Tags In Bulk
Step 1. Click Orders in your Shopify admin.
Step 2. Examine the orders to which you’d like to add or remove a tag.
Step 3. Tags can be added or removed by clicking Add tags or Remove tags.
Step 4. Select the tags you wish to add or remove by clicking on them.
Step 5. Save the file.
How To Search Shopify Tags?
Firstly, to find something, you can search for a tag that you added to a product, transfer, customer, blog post, order, or draft order. Then, any results that match the tag are returned by the search.
And, of course, if you search for a tag that hasn’t been attached to anything, no results are returned.
If you don’t know how to search by Shopify tags, let’s refer to the following steps:
Step 1. In the Shopify search bar, type the tag’s name.
Step 2. View the matching results and click on a result to learn more about it.
Tags Can Be Used To Refine Your Search
On the Products, Transfers, Customers, Blog posts, Orders, and Draft orders pages, you can use Shopify product tags to filter the lists. Besides, on the Inventory page, you can also utilize product tags to narrow down the list of versions.
Now, refer to Filter your orders for information on how to filter orders by tag:
Step 1. Click Products, Transfers, Customers, Blog Posts, Orders, Draft Orders, or Inventory from your Shopify admin.
Step 2. Select Tagged with or More Filters from the drop-down menu.
Step 3. Put the name of the tag you’d want to use as a filter in this box. Then, the results of the filter will be shown.
In Conclusion
To sum up, Arrowtheme hopes this blog will bring you a lot of useful information about Shopify tags and you can apply them to your working process with Shopify well. Then, in case you have any question, let’s CONTACT US for more details.
Moreover, do you want to grab the most appealing Shopify deal from Arrowtheme? Specifically, if you are planning to open a new Shopify ecommerce store but have no technical skills and are unfamiliar with this platform. Or cash flow a main issue for your ecommerce business.
Contact US – ArrowTheme:
– Email: [email protected]
– Facebook: Facebook.com/ArrowThemeTeam
– Website: ArrowTheme.com