Shopify DNS: How to Edit and Reset It for Your Domain
DNS (Domain Name System), as you can see, is critical to all of your internet operations. So you need to know how to edit DNS and reset it for your domain. In case you are a Shopify owner, you may want to manage your domain. Hence, our blog today will show you how to edit Shopify DNS with simple steps.
How to edit Shopify DNS settings
DNS settings
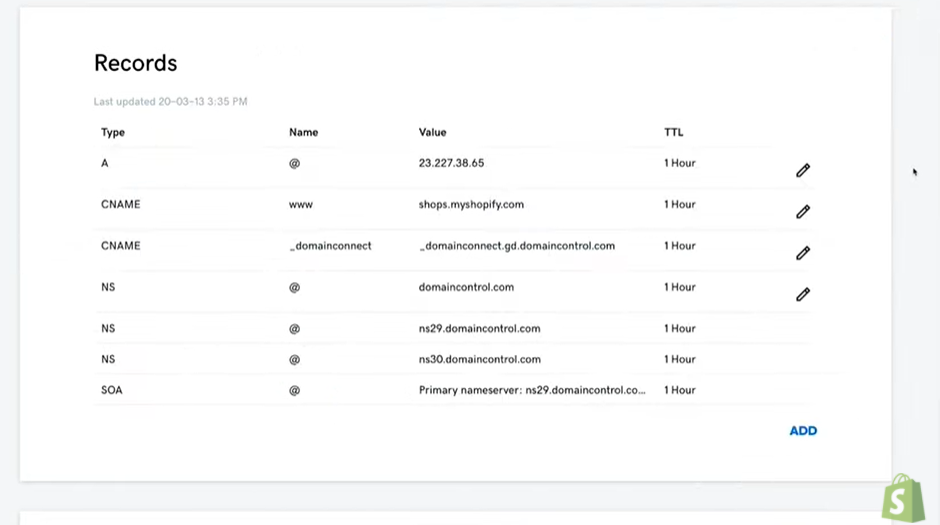
In the first place, from your Shopify admin account, navigate on Domains sections to see the DNS settings below:
- A Record (Shopify default)
- CNAME Record (Shopify default)
- MX Record (editable)
- TXT Record (editable)
- AAAA Record (editable)
- SRV Record (editable)

As you can see, A Record and CNAME Record are Shopify default’s Records. When the other 4 Record is added, you can have the right to edit DNS settings. You need to add these records in the following cases:
- Your store uses a third party email service on your domain.
- You wish to point a subdomain to another website.
- You need to validate your domain with a third-party provider.
Modifying A Record and CNAME records may cause your domain and Shopify to lose contact. So you should edit only when you know well about these records.
Steps to edit Shopify DNS settings
How to edit Shopify DNS for desktop
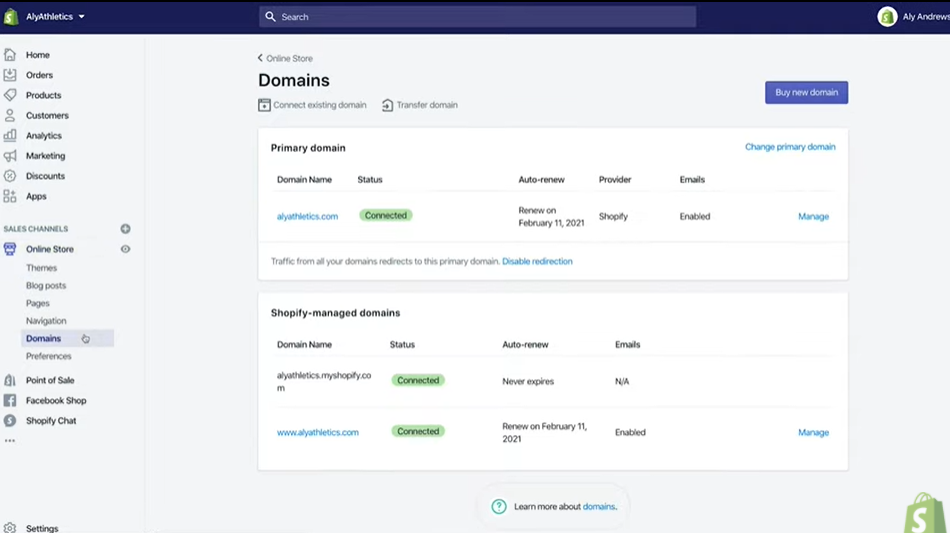
#1. Log in to your Shopify account. Open Online Store> Domains.

#2. Click on Shopify-managed domains and select the domain that you want to edit.
#3. Open DNS Settings.
#4. There are 3 choices for you to edit the domain:
- Firstly, Click Add new custom record to create a new one. You have to choose the type, click Enter and Confirm the changes.
- Secondly, Open Actions > Edit to change the record You also edit, click enter and confirm.
- Thirdly, Click Actions > Remove to delete the record. Confirm your choice by click Remove one more time.
How to edit Shopify DNS for mobile
#1. Open Shopify app > Store
#2. Click on Online Store > Sales Channels > Domains > Shopify-managed domains then select the domain you want to edit
#3. Open DNS settings and you also see 3 choices:
- Firstly, Click Add new custom record to create a new one. You have to choose the type, click Enter and Confirm the changes.
- Secondly, Open Actions > Edit to change the record You also edit, click enter and confirm.
- Thirdly, Click Actions > Remove to delete the record. Confirm your choice by click Remove one more time.
How to reset Shopify DNS settings
Next, you can restore your DNS settings to the default Shopify setup. Except for Shopify’s DNS and A records, this will remove all of your records.
For desktop
#1. Firstly, Open Online Store > Sales Channels > Domains > Shopify-managed domains then select the domain you want to reset.
#2. Secondly, Navigate DNS Settings > Advanced Settings >Reset DNS Settings
#3. Thirdly, Click Confirm to start reset DNS.
For mobile
#1. Firstly, Open Shopify app > Store
#2. Secondly, Click on Online Store > Sales Channels > Domains > Shopify-managed domains then select the domain you want to reset.
#3. Thirdly, Navigate DNS Settings > Advanced Settings > Reset DNS Settings
#4. At last, Click Confirm to start reset DNS.
How to transfer Shopify domain to another Shopify store
From the Domains tab, you may move your primary Shopify domain from one Shopify store to another. Together with the domain, email forwarding and DNS information will be transferred.
*To transfer a Shopify domain, you must be the store owner.
For desktop
#1. Open your Shopify store with the domain you want to transfer
#2. Open Online Store > Domains
#3. Tap on Manage to edit the settings of the selected domain
#4. Click on Transfer domain > Transfer to another Shopify Store
#5. Make sure that your Store contact email is the same as in the Settings>General. After that, tap Send transfer link. Shopify will send you an email that includes a transfer link.
#6. Click the transfer link in the email
#7. Log in to the Shopify account where you want to transfer the domain.
This transferring process may take around 24 hours.
For mobile
#1. Open Shopify app > Store
#2. Click on Online Store > Sales Channels > Domains > Manage to open the settings of the selected domain
#3. Open Transfer domain > Transfer to another Shopify Store
#4. Make sure that your Store contact email is the same as in the Settings>General. After that, tap Send transfer link. Shopify will send you an email that includes a transfer link.
#5. Click the transfer link in the email
#6. Log in to the Shopify account where you want to transfer the domain
How to transfer Shopify domain to another outside Shopify
You can transfer your Shopify domain to another host with the following conditions:
- 60 days after buying the domain
- Unlock your Shopify domain and submit a domain authorization number to your new host.
- In case your domain contains .co.uk, .eu, or .be extension, you need to contact Shopify support to receive support.
Here are our instructions to transfer.
For desktop
#1. Open Online Store >Domains > Shopify-managed domains then select the domain that you want to transfer.
#2. Click on Transfer domain > Transfer to another provider.
#3. Check the information before clicking on Confirm
#4. The domain authorization code is on the information page for your domain. To confirm the transfer, send your new provider this code.
#5. If you no longer want to transfer, click on Cancel transfer
For mobile
#1. Open Shopify app> Store
#2. Click on Online Store > Sales Channels > Domains > Shopify-managed domains then select the domain that you want to transfer.
#3. Open Transfer domain > Transfer to another Shopify Store
#4. Check the information before clicking on Confirm
#6. The domain authorization code is on the information page for your domain. To confirm the transfer, send your new provider this code.
#6. If you no longer want to transfer, click on Cancel transfer
In case you haven’t finished the transferring process, Shopify will lock your domain after 30 days.
In conclusion, our blog introduced carefully how to edit, reset and transfer Shopify DNS. When you change your domain, the SSL may be affected. So read our blog to know about SSL unavailable.
Read More: Shopify errors: The most common problems with solutions


